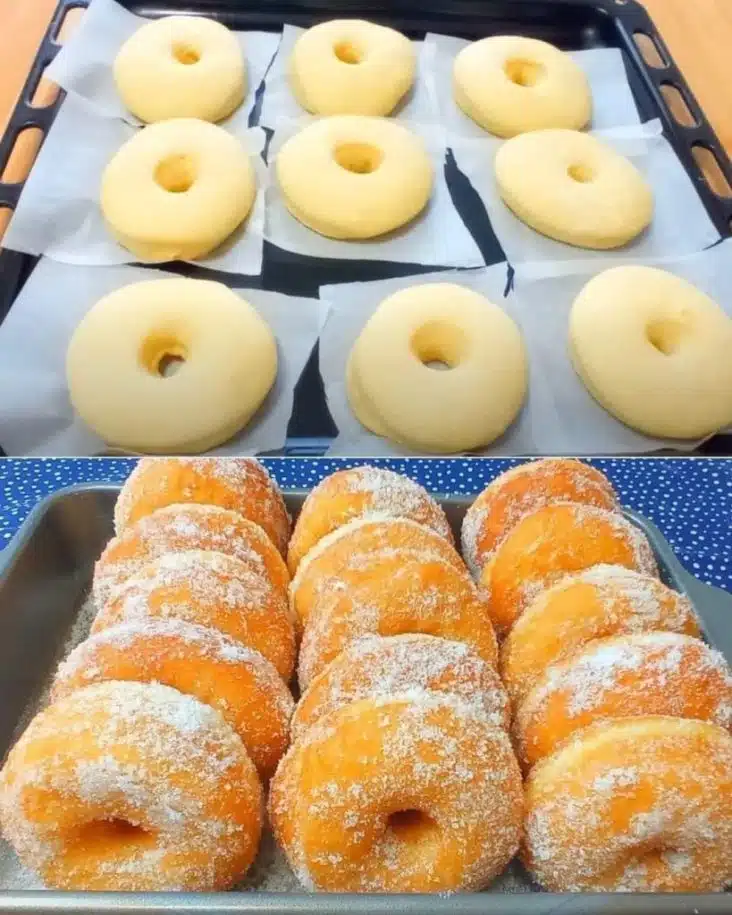
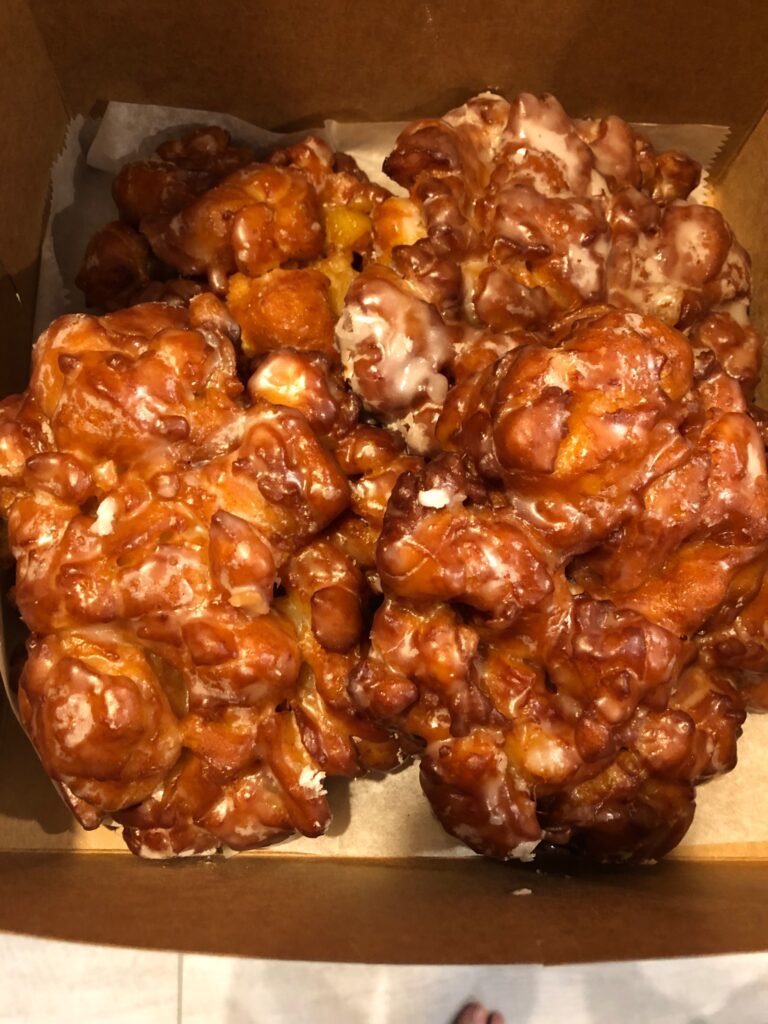
Doughnuts 🍩🍯 – Sweet, deep-fried pastries that are soft and fluffy inside with a golden exterior. Often glazed, sugared, or filled with cream or jam, they’re a beloved treat for breakfast or dessert.

The Sweetest Memories: Homemade Doughnuts to Warm Your Heart
If you ask me about my most vivid childhood memories, the heady aroma of fresh doughnuts frying is right up there with lazy summer afternoons. Making doughnuts at home always felt magical—there’s nothing quite like plucking a golden, sugar-dusted pastry from warm oil and biting into its pillowy softness. “Doughnuts” (yes, we’re talking about those classic soft and fluffy sweet pastries you crave for breakfast or dessert) have a way of transforming an ordinary morning into something truly special.
Whether you call them donuts or doughnuts, you’ll fall for their crispy-golden exterior, cloud-like interior, and endless options for toppings or fillings. Today, I’m sharing my favorite doughnuts recipe—the one I reach for when I need a bit of nostalgia and sweetness. Come along, and let’s make a batch together!
Why You’ll Adore This Doughnuts Recipe
There are a million reasons to love a classic doughnuts recipe, but here are my personal favorites:
- Unbeatable Freshness: Nothing compares to warm, homemade doughnuts—store-bought just isn’t the same.
- Versatile Treat: Whether you love them glazed, sugared, or bursting with jam, this recipe lets you customize your sweet pastries however you like.
- Comfort in Every Bite: Doughnuts are perfect for sharing—or keeping all to yourself on a rainy Saturday morning (no judgment!).
- Simple Joys: Making doughnuts from scratch is easier than you think, and the process itself is half the fun (kids love helping roll and cut the dough).
Ingredients You’ll Need for Homemade Doughnuts
Gather these simple ingredients for the best fluffy doughnuts—you probably have most of them in your kitchen already:
- All-purpose flour – Look for a good-quality flour; it’s the base of that tender, soft interior.
- Milk – Whole milk adds extra richness (but feel free to sub in 2% or dairy-free if you like).
- Sugar – For sweetness and that classic pastry flavor.
- Active dry yeast – Helps your dough rise for those signature puffy, airy doughnuts.
- Eggs – Give structure and a hint of richness to the dough.
- Butter – Melted butter brings moisture and flavor (go for unsalted to control seasoning).
- Salt – Enhances all the sweet notes.
- Vanilla extract – Adds warmth and depth.
- Vegetable oil – For deep frying. (Choose something neutral like canola or sunflower oil.)
Optional for finishing:
- Granulated sugar or powdered sugar (for dusting)
- Glaze ingredients (powdered sugar, milk, vanilla)
- Jams or chocolate for filling (if you want to get fancy)
Step-by-Step Guide: Making the Perfect Homemade Doughnuts
Ready to turn your kitchen into a doughnut haven? Here’s how I do it, step by easy step:
- Proof the Yeast: Warm your milk until just lukewarm (not hot!). Stir in the sugar and yeast and let it sit for about 5-10 minutes until it’s nice and foamy. If it doesn’t foam, try fresher yeast.
- Mix the Dough: In a large bowl, combine the yeast mixture, eggs, melted butter, vanilla, salt, and most of the flour. Mix until a shaggy dough forms.
- Knead the Dough: Knead by hand (or use a stand mixer with a dough hook) for 5-8 minutes, adding more flour as needed until the dough is smooth and elastic (it should feel soft, not sticky).
- First Rise: Place the dough in a greased bowl, cover, and let rise somewhere warm for about 1-2 hours—until doubled in size. (Pro tip: the inside of a turned-off oven is perfect.)
- Shape the Doughnuts: Roll dough to ½-inch thickness. Cut with a doughnut cutter or use two round cookie cutters (one big, one small for the “donut hole”). Reroll scraps if needed.
- Second Rise: Arrange the cut doughnuts on parchment. Cover with a clean towel and let them puff up for 30-45 minutes.
- Fry Time: Heat oil to 350°F (175°C) in a heavy pot. Carefully lower doughnuts in, a few at a time, frying about 1 minute per side until golden.
- Drain & Finish: Transfer cooked doughnuts to a wire rack over paper towels. While still warm, dip in glaze or roll in sugar.
Don’t stress—it’s okay if your first ones aren’t perfect. Part of the charm (and the fun) is their homemade personality!
My Secret Tips and Tricks for Doughnut Success
After years of doughnut frying (and eating way too many taste tests), here are my best tips for fluffy pastries every time:
- Temperature Matters: Let your milk cool to just warm; too hot and it’ll kill the yeast (and nobody wants dense doughnuts).
- Double Rise for Double Fluff: Giving your dough two rises is the secret to that super soft, airy texture (it’s tempting to rush, but be patient!).
- Oil Control: Keep a candy thermometer handy to maintain oil temperature—too hot and doughnuts burn outside but stay raw inside; too cool and they absorb too much oil.
- Fresh is Best: Eat them still warm if you can—the crispy exterior and fluffy center are absolute perfection.
- Flavor Up: A little fresh nutmeg in the dough gives these sweet pastries that classic “bakery” flavor.
Creative Variations and Ingredient Swaps
Don’t be afraid to put your own spin on these homemade doughnuts! Here are some fun twists (and allergy-friendly swaps):
- Gluten-Free Option: Substitute a good gluten-free all-purpose blend for regular flour.
- Vegan Doughnuts: Use plant milk, egg replacer, and vegan butter for a dairy- and egg-free treat.
- Flavoring Fun: Add citrus zest (lemon, orange) or a pinch of cinnamon to the dough for extra flavor.
- Fillings & Toppings: After frying, try piping in jam, pastry cream, or Nutella. Or go classic with powdered sugar or a simple vanilla glaze.
- Baked Instead of Fried: Not traditional, but you can bake at 375°F (190°C) for 10-12 minutes for a lighter, less messy doughnut.
Mix and match to suit your cravings or whatever’s in your pantry!
How to Serve and Store Your Homemade Doughnuts
Doughnuts are best served fresh and still a little warm—maybe with a mug of coffee or a tall glass of cold milk (classic sweet pastry pairing!). If you’re hosting brunch, pile them high on a platter and watch them disappear.
To store leftovers:
- Room Temp: Keep in an airtight container for up to 2 days; reheat for 10 seconds in the microwave to freshen.
- Freezer: Freeze unglazed doughnuts for up to 2 months. Thaw and reheat, then glaze or sugar as desired.
- Don’t Glaze in Advance: Wait until just before serving to glaze or sugar for the best texture (it keeps that exterior crispy).
FAQs: Your Top Doughnut Questions Answered
Can I make doughnuts ahead of time?
Yes! You can shape the dough and let it rest overnight in the fridge (cover tightly). Bring to room temperature before frying.
How do I keep my doughnuts fluffy, not dense?
Stick with two proper rises and make sure your yeast is active (look for bubbles during proofing). Don’t add too much flour; a slightly sticky dough yields softer pastries.
Why are my doughnuts greasy?
Oil that’s too cool leads to sad, greasy doughnuts. Keep it steady at 350°F (a deep-fry thermometer really helps).
Can I fill my doughnuts?
Absolutely! Once cool, use a piping bag to inject jam, pastry cream, or chocolate into the centers.
What’s the best way to glaze or sugar-coat?
While still warm, dip doughnuts into glaze or toss them in sugar. It’s messy—in the best possible way!
Making doughnuts at home is more than just a recipe—it’s an event, a memory in the making. I hope you try this sweet classic soon. If you do, let me know how your homemade doughnuts turned out—or what wild and wonderful fillings you decided to try! Happy frying! 🍩💕
