Crispy Fried Chicken
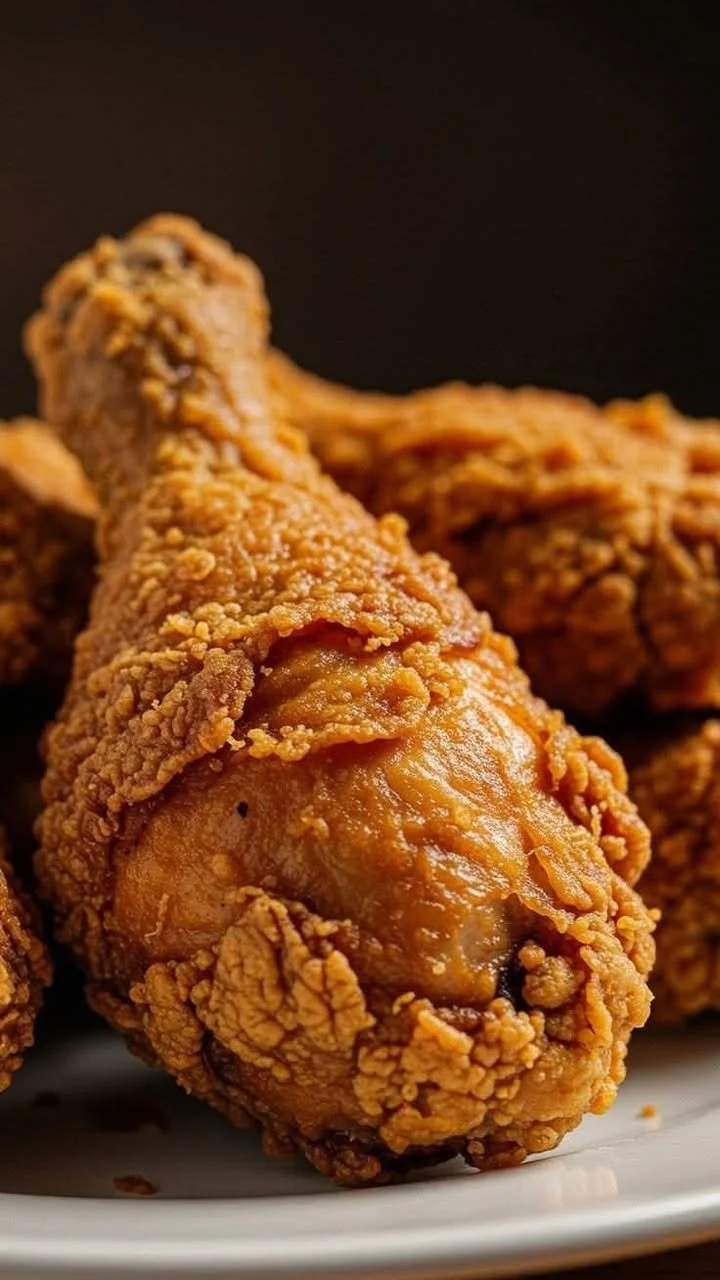
Crispy Fried Chicken – The Recipe That Brings My Family Together
There are certain smells that just stop me in my tracks and instantly transport me home—honestly, nothing does it for me quite like the aroma of crispy fried chicken sizzling in hot oil. I still vividly remember summer afternoons at my grandmother’s house, where plates piled high with golden, crackling chicken awaited us after what felt like a lifetime of anticipation. The irresistible combination of seasoned crust, juicy chicken, and laughter around the table became a family ritual that I keep alive in my own kitchen today. If you’re ready to bring that kind of homemade magic to your own table, my foolproof crispy fried chicken recipe is about to become your new comfort-food obsession.
Why You’ll Adore This Crispy Fried Chicken
I could go on and on about why this is the best fried chicken recipe—here are my top reasons:
- Unbelievable Crunch: This fried chicken has the kind of audible crispiness you can actually hear with each bite (music to my ears!).
- Mouthwateringly Juicy: The buttermilk soak ensures every piece is tender and succulent inside, soaking up the flavors and keeping the meat so juicy.
- That Classic Flavor: Balanced spices, just enough kick, and a nostalgic, old-fashioned taste—I swear it’s like a time machine to family gatherings.
- Foolproof for Weeknights or Parties: Whether I’m making a small batch for our weeknight dinner or feeding a crowd, this recipe scales perfectly (plus, fries up in big batches!).
Ingredients You’ll Need for Crispy Fried Chicken
Let’s talk through each ingredient so you’ll get that signature taste and texture (it’s easier than it looks!):
- 1 kg (2.2 lbs) chicken parts (thighs): I love chicken thighs for their flavor and tenderness, but mix it up with drumsticks or breasts if you like. Uniform size cooks best!
- 2 cups buttermilk (or 1 1/2 cups milk + 1 tbsp vinegar): The secret to tenderizing and flavoring the chicken—don’t skip this step. Buttermilk always wins for richness, but the milk-vinegar trick totally works in a pinch.
- 2 cups all-purpose flour: Gives that classic, crunchy coating.
- 1/2 cup cornflour (cornstarch): For that extra-light, crispy texture (trust me, this makes a difference!).
- 1 tsp baking powder: Ensures maximum crunch—think bubbles for your crust.
- 1 tsp garlic powder, 1 tsp paprika, 1 tsp black pepper, 1 tsp onion powder, 1 tsp salt: The perfect blend of spices for bold flavor without overpowering.
- 1/2 tsp cayenne pepper or dry pepper (optional): Add a little kick if you love some heat—I usually do half spicy, half not to please everyone.
- Vegetable oil for frying: Choose a neutral oil with a high smoke point like canola or sunflower for the best crispy fried chicken.
Step-by-Step Guide: Making the Perfect Crispy Fried Chicken
I promise, you can absolutely master classic fried chicken at home! Here’s how I do it, with little tips so you nail it on your first try:
- Soak the chicken: In a large bowl, combine chicken pieces and buttermilk (or milk + vinegar). Cover and refrigerate for at least 2 hours, or even better—overnight. This step tenderizes and infuses the meat with flavor.
- Mix up the coating: In a big shallow dish, whisk together the flour, cornflour, baking powder, garlic powder, paprika, black pepper, onion powder, salt, and optional cayenne. I like to run my fingers through it to break up any clumps.
- Dredge the chicken: Remove each piece from the buttermilk, letting the excess drip off. Dredge well in the flour mixture, pressing it on so every nook gets coated. Let the chicken sit for 10 minutes—this helps the coating really stick (no patchy bits!).
- Heat the oil: Pour enough vegetable oil into a deep fryer or heavy-bottomed pot so it’s about 2–3 inches deep. Heat to 175°C (350°F)—I use a thermometer for accuracy, but a wooden spoon handle will bubble vigorously when ready.
- Fry in batches: Carefully lower chicken into the oil. Don’t overcrowd—the oil temp will drop too much. Fry for 12–15 minutes, turning halfway, until a deep golden brown and the internal temp hits 75°C (165°F).
- Drain and serve: Place done pieces on a wire rack set over a baking sheet or on paper towels—this keeps the crust crispy. Serve immediately (it’s downright irresistible with fries or over fluffy rice).
My Secret Tips and Tricks for Crispy Fried Chicken Success
A few game-changing fried chicken tips I’ve picked up over years of kitchen experimentation:
- Double coat for the crunchiest fried chicken: For extra-thick crust, dunk the chicken in the buttermilk a second time, then coat in flour again.
- Let your dredged chicken sit: Allowing it to rest for 10–15 minutes before frying keeps the crust attached and develops that coveted “shaggy” texture.
- Monitor your oil: Use a thermometer and keep the oil temp steady—not too hot or you’ll burn the coating, too low and the chicken gets greasy.
- Drain on a rack, not towels: This keeps the crispy exterior you worked so hard for.
- Season hot out of the oil: A sprinkle of flaky salt while the fried chicken is fresh from the pot is a chef’s secret for extra flavor.
Creative Variations and Ingredient Swaps
I know we all love putting our own twist on classics! Here are some of my favorite fried chicken variations:
- Southern-Style Buttermilk Chicken: Add a tablespoon of hot sauce to the buttermilk for a real Southern kick.
- Gluten-Free Option: Swap all-purpose flour for a trusted gluten-free blend and double-check your cornflour.
- Spicy Lovers: Use more cayenne pepper or add chili powder to the coating for hot fried chicken.
- Herb Flourish: Toss in thyme or rosemary to the flour mixture for fragrant, herby fried chicken.
- Lighten It Up: Air fryers or oven-baked versions work, though the crunch is a bit different—spray liberally with oil and cook at 200°C (400°F) until crisp.
How to Serve and Store Your Crispy Fried Chicken
Hot, juicy, and crispy—fresh fried chicken is unbeatable, but leftovers are still a treat:
- Serve hot: Right out of the fryer is best. We love ours with a creamy dip, coleslaw, seasoned fries, or even over steamed rice (classic comfort food vibes).
- Storing leftovers: Cool leftovers completely, then refrigerate in an airtight container for up to three days.
- Reheating: To re-crisp, bake pieces in a hot oven (200°C/400°F) for 15-20 minutes, or use an air fryer for even more crunch.
- Picnic-perfect: Fried chicken is also great cold for lunches and picnics (just like my grandma did!).
FAQs: Your Top Questions About Crispy Fried Chicken Answered
Can I use chicken breast instead of thighs for this crispy fried chicken recipe?
Absolutely! Chicken breast works great—just try to use similar-sized pieces for even cooking, and remember they’ll cook a touch faster.
What’s the secret to really crispy fried chicken at home?
The cornflour (cornstarch) adds that magic crispy texture! Also, keep your oil hot and let the battered chicken rest before frying.
Can I make fried chicken without buttermilk?
Definitely—just use regular milk with a tablespoon of vinegar or lemon juice stirred in. Let it sit 5 minutes and voilà, homemade buttermilk.
How do I know my fried chicken is cooked through?
Check with a thermometer: You want 75°C (165°F) at the thickest part. If you don’t have a thermometer, the juices should run clear and no pink inside.
Can I freeze leftover fried chicken?
Yes! Freeze cooled fried chicken in freezer bags for up to a month. Reheat from frozen in the oven for best texture.
If you’re ready to fill your kitchen with that mouthwatering aroma and create memories around the table, give this crispy fried chicken a try. I bet your family will fall in love with it just like mine has (and don’t forget to let me know how it turns out—I genuinely love hearing your kitchen stories!).
