Crispy Chicken Batter
Crunchy Memories and Crispy Chicken Batter
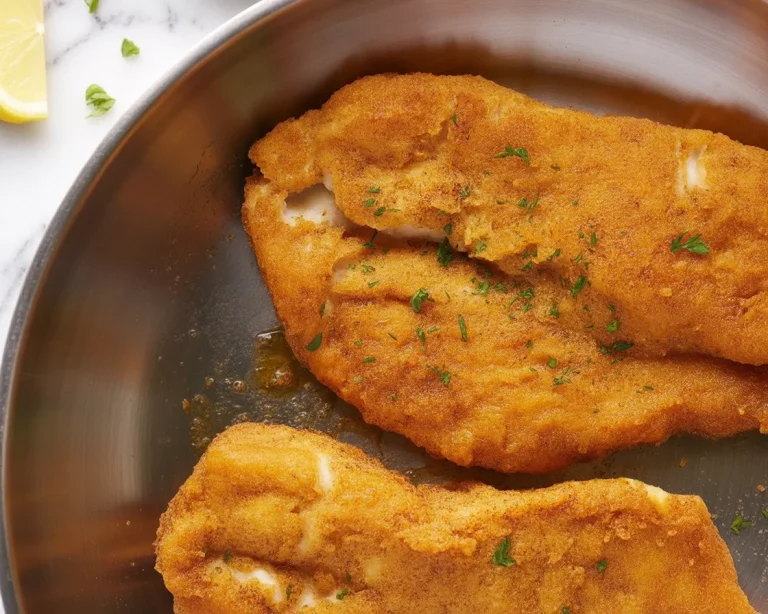
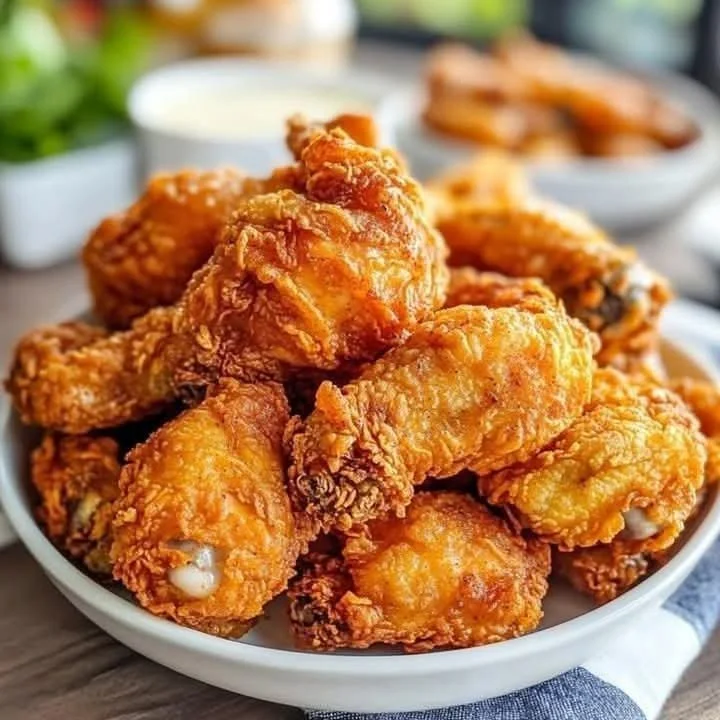
I’ll never forget the first time my mom taught me how to make real crispy chicken batter. The kitchen windows fogged up as a golden aroma drifted through the house, making everyone instantly hungrier than before. We’d gather around the countertop—kids with sticky fingers, eager to help dunk chicken drumsticks into bowls of batter. There’s something so deeply comforting about the familiar sizzle of coated chicken hitting hot oil, promising a shatteringly crisp bite. If you’re craving homemade fried chicken that’s tender inside and truly crunchy outside, you’ve got to try this crispy chicken batter recipe. It’s the kind of meal that feels like a warm hug, rain or shine.
Why You’ll Adore This Crispy Chicken Batter
Let me tell you—this isn’t just any fried chicken recipe. Here’s why you’ll keep coming back (and why it’s on repeat at my house):
- Unbelievably Crunchy: Thanks to a blend of flour and cornstarch, every bite is super crispy and stays that way—even after cooling (perfect for sneaking leftovers from the fridge!).
- Flavor in Every Bite: With garlic powder, paprika, and a dash of black pepper in the batter, these drumsticks don’t need extra dipping sauce—they’re packed with flavor on their own.
- Fuss-Free: No fancy techniques, just simple pantry staples. You’ll be frying up drool-worthy chicken in no time.
- Crowd-Pleaser: Whether you’re making game day snacks or cozy Sunday dinners, this crispy chicken batter turns ordinary drumsticks into something special. Trust me, you’ll want leftovers (if there are any!).
Ingredients You’ll Need for Crispy Chicken Batter
Gather up these goodies—most are probably in your kitchen already! I’ve added a few personal thoughts to make prepping even smoother:
- 1 cup all-purpose flour: The backbone for our crispy coating. Go for unbleached if you can.
- 1/2 cup cornstarch: This is my secret weapon for extra crunch! (It’s what makes restaurant fried chicken stand out.)
- 1 teaspoon baking powder: Fluffs it up for a light, airy crunch.
- 1 teaspoon garlic powder: Adds a savory punch—don’t skip this!
- 1 teaspoon paprika: Sweet, smoky, and adds a beautiful color to your crust.
- 1/2 teaspoon salt: Essential for bringing out all those flavors.
- 1/2 teaspoon black pepper: Just the right amount of heat.
- 1 cup cold water or soda water: The real trick for a batters that fries up crisp and light. (Soda water makes it especially airy.)
- 1 egg (optional): For a richer batter—skip it if you want extra-crispy, almost tempura-like results.
- 10 chicken drumsticks: You can use wings or thighs, but drumsticks are family-favorite at our place. Pat them dry for extra crispiness.
Step-by-Step Guide: Making the Perfect Crispy Chicken Batter
I promise, this is way easier than it looks (and way better than anything from a takeout box):
- Mix the dry stuff: In a large bowl, whisk together flour, cornstarch, baking powder, garlic powder, paprika, salt, and pepper. (No need to sift, unless you want ultra-smooth batter.)
- Add liquids: Slowly pour in the cold water or soda water, whisking until you have a smooth batter. If you’re feeling indulgent, mix in the egg now.
- Coat the chicken: Dip each drumstick into the batter, turning to coat completely. Let any excess drip off—this helps the crust fry up super even.
- Heat your oil: Use a heavy pot or deep fryer, heating oil to about 175°C/350°F. (A kitchen thermometer makes this worry-free).
- Fry away: Carefully place battered chicken pieces in the oil. Don’t overcrowd—fry in batches if you need to. Cook until each piece is golden brown and crispy, about 10–15 minutes, depending on size.
- Drain and rest: Pop the fried pieces onto a wire rack or paper towels to let the extra oil drain off (and keep them crispy).
Sometimes I’ll sneak a piece “just to check if it’s done.” Quality control is important!
My Secret Tips and Tricks for Crispy Chicken Batter Success
Here’s what I’ve learned after more batches than I can count:
- Cold matters: Always use cold water or soda water for the batter. It prevents gluten from forming so your chicken gets impossibly crunchy (trust me, it’s a game-changer).
- Pat chicken dry: Moisture is the enemy of crispiness! Dry those drumsticks thoroughly (kitchen towels are my lifesaver here).
- Rest the batter: Five minutes is enough, but it helps the flour and cornstarch fully hydrate, making for a light, even crust.
- Oil temp is key: Too hot, and the outside burns before the inside’s done. Too cool, and you’ll get greasy chicken—nobody wants that. Keep it steady at 350°F for the best results.
- Batch fry: Overcrowding drops oil temp and leads to soggy fried chicken. Fry in batches, and let each batch rest on a rack (not stacked, so the coating stays crispy).
Creative Variations and Ingredient Swaps
You can totally make this crispy chicken batter your own—here are some fun ideas:
- Make it spicy: Add a teaspoon of cayenne pepper or a dab of hot sauce to your batter (I do this for my spice-loving friends).
- Gluten-free twist: Swap all-purpose flour for your favorite gluten-free blend—just keep the ratio of flour to cornstarch the same.
- Dairy-free: No egg? No problem! The batter is still fluffy and crisp with just water.
- Oven baked (for the brave): If you’d rather avoid deep-frying, brush coated chicken with oil and bake at 220°C/425°F until crispy. It’s not exactly the same, but still tasty!
- Skinless chicken: Want a slightly lighter version? Go skinless—just pat dry really well.
How to Serve and Store Your Crispy Chicken Batter
Serving:
We love drizzling honey or a spicy dipping sauce on the side (think classic ranch, hot honey, or even Sriracha mayo). Pair it with simple slaw, pickles, or buttery corn for a full meal. These drumsticks are the star of any potluck or picnic.
Storing:
If you somehow have leftovers, let the fried chicken cool completely, then pop it into an airtight container (layered with parchment paper to keep the crust crisp). Store in the fridge for up to 3 days.
Reheating:
For the crispiest results, skip the microwave—reheat in a 180°C/350°F oven for about 10-15 minutes. The outside gets snappy again, just like freshly fried (great for lunch boxes or next-day snacks!).
FAQs: Your Top Questions About Crispy Chicken Batter Answered
Can I use this crispy chicken batter for boneless chicken or nuggets?
Absolutely! Just cut chicken breasts or thighs into chunks, dunk, and fry as usual. Keep an eye on cooking time—smaller pieces cook faster.
Is soda water necessary, or can I just use regular water?
Soda water makes the batter extra airy, but if you don’t have any, cold tap water works fine too. Just keep it cold for best results.
How can I tell when the chicken is cooked through?
Fry until deep golden brown—then, for peace of mind, check the thickest part of a drumstick with a thermometer (look for 74°C/165°F). The juices should run clear.
Can I freeze battered chicken before frying?
Not really—this batter is best made and fried fresh. But you can fry, cool, and then freeze cooked chicken, then reheat in the oven later.
What oil is best for frying?
Use a neutral oil with a high smoke point, like canola, peanut, or sunflower oil. They help your chicken fry up golden without overpowering the flavor.
So, is your mouth watering yet? This crispy chicken batter has become a go-to for our family, turning even an ordinary night into something worth celebrating. Give it a try, put your own spin on it, and let me know how it turns out—I’d love to hear your cleanup stories, “sneak-a-bite” moments, or even your creative variations in the comments. Happy frying!
