Cookies and Cream Cake
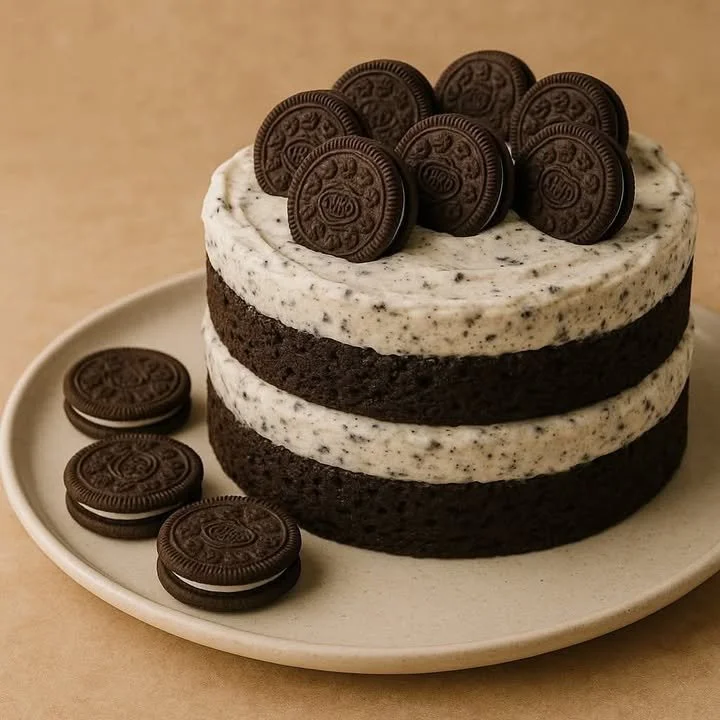
Cookies and Cream Cake: The Dessert That Takes Me Back
Isn’t it amazing how the smell of something baking can transport you straight to a favorite memory? Every time I make a cookies and cream cake, I’m ten again—sneaking chocolate sandwich cookies out of Mom’s secret stash (she always knew, by the way) and dreaming up ways to put them in every dessert. For me, this chocolatey, creamy cake is pure nostalgia in every bite: sweet, playful, and just indulgent enough to make any day feel special.
If you’ve been searching for the ultimate cookies and cream cake recipe that’s actually easy to make, full of that iconic Oreo flavor, and perfect for celebrating… well, you’re absolutely in the right place.
Why You’ll Adore This Cookies and Cream Cake
There are so many reasons this cookies and cream cake has a permanent spot in my recipe box (and heart!):
- Rich, Chocolatey Goodness: The chocolate cake base is fudgy and moist, thanks to a combo of cocoa, oil, and buttermilk. Every forkful is pure chocolate heaven.
- Creamy Dreamy Frosting: The cookies and cream frosting is fluffy, sweet, and packed with crunchy cookie bits for that unmistakable Oreo magic.
- No Fuss—Just Fun: No stand mixer? No problem. This cake is super straightforward, whether you’re a beginner baker or just short on time.
- Crowd-Pleaser: It’s impossible not to smile when you cut into a homemade cookies and cream cake. Kids and adults both go back for seconds (and thirds).
I guarantee this cake will spark joy—and maybe even inspire a few new sweet traditions at your place.
Ingredients You’ll Need for Cookies and Cream Cake
Gather these ingredients before you start (trust me, mise en place makes everything easier):
- All-purpose flour (1 3/4 cups): The backbone of your cake; sift it for an extra-tender crumb.
- Unsweetened cocoa powder (3/4 cup): Gives that amazing deep chocolate flavor. Dutch process or natural both work well—just pick your favorite.
- Baking powder + baking soda (1 1/2 tsp each): These leaveners help the cake rise and stay fluffy.
- Salt (1/2 tsp + a pinch for frosting): A little brings out all the flavors (don’t skip it!).
- Granulated sugar (1 cup) & brown sugar (3/4 cup): The blend adds dimension and keeps the cake moist.
- Vegetable oil (1/2 cup): Keeps things rich and tender, even after a day or two.
- 2 large eggs: Room temp is best—they’ll mix in so much more smoothly.
- Buttermilk (1 cup): That tang gives depth and softness. (No buttermilk? Mix 1 cup milk with 1 tbsp vinegar. Let it sit for 5 mins!)
- Vanilla extract (1 tsp + 1 more for frosting): Always use the real stuff if you can—I promise it’s worth it.
- Hot water or hot coffee (1 cup): Coffee deepens the chocolate flavor, but hot water keeps it kid-friendly.
- Unsalted butter (1 cup, softened): For that cloudlike cookies and cream frosting.
- Powdered sugar (3 cups): The base of the buttercream. Sift if lumpy!
- Heavy cream or milk (2 tbsp): Just enough to make the frosting ultra-whippable.
- Chocolate sandwich cookies (10–12, crushed): Any classic Oreo-style cookie will do—fold them into the frosting and save a few for decorating.
Step-by-Step Guide: Making the Perfect Cookies and Cream Cake
Here’s exactly how I like to make this classic cookies and cream cake recipe (with all my favorite shortcuts):
- Prep the pans: Preheat your oven to 350°F (175°C). Grease and line two 8-inch round cake pans with parchment. Trace the pans for a perfect fit—no more stuck cake layers!
- Mix the dry ingredients: Sift together flour, cocoa powder, baking powder, baking soda, and salt. (Sifting means fewer lumps—plus, it just looks so fancy.)
- Whisk the wet ingredients: In a big bowl, whisk sugars, oil, eggs, buttermilk, and vanilla until smooth. No electric mixer needed for this step!
- Combine: Add dry ingredients to the wet ingredients in thirds, mixing slowly. Pour in hot water or coffee and stir until you have a glossy, smooth batter.
- Bake: Divide the batter evenly between pans. Bake 30–35 minutes, or until a toothpick comes out clean. Cool the cakes in their pans about 10 minutes, then transfer to a wire rack. Let them cool completely before frosting (learned that one the hard way).
- Make the frosting: Beat softened butter until really fluffy—don’t rush! Gradually mix in the powdered sugar, then add vanilla, cream, a pinch of salt, and beat until it’s light. Fold in your crushed cookies gently. Taste (try not to eat half the bowl).
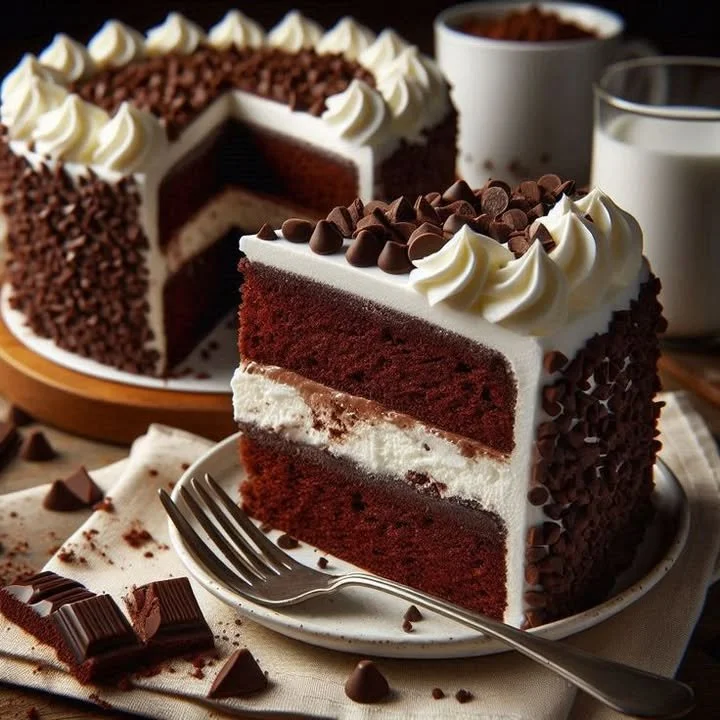
- Assemble: Place your first layer on a cake stand. Spread a thick layer of cookies and cream frosting, then top with the second cake. Cover the top and sides generously. Decorate with whole cookies, extra crumbs—whatever makes you smile.
That’s it! You’ll have your own show-stopping, homemade cookies and cream cake in no time.
My Secret Tips and Tricks for Cookies and Cream Cake Success
- Use room temp ingredients. They mix better, so your cake is fluffier and frosting is silkier.
- Coffee intensifies the chocolate flavor, but if you’re baking for little ones, feel free to use hot water.
- Don’t overmix! Stir until just combined—overmixing can make your cake a bit tough.
- Crush cookies for the frosting by sealing them in a zip bag and rolling with a rolling pin (less mess, more crunchy bits).
- Chill the cake before slicing: It’ll cut way cleaner, especially if you love thick, bakery-style layers.
I swear by these steps—they always help my cookies and cream cake turn out bakery-perfect (and absolutely irresistible).
Creative Variations and Ingredient Swaps
Let’s make this cookies and cream cake your own! Here are some ideas:
- Gluten-Free: Swap in a cup-for-cup gluten-free flour blend for a celiac-friendly dessert.
- Dairy-Free: Use plant milk + vinegar for buttermilk, vegan butter for frosting, and dairy-free sandwich cookies.
- Add Mix-ins: Fold mini chocolate chips or white chocolate pieces into the batter for an extra treat.
- Cookies & Cream Cupcakes: Divide batter into cupcake tins for bite-sized party fun—bake 16–20 minutes.
- Flavor Boost: Try a chocolate ganache drizzle, or whip a little peanut butter into the frosting for a totally different twist.
Don’t be afraid to riff on this classic—creative spins keep things exciting in the kitchen!
How to Serve and Store Your Cookies and Cream Cake
Serving Suggestions:
Let your freshly frosted cookies and cream cake chill for about 30 minutes for extra-clean slices (great for birthday parties or easy plated desserts). Add extra crushed cookies on top and… well, serve with a glass of cold milk for that ultimate cookies & cream experience!
Storing Leftovers:
- At room temp: Keep covered on the counter for up to 2 days.
- In the fridge: Store in an airtight container up to 5 days (the cookies in the frosting gets slightly softer, and I actually love it!).
- Freezing: Wrap individual slices well—perfect for emergency chocolate cravings. Thaw at room temp.
FAQs: Your Top Questions About Cookies and Cream Cake Answered
1. Can I make this cookies and cream cake in advance?
Absolutely! Bake the layers a day (or even two!) ahead, then wrap tightly and store at room temperature. Frost just before serving for the freshest taste.
2. Can I use different kinds of cookies?
Yes! Any chocolate sandwich cookie works—gluten-free or flavored varieties are delicious too. Just make sure they’re crisp for the best crunch.
3. My cake is dry—what happened?
Check your measurements (especially flour and cocoa), and don’t overbake. Every oven is different, so start checking doneness at 30 minutes.
4. Can I make this into a sheet cake instead?
You sure can! Use a 9×13-inch pan and bake about 35–40 minutes. (Sheet cakes are so easy to carry to potlucks.)
5. How do I get my frosting extra fluffy?
Beat the butter first until it’s very pale and soft—don’t rush that step!
There’s just something magical about sharing a homemade cookies and cream cake with the people you love. Every crumb says, “I care about you… and yes, please take another slice!” If you try this recipe, I hope it gives you the same comfort, joy, and maybe even some happy cookie sneak-thief memories, too.
If you have questions, ingredient swap stories, or decorating ideas, drop them in the comments—I love hearing from you. Happy baking!
