Danish Butter Cookies
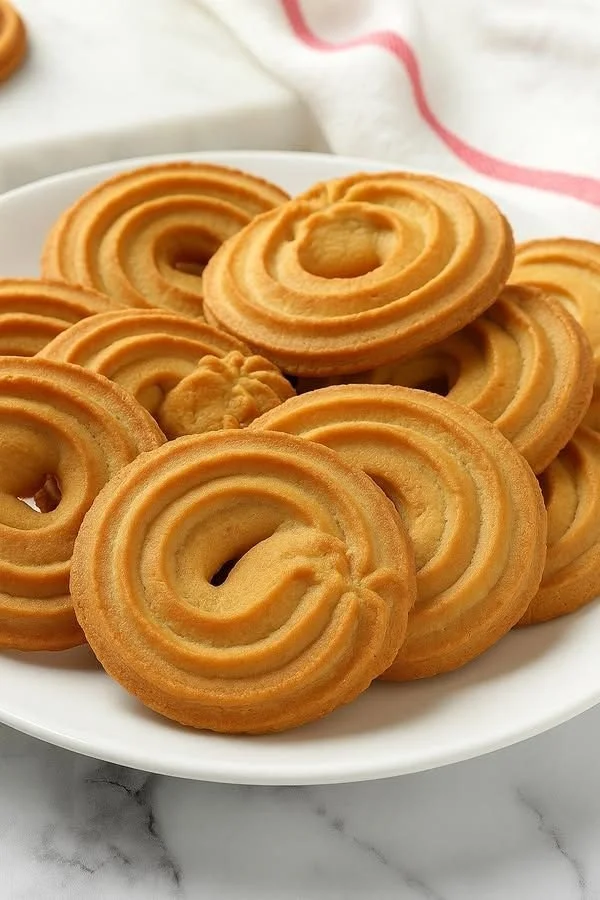
The Cozy Magic of Danish Butter Cookies
Every December, my kitchen transforms into a buttery wonderland, echoing with laughter and the intoxicating aroma of freshly baked Danish butter cookies. My love affair with these classic treats began when I was a little kid, perched on a stool at my grandmother’s side, sneaking tastes of dough while she shaped each cookie by hand. There’s something wildly comforting about the delicate crumb, the rich, melt-in-your-mouth texture, and the soft golden hue that signals cookie perfection.
Danish butter cookies aren’t just a recipe—they’re a cherished tradition. Taking that first bite instantly transports me to snowy mornings and warm mugs of tea. If you’ve ever wondered how to recreate that authentic Danish cookie shop flavor (but easier, in your own cozy kitchen!), you’re in the right place. Let’s dive into homemade Danish butter cookies together—because your next sweet memory deserves the buttery magic of these classics.
Why You’ll Adore This Danish Butter Cookies Recipe
Let’s be honest—there’s no such thing as too many cookies. But these Danish butter cookies? They’re something special. Here’s why you’ll keep coming back to this recipe (trust me, you will):
- Unbeatable Texture: Each cookie is incredibly tender with the signature snap and melt from heaps of real butter.
- Effortlessly Elegant: You get picture-perfect, swirled cookies at home—no fancy bakery trip required.
- Crowd-Pleasing: These are the ultimate treat to share (or hoard, no judgment here!), and they’re wildly nostalgic for adults and kids alike.
- Foolproof & Fun: Even if you’re a cookie newbie, this buttery cookie dough is super forgiving and honestly fun to pipe out, especially with little helpers on hand.
Ingredients You’ll Need for the Best Danish Butter Cookies
Gather your simple ingredients—each one brings something magical to this classic, buttery cookie. Here’s what you’ll need:
- Unsalted Butter (1 cup / 227g): The star of the show! Use good European or high-fat butter if you can for that ultra-rich flavor.
- Powdered Sugar (2/3 cup / 80g): Gives your cookies that delicate sweetness and smooth, crumbly texture.
- Large Egg (1, room temperature): Helps bind everything for just the right snap—bring it to room temp so it blends easily.
- All-Purpose Flour (1 1/2 cups / 190g): The sturdy backbone of your cookie. Spoon and level it for accuracy!
- Cornstarch (1/4 cup / 30g): Secret ingredient! It softens the dough and delivers that iconic tender bite.
- Vanilla Extract (1 tsp): Invest in pure vanilla for the most authentic Danish flavor.
- Salt (1/4 tsp): Just a pinch to balance all the sweetness and enhance those buttery notes.
Pro tip: If you don’t bake often, double-check your flour and cornstarch for freshness—old flour can mean dense cookies, and you want that signature lightness!
Step-by-Step Guide: Making the Perfect Danish Butter Cookies
Ready for buttery cookie heaven? Here’s my go-to method (with zero intimidating steps):
- Beat the Butter & Sugar: In a mixing bowl, cream the unsalted butter and powdered sugar until it’s pale, super light, and fluffy—think soft serve ice cream (this is key for tender cookies).
- Blend in Egg & Vanilla: Crack in your room-temperature egg and splash in the vanilla extract, beating until it’s all glossy and smooth.
- Sift in Flour Mixture: Sift together the all-purpose flour, cornstarch, and salt. Add them gradually to your wet ingredients, mixing just until a soft, pipeable dough forms.
- If it’s too thick, add 1–2 teaspoons of milk until it’s just right for piping swirls.
- Pipe Your Cookies: Scoop the dough into a piping bag fitted with a large star tip, and pipe round swirl shapes onto a parchment-lined baking tray. Leave space—they’ll puff a bit.
- Chill: Cover or slide the trays into the fridge for 20–30 minutes so your Danish butter cookies will hold their shape when baked.
- Bake: Preheat your oven to 170°C (340°F). Bake the chilled cookies for 12–15 minutes until the edges are lightly golden—resist over-baking for that perfect, tender crumb.
- Cool & Enjoy: Let them cool completely on a wire rack before tasting (or storing in an airtight container—if you can wait that long).
Honestly, the hardest part is not eating the dough straight from the bowl (no judgment if you sneak a little).
My Secret Tips and Tricks for Danish Butter Cookies Success
Years of trial and error (plus a few minor cookie panics) have taught me a few secrets for epic homemade Danish butter cookies:
- Room Temperature is Everything: Cold ingredients mean stiff dough—always soften your butter and bring the egg to room temp for a silky, pipeable consistency.
- Chill Before Baking: Chilling the piped cookies is non-negotiable. It stops them from spreading into blobs, so you get those bakery-style swirls.
- Don’t Skip the Cornstarch: It’s the not-so-secret ingredient for ultra-tender cookies. If you’ve only used it for sauces, cookies will change your mind.
- Use Good Butter: Seriously, the butter makes or breaks this recipe. Go for a brand you’d eat on its own toast!
- Keep an Eye on the Oven: Bake just until the edges are golden. Overbaking leads to dry, crumbly cookies instead of the melt-in-your-mouth texture we all crave.
- For Easier Piping: If the dough feels tough, a touch of milk will loosen it for those gorgeous swirls.
Little things make a big difference with classic butter cookies, especially when you want that bakery-worthy finish at home.
Creative Variations and Ingredient Swaps
Want to put your own twist on these Danish butter cookies? Here are some fun ways to switch things up:
- Lemon or Orange Zest: Add a teaspoon of grated zest with the vanilla for a fresh, citrusy twist.
- Chocolate Dipped: Once cooled, dip half of each cookie in melted dark or milk chocolate, then sprinkle with chopped pistachios or sea salt.
- Almond Flavor: Replace half the vanilla extract with almond extract for a nutty undertone.
- Gluten-Free Version: Substitute a 1:1 gluten-free flour blend and use potato starch in place of cornstarch.
- Festive Sprinkles: Before baking, decorate with colored sugar or nonpareils for a holiday spin.
Let your creative side shine—these buttery, piped cookies are the perfect blank canvas!
How to Serve and Store Your Danish Butter Cookies
Danish butter cookies are fantastic straight from the oven, but they truly shine after a day in an airtight container—the flavors deepen and the texture becomes even more melt-in-your-mouth. Here’s how I serve (and stash) them:
- Serve With: Hot coffee, spiced tea, or a cold glass of milk. They also make the prettiest addition to holiday cookie boards or sweet care packages.
- Storing: Keep your cookies in an airtight tin or container at room temp for 1–2 weeks. Separate layers with parchment if you stacked them to keep their delicate edges perfect.
- Freezing: You can freeze baked cookies for up to 2 months (or freeze piped, unbaked dough and bake off when a cookie craving strikes—just add 2-3 min to the bake time straight from the freezer).
Just be ready—they disappear fast! (Good thing you can make another batch in a snap.)
FAQs: Your Top Questions About Danish Butter Cookies Answered
1. Can I use salted butter in this recipe?
Absolutely—you can use salted butter and skip the added salt. Just know the cookies might have a slightly stronger salt flavor, which some people love!
2. My dough is too stiff to pipe. What should I do?
If your Danish butter cookie dough feels too firm, add a teaspoon or two of milk, mixing until it’s just soft enough to easily pipe into swirls.
3. Do these cookies spread much?
Not if you chill them! Refrigerating your piped cookies before baking helps them hold that gorgeous shape.
4. Can I double the recipe?
Totally! This butter cookies recipe doubles beautifully for holiday gifting or big family gatherings—just use a large mixing bowl.
5. How do I get perfectly even swirls?
Practice makes perfect, but a star tip and steady pressure on the piping bag help keep cookies even (and honestly, a slightly wonky swirl tastes just as good).
From my kitchen to yours—may your cookie tin always be full and your home filled with the buttery warmth of homemade Danish butter cookies. If you bake a batch and share, don’t forget to save a couple for yourself (trust me!). Happy baking!

