Fondant Icing
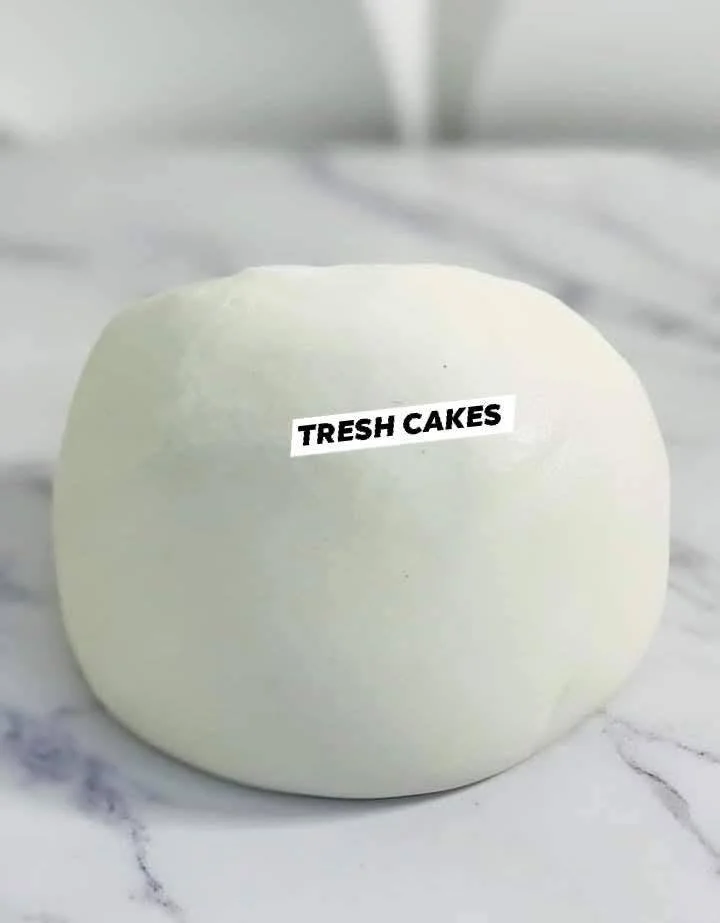
Baking Memories: My Go-To Fondant Icing Recipe
Every time I open a fresh bag of powdered sugar, I’m pulled back to the kitchen table in my childhood home. My mom and I would gather around, laughter floating as we worked together to create the perfectly smooth, magical coating for birthday cakes—fondant icing. There was an unspoken magic in those moments, the way simple ingredients transformed into glossy, colorful canvases that turned every cake into a celebration.
Now, making homemade fondant icing is still my favorite cake trick, but it’s also my happy ritual; a chance to add a personal touch to any cake or batch of cupcakes. If you’re intimidated by fondant icing, I totally get it—but trust me, this recipe is simple, delicious, and will make you feel like a cake-decorating superstar in your own kitchen.
Why You’ll Adore This Fondant Icing
Let me tell you why this fondant icing recipe is honestly one of my kitchen MVPs—aside from the fact that it’s crazy satisfying to knead silky-smooth dough with your own hands!
- Crazy Versatile: This homemade fondant icing works on any cake—weddings, birthdays, cupcakes, cookies, you name it. Whether you’re a beginner or a “just for fun” baker, you’ll be amazed at how easily it drapes and molds.
- Tastes So Much Better: Unlike store-bought fondant (which I’ll be honest, can taste like sweet plastic), this one is buttery, sweet, and not at all overwhelming. Even my picky nephew says it’s better than the bakery’s!
- Customizable Colors and Flavors: Want pink unicorn cake? Or a sophisticated almond finish? Add a few drops of your favorite extract or food coloring and you’re golden (well, or whatever color your heart desires).
- It’s Actually Fun: Making fondant feels a little like grown-up playdough time. Roll it, color it, cut it—get creative and let your kids or friends jump in too!
Ingredients You’ll Need for Fondant Icing
Here’s what you’ll need to whip up a batch of this soft and workable fondant icing:
- 1/4 cup unsalted butter
(Use real butter for the best flavor. Always start with soft, room temperature butter for easy melting.) - 1/2 cup water
(Filtered water works great. Make sure it’s not too hot, just enough to help melt the butter.) - 1/4 cup light corn syrup
(This helps keep your fondant pliable and perfectly glossy.) - 2 pounds powdered sugar
(Measure with a gentle hand, and yes—always sift to avoid clumps. Trust me, it makes a difference.) - 1 teaspoon vanilla extract
(Use pure vanilla for that irresistible aroma. You can swap in almond or lemon extract for a twist.) - Gel food coloring (optional)
(Gel food colors are best—liquids can make fondant sticky. Go wild with your palette or keep it elegant and minimal.)
Step-by-Step Guide: Making the Perfect Fondant Icing
Let’s get to the fun part! Here’s exactly how I make this foolproof fondant icing at home:
-
Melt the Base:
In a medium saucepan, combine unsalted butter, water, and light corn syrup. Heat on low, stirring gently until butter melts and the syrup blends in.- (Tip: Don’t rush the melting—low and slow is key here.)
-
Add Flavor:
Remove pan from heat. Stir in your vanilla extract (or any flavor you love). Take a quick whiff—that’s your kitchen’s new signature scent! -
Mix in the Sugar:
Gradually add powdered sugar, about a cup at a time. Use a sturdy spoon (or your mixer’s dough hook) until it starts coming together.- (It’ll look crumbly at first, but don’t panic, it comes together beautifully by step 5.)
-
Tint the Fondant (Optional):
If you want colorful fondant icing, add a few dabs of gel food coloring. Knead until the color is evenly distributed (gloves help here if you want to avoid rainbow palms!). -
Knead It Smooth:
Turn the dough onto a surface dusted with powdered sugar. Knead by hand until it’s entirely smooth, elastic, and workable. Think soft Play-Doh vibes. -
Roll and Decorate:
Roll fondant to your desired thickness (I go for about 1/8-inch). Drape over your cake or use cutters to create decorations.- (A little dusting of powdered sugar prevents sticking.)
And voilà—your very own homemade fondant icing, ready to make any cake party-worthy!
My Secret Tips and Tricks for Fondant Icing Success
Years of making fondant have taught me a few game-changing secrets (and yeah, a few “oops” moments):
- Sift That Sugar: Don’t skip sifting the powdered sugar before mixing—it keeps your fondant icing ultra-smooth (no mysterious lumps!).
- Corn Syrup Matters: Light corn syrup really is the trick for flexibility. Don’t substitute it, or you’ll end up with brittle fondant that cracks over your cakes.
- Grease Up: If your hands get sticky, a dab of unsalted butter or a dusting of powdered sugar works wonders while kneading fondant.
- Smell the Vanilla: The scent of real vanilla makes homemade fondant icing unforgettable (it’s the little things!).
- Storage Is Key: Wrap unused fondant tightly in plastic wrap and then again in an airtight container. It’ll last for weeks—just knead again to re-soften.
Creative Variations and Ingredient Swaps
Want to put your own spin on this fondant icing? Try these fun twists:
- Flavor Switch: Swap vanilla extract for almond, lemon, orange, or even rose water for unique fondant icing flavors.
- Vegan Fondant: Sub vegan butter for unsalted, and light corn syrup stays the same—totally plant-based and still silky!
- Dyed-to-Impress: Mix different gel food coloring for custom shades. Marbling two or three colors into the fondant makes stunning effects for special cakes.
- Extra Shimmer: Knead edible pearl dust or glitter right in, or brush it on for a glamorous touch.
Homemade fondant icing isn’t just about taste—it’s about unleashing your creativity.
How to Serve and Store Your Fondant Icing
- Serving Suggestions:
Roll your fondant icing over a freshly crumb-coated cake, cupcakes, or even sugar cookies. Get fancy and use cutters for shapes, or mold it into cute toppers (think flowers, bows, or little animals!). - Storage Advice:
Any leftover homemade fondant icing? Wrap it tight (cling film is perfect) and store in an airtight container at room temperature for up to 2 weeks. For longer storage, pop it in the fridge—but let it reach room temp and knead again before using. - Reusing Fondant Icing:
If your fondant hardens a bit, a few seconds in the microwave (5-10) will soften it up. Dust your hands with powdered sugar as you knead.
FAQs: Your Top Fondant Icing Questions Answered
Q: Can I flavor fondant icing with something other than vanilla?
A: Absolutely! Almond, lemon, orange, or even coconut extracts are all delicious (just don’t go overboard so it doesn’t clash with your cake).
Q: How do I color fondant icing without making a mess?
A: Use gel food colors and wear kitchen gloves. Start small—colors intensify as you knead. If you’re marbling, stop before it’s fully blended for that trendy look!
Q: My fondant icing is cracking—help!
A: Dry fondant often needs a touch more corn syrup or a teeny bit of water. Knead well until it’s smooth and elastic again.
Q: Can I freeze homemade fondant icing?
A: You can, but I find the texture best after simple airtight storage at room temperature. If you do freeze, double-wrap and thaw overnight, then knead well.
Whether you’re brand new to fondant icing or looking for your new favorite recipe, I hope this guide inspires you to roll up your sleeves and try making it from scratch. There’s something so special about creating (and sharing) homemade cakes topped with fondant you crafted yourself. If you give this fondant icing a try, drop a comment or tag me on your cake creations—I can’t wait to see your kitchen magic!
