Chocolate Buttermilk Cake
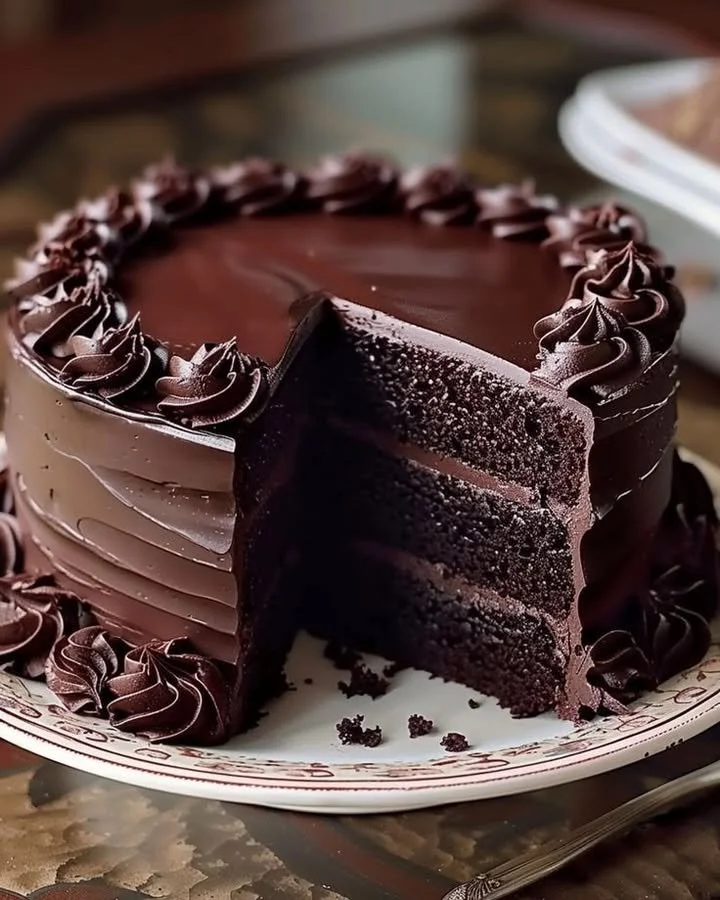
The Chocolate Buttermilk Cake That Stole My Heart
There’s something magical about the very first bite of a homemade chocolate buttermilk cake. I still remember baking my first one with my grandmother on a rainy afternoon, the kitchen filled with the rich scent of cocoa and melted butter. She’d laugh as I sneakily licked the batter from the spoon—hey, who doesn’t love a taste test? To this day, chocolate buttermilk cake takes me right back to that countertop, flour smudged on my cheek and warmth in my chest. If you’re searching for a decadent, moist chocolate cake that melts in your mouth (and stirs up heart-warming nostalgia), you’re absolutely in the right place.
Why You’ll Adore This Chocolate Buttermilk Cake
Let me tell you why this chocolate buttermilk cake is such a crowd-pleaser—and why it never lasts more than 24 hours in my house:
- Unbelievably Moist Texture: Thanks to the buttermilk and coffee, every layer is pillow-soft, yet still holds its shape (seriously, I almost can’t believe how tender it turns out).
- Deep, Rich Chocolate Flavor: Cocoa plus hot coffee is a game-changer if you want that truly intense, bakery-style chocolate cake.
- Simple, Classic Ingredients: Everything in this cake is easy to find—and no complicated tricks or fancy kitchen gadgets required!
- Brings People Together: There’s something about slicing into a homemade chocolate cake with friends that just feels right. It’s comfort food at its most joyful, whether you’re celebrating or just need a pick-me-up.
Ingredients You’ll Need for Chocolate Buttermilk Cake
Before we dive in, let’s talk about what you’ll need for this easy homemade chocolate cake. Here’s the ingredient list, plus my honest tips for each:
- All-Purpose Flour (2 1/2 cups): Gives the cake structure—sift it for extra lightness!
- Unsweetened Cocoa Powder (1 cup): I prefer Dutch process for an ultra-dark color and smooth chocolate flavor.
- Baking Soda & Baking Powder (2 1/2 tsp + 1 tsp): Balances the buttermilk’s acidity and gives the cake its rise.
- Salt (1 tsp): Don’t skip it—salt brings out the chocolate flavor.
- Unsalted Butter (1 cup, softened): Room temperature is key! It creams perfectly with sugar, making the crumb light.
- Granulated Sugar (2 1/2 cups): Adds sweetness and keeps the cake moist.
- Large Eggs (4, at room temperature): Bind everything together and add richness. Room temp eggs yield a fluffier cake.
- Vanilla Extract (2 tsp): Prefer real vanilla for the deepest flavor.
- Vegetable Oil (1 cup): You get the moisture of oil and the flavor of butter—best of both worlds!
- Buttermilk (1 1/2 cups, at room temp): The not-so-secret secret to a super tender cake crumb.
- Hot Coffee or Boiling Water (1 cup): Trust me—coffee doesn’t make it taste like coffee, it just intensifies the chocolate.
Step-by-Step Guide: Making the Perfect Chocolate Buttermilk Cake
Ready to bake? Here’s how I do it—plus a few little tricks from my own kitchen.
- Prep Your Pans and Oven: Preheat the oven to 175°C (350°F). Grease three 8-inch round cake pans and line the bottoms with parchment (so nothing sticks!).
- Mix the Dry Ingredients: In a large bowl, whisk together the flour, cocoa powder, baking soda, baking powder, and salt. I like to sift my dry ingredients—no lumps means a lighter, fluffier cake.
- Cream the Butter and Sugar: In another bowl, beat softened butter and sugar until pale and fluffy. Don’t rush this step; it takes about 3-4 minutes.
- Add Eggs One by One: Beat in each egg, one at a time, waiting until it’s fully mixed before adding the next. Add vanilla and oil—mix until it all comes together.
- Alternate Buttermilk and Flour: Add about a third of the flour mixture, then half your buttermilk. Repeat, ending with flour. Only mix until it just comes together—overmixing can make cake tough.
- Pour in Hot Coffee: Slowly pour in the hot coffee or boiling water, stirring until smooth. The batter will be thin, but that’s a good sign—it means the cake will be super moist.
- Bake: Divide the batter among your pans, smooth the tops, and bake for 28–32 minutes. I usually check with a toothpick around 28 minutes.
- Cool: Let cakes cool in the pans for 10 minutes, then turn out onto wire racks.
My Secret Tips and Tricks for Chocolate Buttermilk Cake Success
- Room Temperature Everything: It’s not just a suggestion—it helps batters combine more evenly, giving you a fine, bakery-style crumb.
- Sift Your Cocoa: Sometimes cocoa gets clumpy; sifting it with the flour keeps the cake velvety and smooth.
- Let the Cake Cool Completely Before Frosting: This is hard—I know. But if you frost warm cake, the icing will melt (and slide right off).
- Use Good Coffee: Decaf works if you’re sensitive! Coffee deepens the chocolate flavor, and you won’t taste coffee at all.
- Oil for Moisture, Butter for Flavor: Combining both makes the cake extra moist while keeping the classic taste.
- Don’t Overbake: Start checking early—chocolate cakes can dry out quickly. (My oven runs hot, so I always start checking a couple minutes before the timer.)
Creative Variations and Ingredient Swaps
Want to put your own spin on this classic buttermilk chocolate cake recipe? Here are my favorite ideas:
- Gluten-Free: Swap in a good 1:1 gluten-free flour blend.
- Dairy-Free: Substitute buttermilk with almond or coconut milk plus a tablespoon of lemon juice.
- Espresso Kick: Add a teaspoon of instant espresso powder to the hot coffee for extra depth.
- Add Chopped Nuts or Chocolate Chips: Fold in half a cup to the batter for texture and richness.
- Frosting Ideas: Classic chocolate buttercream, fluffy whipped cream, or a tangy cream cheese icing all work beautifully.
How to Serve and Store Your Chocolate Buttermilk Cake
- Serving: I love this cake simply dusted with cocoa, but it’s absolutely divine with a pour of chocolate ganache or a scoop of vanilla ice cream (perfect homemade dessert after Sunday dinner).
- Storing Leftovers: Wrap any leftover cake tightly in plastic wrap, then place in an airtight container. It’ll stay moist for 2-3 days at room temperature, or up to a week in the fridge. You can even freeze unfrosted cake layers—just thaw before assembling.
FAQs: Your Top Questions About Chocolate Buttermilk Cake Answered
Q: Can I use regular milk instead of buttermilk?
A: Buttermilk is really key for that soft, tender crumb, but in a pinch, you can make a substitute: mix 1 1/2 cups milk with 1 1/2 tablespoons lemon juice or vinegar and let it sit for 5 minutes.
Q: Why hot coffee? Won’t it taste like coffee?
A: Nope! Hot coffee intensifies the chocolate flavor in the cake, but you (and the kids) won’t taste it as coffee at all. Promise.
Q: How do I know when the cake is done?
A: Insert a toothpick into the center—if it comes out clean or with a few moist crumbs, you’re good. Overbaked cake can be dry (and nobody wants that).
Q: Can I make this chocolate buttermilk cake ahead of time?
A: Yes! Bake the layers up to two days in advance, wrap tightly, and keep unfrosted at room temp. I actually think chocolate cakes taste even better the next day.
Q: What’s the best way to frost this cake?
A: I’m partial to a silky chocolate buttercream or a billowy whipped cream frosting, but honestly, this cake is so moist and rich, you could just use a dusting of powdered sugar and still be in chocolate heaven.
If you give this chocolate buttermilk cake a try, let me know how it turns out! I’d love to hear your stories, tweaks, and tips. Here’s to more chocolate memories in every slice—happy baking, friend!
