Classic Vanilla Cake with Cream Frosting
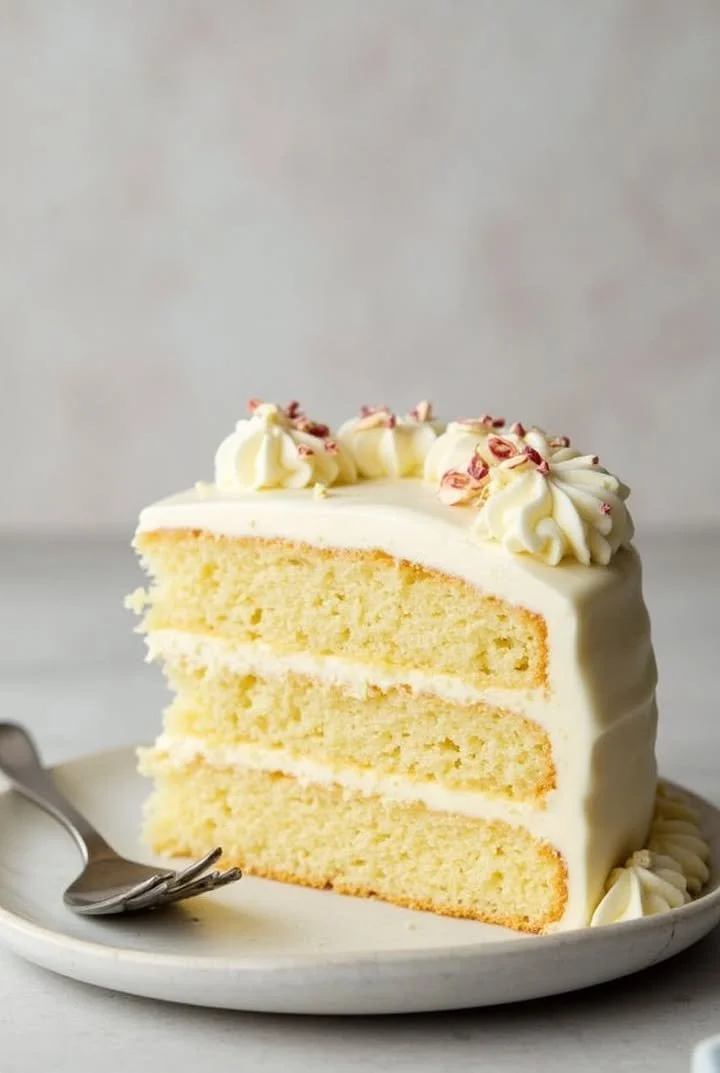
A Slice of Nostalgia: My Classic Vanilla Cake with Cream Frosting
If I close my eyes, I can still picture the kitchen where my love affair with classic vanilla cake first began—the sweet scent of sugar and vanilla wafting through the air, my grandmother’s laughter, and the hum of her old mixer on a warm Saturday afternoon. For me, classic vanilla cake with cream frosting isn’t just a recipe; it’s a cherished family tradition. There’s something so comforting about this homemade vanilla cake—soft, buttery layers, billowy swirls of cream frosting, and that unmistakable, simple elegance that always steals the show at gatherings large and small.
I’m so excited to share this classic vanilla cake recipe (complete with my favorite luscious cream frosting). Whether you’re looking for the perfect birthday dessert, a homemade cake for special celebrations, or just a lovely weekend baking project, you’re in for a delicious treat!
Why You’ll Adore This Classic Vanilla Cake with Cream Frosting
Honestly, I’ve baked so many cakes over the years—but nothing feels quite as timeless (or as delightful) as this homemade vanilla cake. Here’s why I know you’ll love it too:
- Unbeatable Comfort: There’s just something about a classic vanilla cake that wraps you up in nostalgia, like a big, sweet hug from the past.
- Incredibly Versatile: This cake is perfect as-is, but it’s also a blank canvas for your favorite fruits, sprinkles, or even a playful drizzle of caramel. (Talk about a crowd-pleasing dessert!)
- Perfectly Tender Crumb: Thanks to creamed butter and just the right balance of flour and milk, every bite is moist, fluffy, and melt-in-your-mouth.
- Dreamy Cream Frosting: The homemade cream frosting is light, buttery, and just sweet enough—not cloying or overpowering.
I promise, after one bite, you’ll understand why this vanilla cake is a classic for a reason.
Ingredients You’ll Need for Classic Vanilla Cake
Let’s take a quick stroll through what you’ll need for this classic vanilla cake with cream frosting. I’ve added notes on how I like to pick (and tweak!) a few ingredients:
- All-purpose flour (3 cups/375g): Stick with classic all-purpose for the right structure. Sift if you want an extra tender crumb.
- Baking powder (1 tablespoon): Make sure it’s fresh for a nice lift!
- Salt (½ teaspoon): Don’t skip this! It balances out the sweetness.
- Unsalted butter (1 cup/227g for cake; 1 ¼ cups/284g for frosting): Use real, high-quality butter and let it come to room temp for easy creaming. You can taste the difference.
- Granulated sugar (2 cups/400g): Adds sweetness and helps with the tender texture.
- Large eggs (5): Let them sit at room temperature—they incorporate so much better (and help the cake rise).
- Vanilla extract (1 tablespoon for cake, 1½ teaspoons for frosting): Use pure vanilla extract if you can. It really shines in a vanilla cake!
- Whole milk (1¼ cups/300ml): Whole milk keeps the cake moist—don’t swap for low-fat.
- Powdered sugar (4 cups/480g for frosting): For that fluffy, cloud-like cream frosting.
- Heavy cream or milk (3 tablespoons for frosting): I like heavy cream for a richer finish, but milk works too in a pinch.
- Pinch of salt (for frosting): Again, a little goes a long way.
Pro tip: Measuring everything out before you start makes your baking smoother and stress-free.
Step-by-Step Guide: Making the Perfect Classic Vanilla Cake
I promise—delicious, homemade vanilla cake is totally doable, even if you’re not a “fancy” baker! Here’s my tried-and-true, step-by-step method:
- Prep the Pans:
Preheat your oven to 350°F (175°C). Grease and flour three 8-inch (20cm) round cake pans. (I always line the bottoms with parchment—extra insurance against sticking!) - Mix Dry Ingredients:
In a medium bowl, whisk together flour, baking powder, and salt. Set aside. - Cream Butter & Sugar:
In a large bowl, cream softened butter and granulated sugar until light and fluffy. (This takes about 3-5 minutes with a hand or stand mixer. You want lots of air in there!) - Add Eggs & Vanilla:
Beat in eggs, one at a time, mixing well after each. Stir in the vanilla extract. (The batter will look luscious.) - Alternate Dry & Wet:
Mix in the dry ingredients and milk, in batches:- Add a third of the dry mix
- Half of the milk
- Another third of the dry mix
- Rest of the milk
- Finish with the last of the dry ingredients
Mix just until combined. (Over-mixing can make the cake tough, so go gentle!)
- Bake:
Divide batter evenly among prepared pans. Smooth the tops, then bake for 25–30 minutes—until a toothpick inserted in the center comes out clean. - Cool:
Let the cakes cool in pans for 10 minutes, then turn out onto a wire rack to cool completely. (Impatience is the enemy of perfect layers—I’ve learned this the hard way!) - Make the Cream Frosting:
Beat the softened butter until creamy. Gradually mix in the powdered sugar on low, then add vanilla, salt, and cream. Beat on high speed until light and fluffy. (Add more cream, a teaspoon at a time, if you want it softer.) - Assemble:
Place your first layer on a cake board. Frost generously, add the next layer, repeat, then finish with frosting on top and around the sides. Smooth the cake with an offset spatula—or embrace the rustic look with swoops and swirls!
My Secret Tips and Tricks for Classic Vanilla Cake with Cream Frosting Success
After a lot of birthday parties and last-minute bakes for friends (and the occasional kitchen fail), I’ve picked up a few tricks for baking the perfect homemade vanilla cake:
- Room Temperature Everything: Your butter, eggs, and milk blend so much better when not cold. It makes the batter beautifully smooth and the cake more tender.
- Don’t Overmix: The key to fluffy vanilla cake is mixing until ingredients are just combined after adding the flour and milk. Trust me—a gentle touch matters!
- Level the Cakes: If you want that bakery-style finish, use a serrated knife to level off domed cake layers before stacking.
- Frost Like a Pro: For ultra-smooth frosting, I do a crumb coat (a thin layer of frosting) and chill the cake for 15 minutes before the final, dreamy layer.
- Quality Vanilla: It’s the heart of the cake! Choose the best pure vanilla extract you can find—for extraordinary flavor.
Using these tips, you’ll pull a classic vanilla cake with cream frosting from your oven that’s worthy of any celebration.
Creative Variations and Ingredient Swaps
One of the reasons I adore this homemade vanilla cake is its flexibility! Here are some tasty variations and swaps:
- Gluten-Free: Use your favorite 1:1 gluten-free baking blend in place of all-purpose flour.
- Almond Twist: Add ½ teaspoon almond extract to the cake or frosting for a lovely, nutty note.
- Lemon Zest: Stir in a tablespoon of fresh lemon zest to the batter for a bright, citrusy take.
- Berry-Filled: Make it a berry lovers’ dream! Layer fresh berries between each cake layer before frosting.
- Chocolate Chips: Fold 1 cup of mini chocolate chips into the batter for a fun surprise (for when your vanilla cake wants to be a bit adventurous).
- Dairy-Free: Swap in plant-based butter and almond or oat milk if you’re avoiding dairy.
So many ways to make this classic vanilla cake your own!
How to Serve and Store Your Classic Vanilla Cake
I love serving this classic vanilla cake with cream frosting at room temperature. The flavors and textures are at their best—soft layers and creamy frosting without any chill. Want to fancy it up? Add a few fresh berries, a dusting of powdered sugar, or a little sprinkle of edible flowers for a truly memorable presentation.
Leftover Cake Storage Tips:
- Room Temperature: If your kitchen’s cool, keep the cake covered at room temp for a day.
- Refrigerator: For longer storage, wrap well with plastic wrap and refrigerate for up to 4 days. Let slices come to room temp before serving for the best texture (no dry cake here!).
- Freezer: You can freeze unfrosted layers tightly wrapped for up to 2 months. Thaw overnight in the fridge and frost fresh.
This homemade vanilla cake is just as delicious a day or two later—aka, the perfect excuse for another slice with your morning coffee!
FAQs: Your Top Questions About Classic Vanilla Cake Answered
Can I make this classic vanilla cake ahead?
Absolutely! You can bake the cake layers up to 2 days in advance (store tightly wrapped at room temp), then frost the day you want to serve. The assembled cake also holds up beautifully in the fridge.
What’s the secret to that fluffy cream frosting?
Room temperature butter is a must, and beating on high speed at the end really whips in air for that light,

