Hershey’s Chocolate Cake
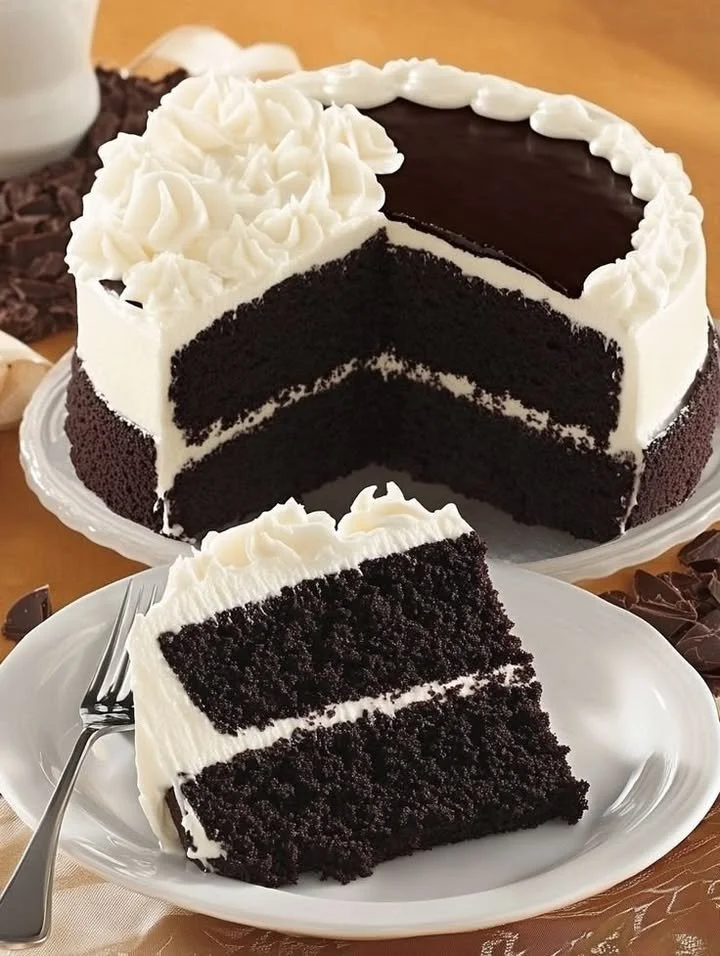
The Chocolate Cake That Feels Like Home: Hershey’s Chocolate Cake
Chocolate cake has always been the soul of our family celebrations, but nothing captures that nostalgic warmth quite like a Hershey’s Chocolate Cake. I still remember the first time I baked this classic chocolate cake for my little sister’s birthday—our kitchen smelled rich and decadent, like a chocolatey hug that lingered long after the candles were blown out. Every bite seemed to melt away the noise of the day, leaving only smiles and that telltale trail of cocoa on little fingers.
If you’re looking for a homemade chocolate cake recipe that brings joy to any occasion (or just a cozy weeknight craving), this one’s a keeper. Trust me—just one forkful, and you’ll see exactly why Hershey’s has remained the go-to cocoa in my pantry for years.
Why You’ll Adore This Hershey’s Chocolate Cake
- Rich, Chocolatey Flavor That Feels Luxurious: The unsweetened Hershey’s cocoa powder gives this chocolate cake its signature depth. Each bite is intensely chocolaty (but not too sweet!), making it perfect for true cocoa lovers.
- Moist, Tender Crumb Every Time: Buttermilk and a splash of boiling water work magic, ensuring your cake stays wonderfully soft and never dry. Seriously, you’ll want a second slice!
- Simple Ingredients, Stunning Results: No fancy stuff here—just classic pantry staples. But the result is a moist chocolate cake that looks (and tastes) totally bakery-worthy.
- Frosting Dreams Fulfilled: The buttercream frosting is silky-smooth, fudgy, and easy enough for even a beginner to whip up. I’ll sometimes catch folks sneaking an extra spoonful. (No judgment—I do it too!)
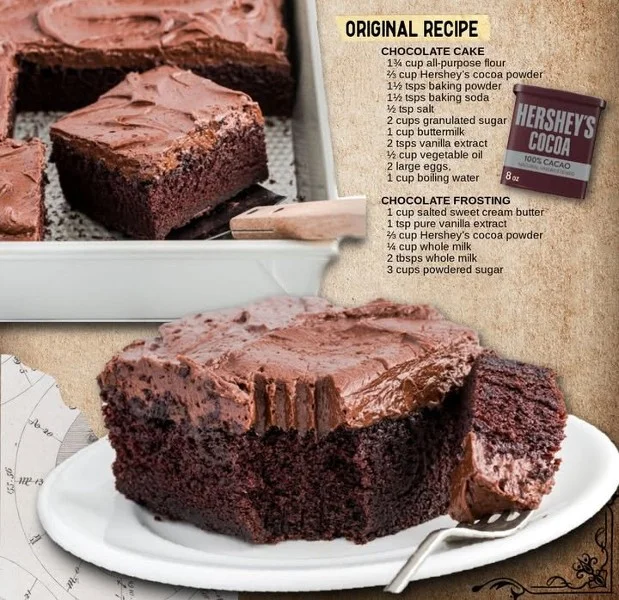
Ingredients You’ll Need for Hershey’s Chocolate Cake
Here’s everything you’ll want on hand to make this classic Hershey’s cake:
- All-purpose flour: The foundation of a fluffy homemade chocolate cake. Make sure to measure using the spoon-and-level method for accuracy!
- Unsweetened Hershey’s cocoa powder: The star of the show—bring on the cocoa flavor! (Dutch-processed isn’t needed; classic Hershey’s works wonders.)
- Baking powder & baking soda: These guys ensure the cake rises beautifully.
- Salt: Just a pinch brings out the chocolate flavor even more.
- Granulated sugar: Keeps things sweet but balanced.
- Buttermilk: Adds moisture and subtle tang—don’t skip it! (If you’re in a pinch, see my swaps below.)
- Pure vanilla extract: Go for real vanilla if you can—it makes a difference!
- Vegetable oil: Locks in tenderness. I find it gives a softer crumb than using butter alone.
- Eggs (room temperature): Help bind everything together—let them sit out for 30 minutes to avoid a dense cake.
- Boiling water: Yes, really! Pouring in hot water deepens the cocoa flavor (plus, it makes mixing smoother).
- Salted sweet cream butter (softened): The base for the dreamiest chocolate frosting.
- Powdered sugar: For that classic buttercream texture.
- Whole milk: Creates a rich, spreadable frosting.
- Extra vanilla & cocoa powder (for frosting): Take the chocolatey goodness over the top.
Step-by-Step Guide: Making the Perfect Hershey’s Chocolate Cake
- Preheat & Prep: Crank the oven to 350°F (175°C). Grease and flour two 9-inch round cake pans—don’t skimp, or your cake might stick!
- Mix Dry Ingredients: In a big bowl, whisk flour, cocoa powder, baking powder, baking soda, and salt until just combined. (I like to sift the cocoa powder first—no lumps, all smooth chocolatey flavor.)
- Blend Wet Ingredients: In another bowl, whisk together granulated sugar, buttermilk, vanilla, vegetable oil, and eggs. You want it totally smooth and glossy.
- Combine & Stir In Water: Slowly fold the dry ingredients into the wet. Then, carefully stir in 1 cup boiling water—it’ll look thin at first, but that’s perfect for a truly moist chocolate cake batter!
- Bake: Divide the batter between your greased pans. Bake for 30–35 minutes. I usually start testing at 28 minutes—look for a toothpick with just a few moist crumbs.
- Cool: Let cakes rest in their pans for 10 minutes, then turn out onto a wire rack to cool completely (patience, friends!).
- Whip Up Frosting: Beat softened butter until creamy. Gradually add cocoa powder and powdered sugar, alternating with whole milk, until smooth and fluffy. Finish with vanilla.
- Frost & Assemble: Spread a thick layer of frosting on one cake layer, gently top with the second, then slather the top and sides. Swirls encouraged!
- Slice & Serve: Use a sharp knife and wipe between slices for the prettiest presentation.
My Secret Tips and Tricks for Hershey’s Chocolate Cake Success
- Quality cocoa powder makes all the difference. Stick with Hershey’s cocoa for that iconic old-fashioned chocolate cake flavor.
- Room temp eggs and buttermilk = fluffier cake. If you forget, pop eggs in warm water for 5 minutes!
- Don’t over-mix the batter. As soon as things are blended (even if minor lumps remain), you’re good to bake. Overmixing can make the cake tough.
- Let cakes cool fully before frosting. Otherwise, the frosting may melt and slide off (ask me how I know).
- Taste as you go! Don’t be shy—sneak a spoon of frosting, and adjust sweetness or milk as needed for spreadability.
Creative Variations and Ingredient Swaps
- No buttermilk? Mix 1 cup whole milk with 1 tablespoon of lemon juice or white vinegar; let sit for 5 minutes.
- Gluten-Free Option: Swap all-purpose flour for your favorite gluten-free blend; I’ve had great results with Bob’s Red Mill.
- Dairy-Free Lovers: Substitute plant-based milk and vegan butter throughout—cake texture stays spot-on!
- Coffee Boost: Swap half the boiling water for strong brewed coffee. It won’t taste like coffee, but the chocolate flavor becomes richer. (Trust me!)
- Add a Cocoa Crunch: Fold in a handful of mini chocolate chips or chopped walnuts before baking for extra texture.
How to Serve and Store Your Hershey’s Chocolate Cake
-
Serving Suggestions:
- For extra decadence, top each slice with whipped cream or a drizzle of warm chocolate sauce.
- Pair with fresh berries on the side for a burst of freshness.
- Try it slightly warmed with a scoop of vanilla ice cream for an ultimate easy dessert.
-
Storing Leftovers:
- Keep your frosted Hershey’s chocolate cake covered at room temperature for up to 2 days.
- For longer storage (hello, make-ahead dessert!), refrigerate in an airtight container for up to 5 days—just let slices come to room temp before serving for the best texture.
- You can also freeze unfrosted cake layers tightly wrapped for up to 2 months; thaw overnight, then frost as usual!
FAQs: Your Top Questions About Hershey’s Chocolate Cake Answered
Can I make this chocolate cake ahead of time?
Absolutely! I often bake the layers a day in advance, then frost and assemble on party day. This classic chocolate cake holds up really well—just store it covered.
What’s the secret to getting the cake super moist?
Don’t skip the boiling water in the batter—combined with buttermilk, it guarantees a tender, moist crumb every time (even on day two!).
Can I use a different cocoa powder?
For authentic taste, I recommend unsweetened Hershey’s cocoa. If you swap for Dutch-process cocoa, you may get a milder flavor and might need to adjust the baking powder/baking soda.
Is this recipe beginner-friendly?
Absolutely! The steps are simple, and the cake is forgiving (even a “rustic” swirl of frosting looks gorgeous). If you’re new, I promise: you can do this.
How do I avoid dry chocolate cake?
Don’t overbake—check with a toothpick a couple minutes early. Also, measure flour carefully and don’t skip the oil and buttermilk.
Whether you’re baking for a special occasion or just ready for a slice of homemade comfort, this Hershey’s Chocolate Cake promises chocolate happiness in every bite. If you try it, I’d love to hear your family’s verdict—drop a note in the comments, and let’s bond over chocolatey memories together. Happy baking!