Every year, we’d drive from Georgia down to Florida to visit my aunt and my dad would stop at two Stuckey’s, one on the way there and one on the way back, so we could eat these on the drive.
The Ultimate Homemade Stuckey’s Treat: A Quick & Easy Family Favorite!
There’s something magical about family road trips—especially our yearly drive from Georgia to Florida to visit my aunt. The excitement builds as we pass by miles and miles of scenic views, but nothing—and I mean nothing—compares to those special stops at Stuckey’s. Every year, my dad would make sure to pull over at two Stuckey’s locations, one on the way there and another on the way back. And what’s our favorite treat on this nostalgic journey? You guessed it! The delightful, creamy, homemade treats that remind us of sweet road trip memories.
Whether you’re planning a cozy weeknight dinner or gearing up for a weekend family meal, these treats are perfect for every occasion. Picture yourself indulging in these creamy bites that melt in your mouth, with aromas wafting through your kitchen, reminding you of carefree road trips. Buckle up—this recipe is going to take you on a delicious ride down memory lane!
Background & Origin
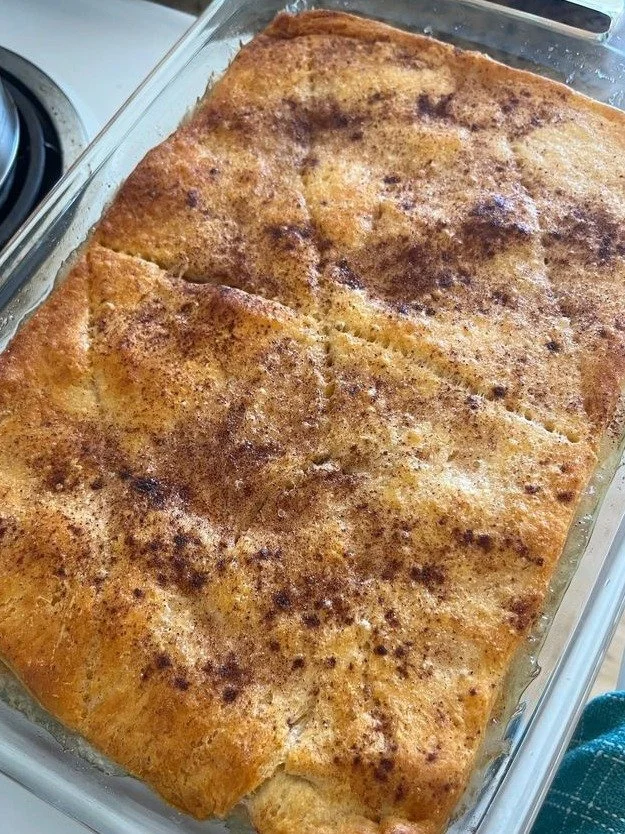
This beloved recipe draws inspiration from traditional American road trip fare, particularly the iconic Stuckey’s chain, which was famed for its pecan treats and country-style snacks. These delicious bites encapsulate the essence of comfort food mixed with childhood nostalgia. Stuckey’s started as a roadside stop for weary travelers in the 1930s and has since become a cherished part of American road trip culture.
Fun Fact: Did you know that Stuckey’s became famous for its pecans, particularly the pecan log roll, which has been a favorite among travelers for decades?
What makes this version unique is not only the recipe but the memories that come along with it. Each bite is a reminder of laughter-filled car rides, family bonding, and the simple joy of enjoying tasty treats together.
Ingredients
To recreate this delightful road trip snack, you will need the following:
- 2 cups of crushed pecans (finely chopped for better texture)
- 1 cup of sweetened condensed milk, room temperature
- 1 teaspoon of vanilla extract
- 1/2 cup of powdered sugar, sifted
- 1/4 cup of butter, softened
- Pinch of salt
- Optional: 1 cup of chocolate chips for an extra indulgent twist
Step-by-Step Instructions
Now, let’s get cooking! Follow these simple steps to whip up your creamy homemade treats.
Prepare Your Ingredients: Gather all your ingredients on the counter for a smooth cooking experience.
Mix the Base: In a mixing bowl, combine the sweetened condensed milk, softened butter, vanilla extract, and a pinch of salt. Stir until perfectly blended and creamy.
Incorporate the Dry Ingredients: Gradually add the sifted powdered sugar and crushed pecans to your mixture. Stir until fully combined and you achieve a thick, creamy consistency. You want a mixture that clings together but is still easy to work with.
Tip: The mixture should be thick yet smooth. If it’s too thick, add a splash more condensed milk.
Mold the Treats: Using your hands, form small ball-shaped pieces or log-shaped pieces, similar to those from Stuckey’s.
Optional Chocolate Coating: For an indulgent twist, melt chocolate chips in the microwave and dip each piece before placing them on a baking sheet lined with parchment paper.
Chill Time: Refrigerate your treats for at least 1 hour to firm them up before serving.
Pro Tips & Common Mistakes
- Flavor Enhancement: Toss in a teaspoon of cinnamon or nutmeg for an aromatic twist.
- Texture Tricks: If you desire a smoother texture, blend the pecans before adding them to the mixture.
- What NOT to Do: Avoid overmixing once you’ve added the pecans, as this can lead to a grainy texture.
- Helpful Shortcuts: Use pre-chopped nuts to save time.
- Prep-Ahead Hacks: These treats can be made a day in advance, giving them time to set in the fridge!
Variations & Substitutions
Here are some variations you can try out:
- Vegan Version: Substitute milk with coconut cream and butter with vegan alternatives.
- Gluten-Free: This recipe is naturally gluten-free; just ensure that your powdered sugar is gluten-free.
- Low-Carb: Use erythritol or a sugar substitute to cut down on carbs.
- Kid-Friendly: Make smaller, bite-sized pieces that kids can easily grab.
- Extra Creamy: Add an additional tablespoon of butter for a richer flavor.
- Spicy Kick: Incorporate a pinch of cayenne or chili powder for a surprising twist!
- Budget-Friendly: Swap pecans for walnuts or sunflower seeds.
Serving Suggestions
These treats can be enjoyed on their own or paired with various accompaniments:
- Best Sides: Fresh fruit or a light garden salad.
- Bread: Pair with crunchy toast or biscuits for a delightful snack.
- Salads: A side of coleslaw or a simple mixed green salad complements the sweet treats.
- Rice or Pasta: Serve alongside a light pasta dish to balance the sweetness.
- Wine Pairing: A glass of sweet Riesling or a light Pinot Noir can elevate your snack experience.
- Plating: Arrange your treats on a lovely platter, garnished with a sprig of mint for an elegant touch!
Storage, Freezing & Reheating
- Refrigeration: These treats will last up to 5 days in the fridge in an airtight container.
- Freezing: For long-term storage, freeze individually wrapped pieces for up to 3 months.
- Reheating: Thaw at room temperature or eat straight from the freezer for a frosty bite!
- Meal-Prep Options: Make a batch over the weekend for chilling snacks throughout the week.
Nutrition & Health Info
Each treat contains approximately 120 calories, packed with healthy fats from pecans. If you make the low-carb or vegan versions, you can enjoy a guilt-free treat while still savoring those cherished flavors. These snacks remind us that fulfilling cravings doesn’t have to mean sacrificing our health goals.
FAQ Section
Can I prepare these treats ahead of time?
Yes! Prepare them a day ahead and store them in the fridge.How do I thicken/thin the sauce?
If too thick, add a splash of condensed milk; if too thin, incorporate more pecans or powdered sugar.Ingredient substitutions?
Yes, feel free to swap nuts or sweeteners to suit your taste preferences!Can I double or halve the recipe?
Absolutely! Adjust the ingredient quantities based on how many treats you want.What cookware is best?
A large mixing bowl and a baking sheet lined with parchment paper work great!Can I make it dairy-free or meat-free?
Yes! Substitute with vegan-friendly ingredients as mentioned above.What sides go well with it?
Fresh fruit or a light salad pairs wonderfully!
Conclusion
I hope this recipe brings a slice of your own road trip memories alive, just like it does for my family! Whether it’s for an on-the-go treat, a cozy family gathering, or simply to indulge your sweet tooth, these creamy delights are sure to satisfy. I would love to hear about your own road trip memories or variations you tried! Please leave a comment, rate the recipe, and share your experience on social media. Safe travels and happy snacking!