Grandma’s Holiday Treats
Easy, Quick & Creamy Grandma’s Holiday Treats — A Homemade, Traditional Family Favorite
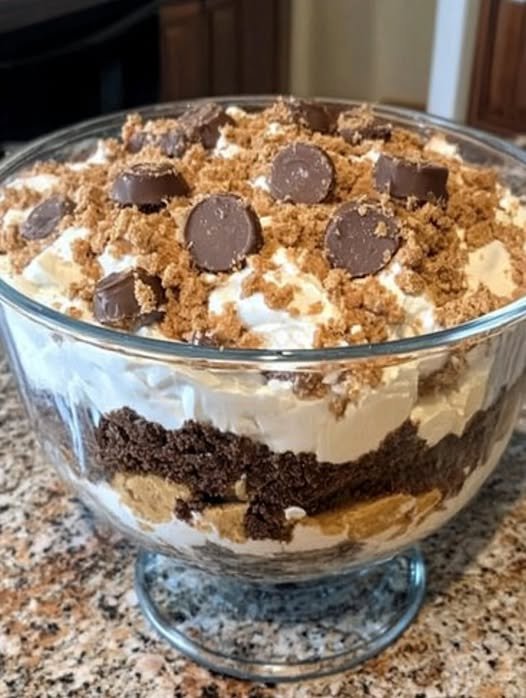
Grandma’s Holiday Treats are more than a recipe — they’re a warm, comforting tradition that fills the kitchen with buttery aroma and cozy memories. This easy, quick, and creamy homemade cookie (or bar) is a traditional family favorite that works for weeknight dinners, weekend baking sessions, and big holiday gatherings. Whether you want a last-minute dessert for guests or a comforting sweet to savor with coffee, Grandma’s Holiday Treats deliver tender texture and nostalgic flavor.
If you love classic holiday baking, try pairing this recipe with other seasonal goodies or explore more ideas on our holiday treats page for inspiration and variations.
Background & Origin
Grandma’s Holiday Treats likely grew out of mid-century American home baking — simple pantry staples turned into a crowd-pleaser. These treats echo the cozy, no-fuss desserts grandmothers baked for school bake sales, family reunions, and festive nights by the fire.
Why it’s so popular:
- Familiar, comforting flavors everyone recognizes (butter, vanilla, chocolate)
- Minimal equipment and straightforward steps, perfect for beginner bakers
- Flexible base that adapts to add-ins like nuts or spices
Fun kitchen science: creaming butter and sugar incorporates air, which gives these treats a slightly lighter crumb. This version stands out because of its balanced sweetness, a gentle vanilla backbone, and the melt-in-your-mouth edge from room-temperature butter.
For more nostalgic bake-off ideas, see this charming collection of crowd-pleasing recipes like those you’d find at a friendly contest: bake-off treats.
Ingredients
- 1 cup unsalted butter — room temperature (soft but not greasy)
- 1 cup sugar — granulated (for a classic crisp-sweet bite)
- 2 cups all-purpose flour — spooned and leveled
- 1 cup chocolate chips — semi-sweet or milk (optional: finely chopped for easier distribution)
- 1 teaspoon vanilla extract — pure vanilla for best flavor
- 1/2 teaspoon salt — balances sweetness
Notes:
- Butter: take out 30–60 minutes before baking to reach room temperature.
- Chocolate chips: swap for chopped nuts or dried fruit for variety.
- Salt: kosher or fine table salt both work — if using salted butter, reduce added salt slightly.
For more pantry-friendly classics and budget-conscious swaps, check out our guide to the best bake-off treats.
Step-by-Step Instructions
- Preheat the oven to 350°F (175°C).
- In a large bowl, cream together the butter and sugar until light and fluffy.
- Beat in the vanilla extract.
- Gradually mix in the flour and salt until well combined.
- Stir in the chocolate chips.
- Drop dough by the tablespoon onto a baking sheet lined with parchment paper.
- Bake for 10-12 minutes or until lightly golden.
- Allow to cool before serving.
Expanded guidance and mini-tips:
-
Preheat & prep (5 minutes)
- Preheat oven to 350°F (175°C) and line a baking sheet with parchment paper.
- Visual cue: oven should reach full temp before your cookies hit the rack for even color.
-
Creaming (3–5 minutes)
- Cream the butter and sugar until the mixture is pale and fluffy — about 3 minutes with a hand mixer, 2 minutes with a stand mixer.
- Visual cue: mixture will look lighter in color and smoother in texture.
-
Mixing in dry ingredients (2–3 minutes)
- Add flour and salt gradually to avoid over-mixing. Stop when no streaks of flour remain.
- Visual cue: dough will be thick, slightly sticky, and hold shape when scooped.
-
Add-ins & scooping (2–4 minutes)
- Stir in chocolate chips until distributed evenly. If dough is too soft, chill 10–15 minutes.
- Use a tablespoon or cookie scoop to drop dough; keep scoops about 2 inches apart.
-
Baking (10–12 minutes)
- Bake until edges are lightly golden and centers look set but tender.
- Visual cue: cookie tops will be matte rather than glossy. If they still look wet on top, give them another minute.
-
Cooling (10+ minutes)
- Let cookies cool on the sheet for 5 minutes before transferring to a wire rack to finish cooling. They firm up as they cool.
Pro timing: Total active time ~20–30 minutes. Makes about 24 cookies depending on size.

Pro Tips & Common Mistakes
How to improve flavor
- Use high-quality vanilla extract for a deeper, more rounded flavor.
- Toast a handful of chopped nuts slightly in a dry pan to add a toasty note.
Texture tricks
- For cakier treats, chill the dough briefly before baking.
- For chewier results, swap 1/4 cup of flour for an equal amount of brown sugar.
What NOT to do
- Don’t use melted butter — it changes the texture and spread.
- Avoid overbaking; pull them out while still slightly soft for tender results.
Helpful shortcuts
- Use pre-measured room-temp butter cubes (keep in fridge wrapped) to speed prep.
- Frozen cookie dough: portion and freeze on a tray, then transfer to a bag. Bake from frozen +2–3 minutes.
Prep-ahead hacks
- Dough can be mixed and refrigerated up to 48 hours before baking for convenience.
- Make dough balls and freeze for up to 3 months for quick fresh baking later.
Variations & Substitutions
-
Vegan
- Replace butter with vegan buttery spread and use a flax egg (1 tbsp ground flax + 3 tbsp water) instead of eggs if your variant uses eggs. Use vegan chocolate chips.
-
Gluten-free
- Substitute 1:1 gluten-free all-purpose flour (ensure it contains xanthan gum) and reduce mixing slightly.
-
Low-carb
- Use almond flour (not a straight 1:1 swap — start with 1 3/4 cups almond flour and add 2 tbsp coconut flour if needed) and a granular erythritol sweetener.
-
Kid-friendly
- Mix in rainbow sprinkles or mini M&M’s for a colorful twist.
-
Extra creamy
- Add 2 tbsp cream cheese to the creaming step for a richer, tangy-sweet lift (chill dough before baking).
-
Spicy
- Add 1/2 teaspoon ground cinnamon and a pinch of nutmeg for a warm holiday spice profile.
-
Budget-friendly
- Swap chocolate chips for chopped chocolate bars (often cheaper on sale), or omit for simple butter cookies.
Explore more creative swaps and inspiration in our roundup of the best treats to make this season.
Serving Suggestions
Pairing ideas to elevate Grandma’s Holiday Treats:
- Best sides: a scoop of vanilla ice cream or a dollop of whipped cream
- Bread: serve alongside thick-cut gingerbread or soft dinner rolls for a cozy dessert board
- Salads: a small citrusy arugula salad balances the sweetness for holiday brunch
- Rice or pasta: not a direct match — reserve these treats for dessert or snack time
- Wine pairing: sweet sherries, tawny port, or a light sparkling wine complement the buttery chocolate notes
How to plate beautifully for guests:
- Arrange 6–8 cookies on a warm wooden board, sprinkle with a dusting of powdered sugar and a few fresh cranberries for color.
- Add a small ramekin of warm chocolate sauce or caramel for dipping.
Storage, Freezing & Reheating
How long it lasts:
- Room temperature: up to 3 days in an airtight container.
- Fridge: 1 week wrapped tightly or in an airtight container.
Freezer-friendly instructions:
- Freeze baked cookies: cool completely, layer with parchment paper, store in an airtight container or freezer bag for up to 3 months.
- Freeze dough: scoop dough onto a baking tray, freeze until solid, then transfer to a freezer bag. Bake from frozen adding 2–3 minutes to the baking time.
Best reheating method:
- Microwave: 8–12 seconds for a soft, warm cookie (watch closely).
- Oven: 300°F (150°C) for 5–7 minutes for several cookies — restores a freshly-baked texture.
Meal-prep options:
- Portion cookies into small bags for grab-and-go snacks.
- Bake a batch to freeze for holiday open houses and unexpected guests.
Nutrition & Health Info
Quick nutrition notes (approximate per cookie, based on 24 cookies):
- Calories: ~150–180 kcal
- Protein: 1–2 g
- Fat: 8–10 g (mostly from butter and chocolate)
- Carbs: 18–22 g
Lighter versions:
- Use reduced-fat butter substitutes and swap 1/4 cup sugar for erythritol or coconut sugar to slightly lower calories.
- Add fiber by using part whole-wheat flour (up to 1/2 cup) — expect a denser texture.
Connect to healthier lifestyle choices:
- Enjoy these treats as an occasional comfort food within a balanced diet. Pair with fruit or a small cup of plain yogurt for a more balanced dessert plate.
FAQ — Common Reader Questions
-
Can I prepare Grandma’s Holiday Treats ahead of time?
Yes — you can mix the dough and refrigerate for up to 48 hours or freeze dough balls for up to 3 months. Bake fresh from chilled or frozen (add a couple minutes to the bake time). -
How do I thicken or thin the dough?
To thicken: chill the dough or add 1–2 tbsp more flour. To thin: add 1 teaspoon of milk at a time until desired consistency. -
What ingredient substitutions work best?
Butter → vegan butter (for dairy-free), all-purpose flour → gluten-free 1:1 blend (for GF), sugar → erythritol (low-carb), chocolate chips → chopped nuts or dried fruit. -
Can I double or halve the recipe?
Absolutely. The recipe scales well. For double batches, mix in a larger bowl and bake on multiple sheets. For half, reduce each ingredient by 50% and adjust baking time slightly if making fewer, larger cookies. -
What cookware is best?
Use a heavy baking sheet lined with parchment or a silicone mat for even baking. A stand mixer or hand mixer makes creaming easier but isn’t required. -
Can I make it dairy-free or meat-free?
Dairy-free: swap butter for a high-quality vegan buttery spread. Meat-free: this recipe is vegetarian by default. -
What sides go well with it?
Coffee, hot cocoa, vanilla ice cream, or a simple citrus salad — all make lovely companions to these treats.
Conclusion
Grandma’s Holiday Treats are a timeless, comforting recipe that brings family together — easy enough for a quick weeknight dessert and special enough for holiday celebrations. Try the variations, use the tips above, and make this classic your own. If you make them, please leave a comment below, rate the recipe, and share a photo on social media — I love seeing your cozy kitchen moments!
👉 #fblifestyle