Oreo Cheesecake
The Creamy, Dreamy Oreo Cheesecake That Transports Me Back to Childhood
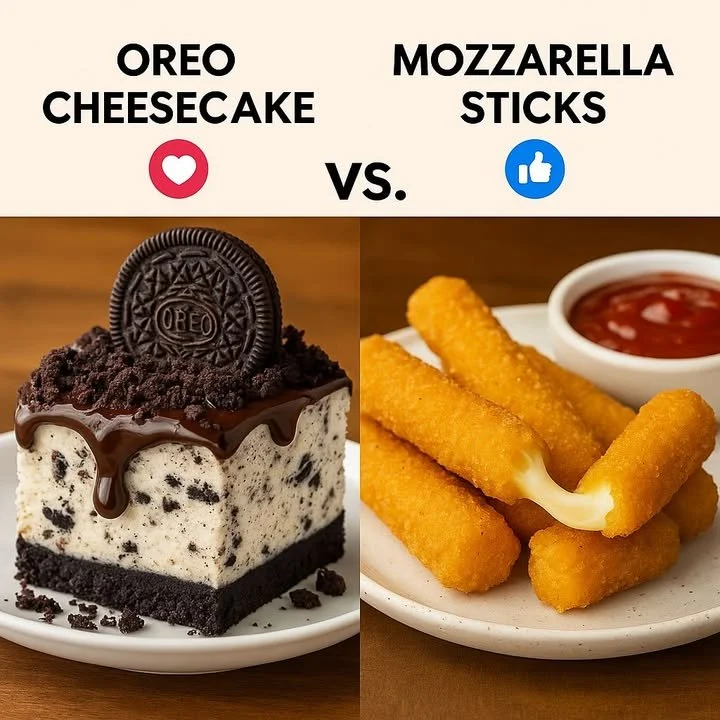
Isn’t it funny how a single dessert can take you straight back to your happiest memories? For me, Oreo cheesecake isn’t just an easy dessert—it’s a slice of nostalgia. Growing up, Oreos weren’t just cookies; they were currency among my siblings and me. But the first time my mom surprised us with a homemade Oreo cheesecake, everything changed. That lush, creamy filling nestled over a buttery Oreo crust, topped with a tumble of more crushed cookies—every bite felt like pure joy. This is the same classic Oreo cheesecake recipe I now make for birthdays, potlucks, or even just to turn a Tuesday into something special.
Why You’ll Adore This Oreo Cheesecake
Let’s be honest—there’s a lot to love about a homemade Oreo cheesecake. Here’s why I think you’ll fall for it just like I did:
- Super Creamy & Decadent: Thanks to plenty of cream cheese and heavy cream, every forkful is smooth, velvety, and totally indulgent.
- Perfect Oreo Crunch: With Oreos in both the crust and on top, you get that iconic cookies-and-cream flavor in every bite.
- Surprisingly Easy: No tricky water bath or fancy tricks here—just straightforward, comforting baking.
- Crowd Favorite: This is the ultimate party showstopper. If you want your friends and family asking for seconds (and the recipe), this is the cheesecake to make.
If I had to sum up the experience, I’d say that making (and eating!) this Oreo cheesecake is like giving yourself a big, chocolatey hug.
Ingredients You’ll Need for Oreo Cheesecake
Here’s what you’ll need to gather before you dive in—plus my little tips for getting the best results:
- 24 Oreo Cookies, crushed (for the crust): I use classic Oreos, but Double Stuf work if you want it extra chocolatey and creamy.
- 5 tablespoons Butter, melted: Go for real butter for a rich, flavorful crust (margarine just doesn’t compare).
- Four 8-ounce packages Cream Cheese, softened: Full-fat cream cheese delivers the creamiest texture and most luxurious cheesecake.
- 1 cup Granulated Sugar: Just the right amount for a perfectly sweet balance.
- 1 teaspoon Vanilla Extract: Opt for pure vanilla—it adds depth and warmth to the filling.
- 4 Large Eggs: They help bind everything together and create a custardy texture.
- 1 cup Heavy Cream: Adds that irresistible silkiness (some folks use sour cream, but I’m all about that heavy cream richness).
- Crushed Oreos (for topping): A generous sprinkle on top looks (and tastes) incredible!
Pro tip: Room-temperature cream cheese is a must for a super-smooth filling (trust me, it saves on elbow grease!).
Step-by-Step Guide: Making the Perfect Oreo Cheesecake
I promise, making an easy cheesecake at home is more approachable than you might think! Here’s how I do it:
- Preheat your oven to 325°F (160°C). Grease a 9-inch springform pan. (This size gives a nice, thick slice!)
- Make the Crust: Crush 24 Oreos (I put them in a zip-top bag and bash away with a rolling pin—excellent stress relief!) and mix with melted butter. Press firmly into the bottom of your pan. Chill while you work on the filling.
- Prepare the Filling: In a large bowl, beat softened cream cheese, sugar, and vanilla until creamy and lump-free. (A hand mixer works wonders here.)
- Add Eggs: Beat in eggs one at a time—don’t rush this part! Scrape down the bowl after each addition for max creaminess.
- Mix in Heavy Cream: Gently fold it in (overmixing adds unwanted air, so take it easy), then pour the batter over the crust.
- Bake: Smooth the top and bake for 1 hour. The edges will look set but the center should still jiggle a little (like a wobbly custard).
- Cool Gradually: Turn off the oven and let the cheesecake cool inside with the door slightly open for 1 hour. This keeps it from cracking.
- Chill & Top: Refrigerate for at least 4 hours (overnight is even better). Before serving, pile on crushed Oreos—you really can’t have too many!
I always sneak a little spoonful before chilling… you know, just for quality control.
My Secret Tips and Tricks for Oreo Cheesecake Success
Through dozens of cheesecake adventures, here’s what I’ve learned:
- Room Temp Everything: Cream cheese and eggs blend up so much smoother if you let them sit out for a bit. (No lumps in your classic cheesecake filling!)
- Don’t Overmix: Mix just until combined to keep your Oreo cheesecake from getting dense or cracking.
- Crust Matters: Use a glass to press the crust mixture evenly—this helps it stay put when slicing later.
- Cool Slow: The gradual cooling step in the oven is key to avoiding the dreaded cracked top!
- Chill Well: Four hours is the absolute minimum for the perfect texture, but overnight will give you that firm-yet-creamy bite everyone loves.
If you do notice a little crack or two on top, don’t stress—extra crushed cookies on top make everything look flawless. (It’s a homemade cheesecake, after all!)
Creative Variations and Ingredient Swaps
One of the best parts about making your own Oreo cheesecake at home? You can play with the recipe! Here are some fun ideas to try:
- Gluten-Free: Use gluten-free chocolate sandwich cookies instead of regular Oreos for a gluten-free cheesecake.
- Chocolate Swirl: Melt 1/2 cup chocolate chips and swirl into the batter before baking for a decadent twist.
- Mint Oreo Cheesecake: Try mint-flavored Oreos and a dash of peppermint extract for a fresh, cool spin.
- Peanut Butter Oreo Cheesecake: Add 1/2 cup creamy peanut butter to the filling for a salty-sweet combo.
- Lighter Option: Substitute half the cream cheese with Greek yogurt, but keep in mind the texture will be slightly lighter.
The recipe is easily adaptable for mini cheesecakes too—just use a muffin tin and adjust baking time to about 18-20 minutes.
How to Serve and Store Your Oreo Cheesecake
Here’s how I keep my Oreo cheesecake as fresh and delicious as that first slice:
- Serving: Let it sit out for 10-15 minutes before slicing—this brings out all the rich, creamy goodness. Serve with extra crushed Oreos, whipped cream, or even a drizzle of chocolate sauce.
- Storing Leftovers: Cover tightly with plastic wrap or place in an airtight container. It’ll keep in the fridge for up to 5 days (although I’m impressed if it lasts that long in your house!).
- Freezing: Cheesecake freezes beautifully! Cut into slices, wrap individually, and freeze for up to 2 months. Just thaw overnight in the fridge.
A leftover slice (if there is such a thing) eaten cold at midnight is its own kind of magic.
FAQs: Your Top Questions About Oreo Cheesecake Answered
Q: Can I make Oreo cheesecake ahead of time?
Absolutely! In fact, it tastes even better after chilling overnight. This makes it the perfect make-ahead special occasion dessert (or just an easy dessert for meal prep!).
Q: Do I need a water bath?
Nope! This recipe is fuss-free and doesn’t require a water bath. As long as you follow the slow cooling instructions, your cheesecake will turn out creamy and dreamy.
Q: Can I use low-fat cream cheese?
Technically, yes—but for that classic, indulgent texture, full-fat is best. Low-fat versions may come out slightly less creamy.
Q: Can I use different sandwich cookies?
Definitely! Chocolate, mint, peanut butter, or even golden Oreos all work. The crust and topping are totally customizable.
Q: How do I prevent cracks?
The key is not overmixing, baking at the correct temperature, and letting the cheesecake cool slowly in the oven (with the door ajar). Even if cracks appear, your toppings will cover them in style.
If you make this Oreo cheesecake (and I so hope you do), let me know how it turns out! Nothing makes my day more than hearing your own Oreo cheesecake stories, tips, and tweaks.
Happy baking, friends—and don’t forget to sneak an extra cookie along the way. You earned it!
