Candy Platter
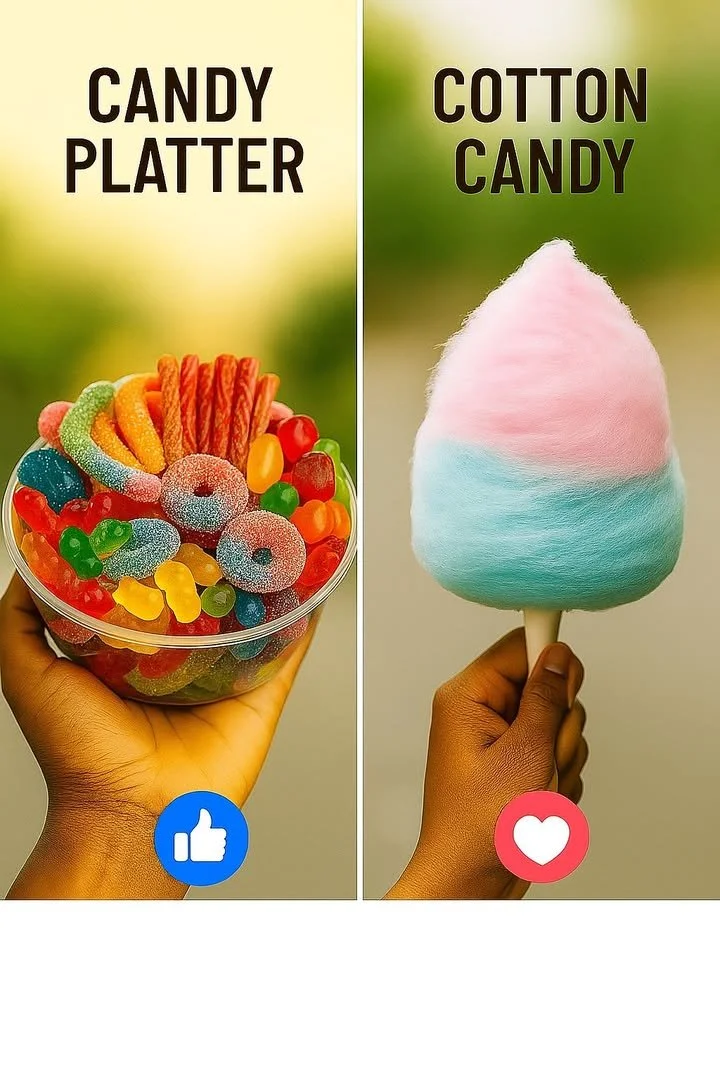
The Candy Platter: A Sweet Tradition That Always Brings a Smile
There are few things more delightful than walking into a party or family gathering and spotting a vibrant, overflowing candy platter on the table. Just the words "candy platter" take me back to childhood birthdays—those magical days when bowls of colorful sweets were front and center, and everyone’s face lit up with excitement. Even now, whenever I put together a DIY candy platter for holidays or get-togethers, it feels like channeling a little bit of that childhood joy and sharing it with everyone in the room.
Whether you’re planning a kid’s birthday bash, a Halloween party, or even just looking to brighten up your dessert table, a candy platter is a simple, no-stress way to spread fun and happiness. Trust me—it’s easy to make, ridiculously customizable, and guaranteed to steal the show!
Why You’ll Adore This Candy Platter
There’s a special kind of magic in assembling and sharing a beautiful candy platter. Here’s why I know you’ll be head-over-heels for this sweet treat option:
- Instant Crowd-Pleaser: Seriously—watch guests of any age light up at the sight of a bright, inviting display of chocolates, gummies, and lollipops (those rainbow colors have a way of sparking joy!).
- Zero Fuss, All Fun: No baking, mixing, or worrying about things not turning out. It’s stress-free, even if you’re throwing things together at the last minute.
- Ultra-Customizable: Got a chocolate lover in the family? Know someone who’s obsessed with sour treats? You can personalize your candy platter to fit the theme, season, or individual taste—so everyone feels included.
- Memorable Presentation: It’s more than just sweets on a plate—when you take a few minutes to arrange candies by color or texture, it becomes a festive centerpiece that everyone remembers.
Ingredients You’ll Need for a Showstopping Candy Platter
One of my favorite things about making a candy platter is that you really can use whatever you love (or have). Here’s what I usually include:
- Gummy Candies: I always go for bears, rings, or worms—they’re chewy, fun, and super kid-friendly. (Choose a variety of shapes and colors for extra eye appeal!)
- Chocolates: Everything from mini chocolate bars to chocolate truffles works here. Pick a mix of milk and dark chocolate so there’s something for everyone.
- Lollipops: These add height and a playful vibe to your candy tray. Classic round pops or fun shapes both work great.
- Hard Candy: Think peppermints, butterscotch, or fruity drops (they’re perfect for adding pops of shiny color).
- Sour Treats: Sour gummies or candy belts break up the sweetness and give your platter a little zing.
- Caramels: Soft, chewy caramels add buttery richness and pair beautifully with chocolate. Individually wrapped ones are especially easy for guests to grab.
Don’t be afraid to let your favorites or whatever seasonal treats are available guide your choices (the candy world is your oyster!).
Step-by-Step Guide: Making the Perfect Candy Platter
Making a candy platter is as fun as it sounds! Here’s how I bring mine to life, with all the little personal tips I’ve picked up:
- Pick Your Platter or Tray: I like to use a large, flat serving tray or even a pretty wooden board (charcuterie-style). The bigger, the better!
- Arrange by Type: Start by grouping candies by type—gummies in one corner, chocolates in another, and so on. It helps with visual appeal and lets guests easily find their favorites.
- Add Height and Texture: Stick lollipops upright in jars or cups, or use cupcake liners for smaller candies. Little bowls add texture and order to your display.
- Fill in the Gaps: Use smaller candies, like hard candy or mini chocolates, to fill any spaces and make your platter look ‘abundant’ (gone are the days of sad, sparse candy bowls).
- Finish with Color Pops: If you have a color scheme, now’s the time to arrange candies by color. Or, go wild with a rainbow effect for a festive, playful look!
And don’t stress if things look a little imperfect—the point is for everyone to dig in and enjoy (no two candy platters are ever the same!).
My Secret Tips and Tricks for Candy Platter Success
Having made more than a few of these (from easy party platters to holiday candy displays), I’ve picked up some insider tricks:
- Theme It Up: Match candy colors to your party theme (think pastel for spring, red and green for Christmas, or spooky tones for Halloween). It makes your candy platter extra special!
- Balance Flavors: Include a mix of sweet, sour, chocolatey, and fruity treats to keep everyone happy (and coming back for seconds).
- Use What You Have: Don’t feel like you must buy tons of new candy—leftover holiday candy, individually wrapped Halloween treats, or even bulk store finds all have a place here.
- Add Edible Surprises: Toss in some “grown-up” treats like chocolate-covered espresso beans or candied nuts for a sophisticated twist (especially if your audience skews older).
Above all, have fun with it—there’s no wrong way to build your own candy platter!
Creative Variations and Ingredient Swaps
The beauty of a candy platter is that you can cater it to any crowd or occasion. Here are some fun ideas:
- Healthier Bites: Mix in dried fruit, yogurt-covered raisins, or dark chocolate bites for a slightly healthier riff.
- Seasonal Touches: Add candy corn and caramel apples in the fall, heart-shaped sweets for Valentine’s Day, or peppermint bark in winter.
- Allergy-Friendly: If you’ve got nut allergies or other dietary needs, opt for vegan or gluten-free candies—there are plenty of delicious choices out there now!
- International Flair: Visit your local world market for imported treats—Japanese gummies, European chocolates, or Mexican tamarind candies are always a hit.
With so many options, your candy platter can easily become your signature party treat (and a talking point, too!).
How to Serve and Store Your Candy Platter
It’s best to serve your candy platter at room temperature. Place it on a flat surface where everyone can access it easily, and keep extra napkins or mini tongs handy for grabbing sweets.
If you have leftovers (which honestly doesn’t happen often in my house!), just transfer the candies to airtight containers or zip-top bags and store them in a cool, dry place. Chocolates and caramels can melt, so avoid direct sunlight or heat. This way, your leftover candy will stay fresh for weeks—perfect for surprise treat cravings or future gatherings.
FAQs: Your Top Questions About Candy Platters Answered
1. Can I make a candy platter ahead of time?
Absolutely! You can arrange your candy tray a day before your event—just cover it loosely with plastic wrap to keep everything fresh (especially those chewy candies).
2. What kind of tray works best for a candy platter?
Anything flat and roomy! I love using a wooden cheese board, a serving tray, or even a large plate. Just make sure there’s enough surface area for all your sweets.
3. How do I keep my candies from getting sticky?
Stick to individually wrapped candies or use small paper liners for particularly sticky treats (like caramels or gummies). Keeping everything in a cool, dry spot will help prevent melting and stickiness.
4. What’s the best way to add a personal touch to my candy platter?
Choose candies that remind you of your own childhood, or favorites that guests have mentioned in the past. Little themed decorations (like seasonal picks or fun signs) always make people smile.
5. How much candy do I need for a platter?
A good rule of thumb: ¼ to ½ cup of candy per guest, but a little extra never hurts! It’s always nice to have leftovers for a sweet snack the next day.
If you create your own candy platter, I hope it brings laughter, nostalgia, and a big dose of fun to your table—just like it does for me. If you have go-to candies or creative ideas, please share them in the comments—I’d love to see your unique takes and tips!
