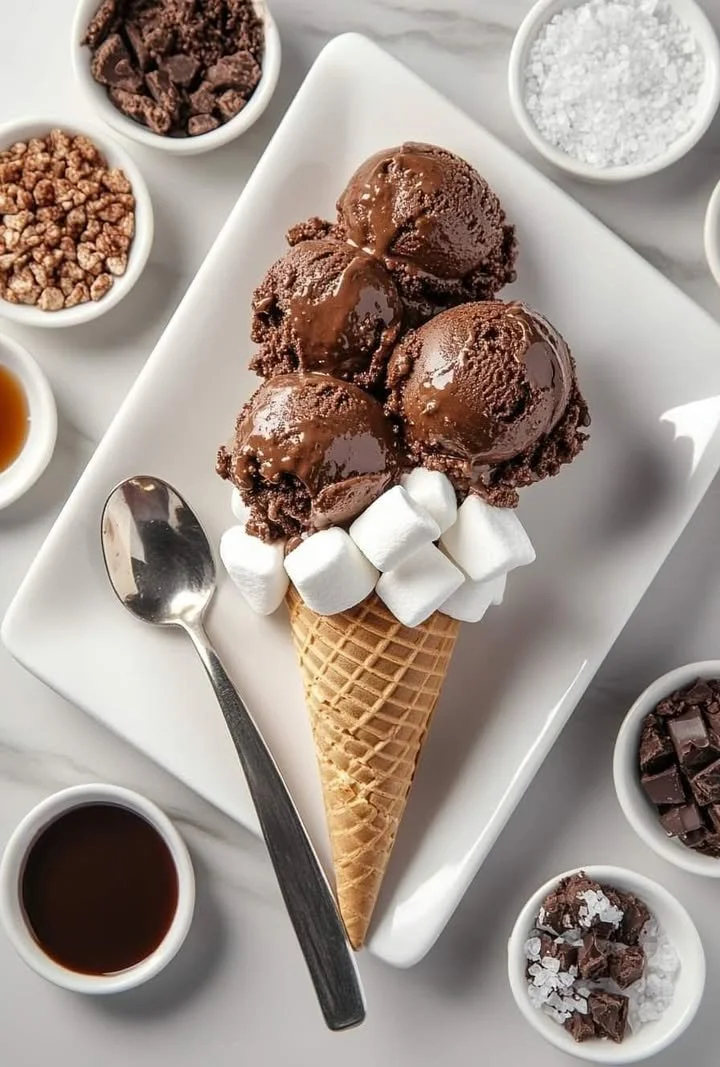
Chocolate Marshmallow Ice Cream Cone
The Sweetest Nostalgia: My Favorite Chocolate Marshmallow Ice Cream Cone
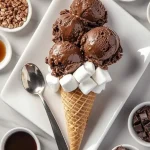
There’s something about a chocolate marshmallow ice cream cone that instantly transports me back to sunny afternoons at the park, sticky fingers, and the sound of laughter echoing through the air. Growing up, the ice cream truck was the hero of summer, and the moment they’d hand over a perfectly swirled cone with gooey marshmallows hiding in the tip—well, it felt like magic. These days, recreating that decadent chocolate marshmallow ice cream cone at home is my way of bottling a little bit of that childhood wonder (and sharing it with my own family, too). If you’ve ever wished you could have the ultimate homemade chocolate ice cream in a crunchy waffle cone—complete with pillowy marshmallows—this recipe is written just for you.
Why You’ll Adore This Chocolate Marshmallow Ice Cream Cone
Let me count the ways—because, honestly, this treat is pure joy in a cone!
- Chocolate Lover’s Dream: Imagine ultra-creamy, homemade chocolate ice cream, made with indulgent dark chocolate and cocoa powder. If you’re a chocolate fanatic like me, every bite feels extra special.
- Surprise Marshmallow Center: The best part? A layer of mini marshmallows packed into the cone’s tip. They add a playful, sweet contrast (and prevent any drippy leaks!).
- Customizable Toppings: Whether you like a sprinkle of chocolate chips, a handful of cocoa nibs, or a luscious caramel drizzle, you get to make it truly your own.
- Guaranteed Smiles: This cone doesn’t just satisfy the taste buds—it brings back happy memories and is guaranteed to make both kids and adults grin from ear to ear.
Ingredients You’ll Need for Chocolate Marshmallow Ice Cream Cones
Let’s talk ingredient shopping—because choosing quality makes the difference in homemade ice cream perfection!
- 2 cups heavy cream: For that dreamy, scoopable texture. Go for the freshest cream you can find!
- 1 cup whole milk: Adds richness without being overly heavy.
- 3/4 cup sugar: Regular granulated sugar works perfectly (keeps things just sweet enough).
- 1/2 cup unsweetened cocoa powder: Look for Dutch-processed or natural—either will give you that deep chocolate hit.
- 150g dark chocolate, chopped: The darker the better if you ask me—at least 60% cacao for intensity.
- 4 large egg yolks: Give the ice cream its signature custard base (don’t worry, it’s easier than it sounds).
- 1 tsp vanilla extract: Brings out all those gorgeous chocolate notes.
- Pinch of salt: Balances the flavors.
- Waffle cones: Grab your favorite brand, or get fancy and make your own!
- Mini marshmallows: Essential for that signature marshmallow surprise.
- Optional toppings: Chocolate chips, caramel drizzle, cocoa nibs, or crushed cookies (because too many toppings is never a thing).
Step-by-Step Guide: Making the Perfect Chocolate Marshmallow Ice Cream Cone
Ready to create pure chocolate marshmallow bliss? Here’s the scoop:
- Make the Chocolate Custard Base: In a saucepan, whisk together milk, heavy cream, sugar, unsweetened cocoa powder, and a pinch of salt. Gently heat until warm but not boiling—you just want to dissolve everything (you’ll smell that cocoa start to bloom).
- Temper the Egg Yolks: In a separate bowl, whisk your egg yolks until just a bit thick. Slowly pour some of the warm cream mixture into the yolks, constantly whisking (so you don’t end up with scrambled eggs—trust me, I’ve been there).
- Cook Until Thickened: Pour everything back into the saucepan. Cook over low heat, stirring non-stop, until the custard coats the back of your spoon. If you swipe your finger across the spoon, it should leave a clean line (my little “kitchen magic” test).
- Melt in That Gorgeous Chocolate: Remove the pan from the heat, add the chopped dark chocolate, and stir until melted and silky. Stir in the vanilla extract.
- Chill Out: Pour the custard into a bowl, cover with plastic wrap (press it right against the surface so no skin forms), and chill for at least 4 hours, or overnight if you can stand the wait.
- Churn to Fluffy Perfection: Pour the cold custard into your ice cream maker and churn until creamy and thick. Transfer to a container and freeze for 2–3 hours until perfectly scoopable.
- Assemble the Cones: Drop a handful of mini marshmallows into the bottom of each waffle cone (this is the fun part). Scoop three generous balls of chocolate ice cream on top, then finish with more marshmallows and your favorite toppings.
My Secret Tips and Tricks for Chocolate Marshmallow Ice Cream Cone Success
- Cold Custard, Happy Ice Cream: Always chill your base until it’s thoroughly cold before churning—this ensures a super-smooth, creamy texture.
- Quality Chocolate Matters: I’ve learned that using good-quality dark chocolate makes all the difference (no chalky, waxy ice cream here!).
- Don’t Skip the Marshmallow “Plug”: This isn’t just for fun—it really does stop the ice cream from leaking, and adds that magical, sticky-sweet bite at the very end.
- Go Wild with Toppings: Extra chocolate chips, a ribbon of caramel, or even a dusting of cocoa nibs on top bring extra texture and personality (plus, it’s more eye-catching for family parties or a special treat night!).
- Serve Fresh: For the best experience, let your ice cream sit at room temperature for 3-5 minutes before scooping. You’ll get those gorgeously round, creamy scoops every time.
Creative Variations and Ingredient Swaps
If you’re in the mood to experiment with these chocolate marshmallow ice cream cones, here are some fun tweaks:
- Peanut Butter Lovers: Swirl in warm peanut butter before the final freeze for a chocolate-peanut butter dream cone.
- Vegan Version: Use full-fat coconut milk instead of cream and milk, coconut sugar to sweeten, and your favorite dark vegan chocolate for a plant-based treat.
- Gluten-Free Option: Choose gluten-free ice cream cones, or serve the ice cream in bowls with marshmallow sprinkles and plenty of toppings.
- Berry-licious: Add a handful of crushed freeze-dried raspberries or strawberries for a fruity twist that balances the chocolate beautifully.
- Nutty Delight: Sprinkle toasted almonds, hazelnuts, or pecans over the top for crunch (and a little “grown-up” flavor).
How to Serve and Store Your Chocolate Marshmallow Ice Cream Cone
- Serve: Build cones just before serving for that perfect contrast between creamy ice cream, chewy marshmallows, and crispy cones.
- Storing Leftovers: Store extra chocolate ice cream in an airtight container (press a piece of parchment or plastic wrap directly onto the surface to avoid freezer burn). It’ll keep for a week or two, but honestly—it rarely lasts that long at my house!
- Topping Bar Fun: If you’re hosting, set up a toppings bar, so everyone can create their own ultimate cone (such a hit at our summer cookouts!).
FAQs: Your Top Questions About Chocolate Marshmallow Ice Cream Cones Answered
Can I make this chocolate ice cream without an ice cream maker?
Absolutely! After chilling your custard, pour it into a loaf pan and freeze. Stir every 30–45 minutes for 3–4 hours to break up ice crystals. It won’t be as perfectly creamy, but it’ll still taste amazing!
How do I keep the cone from getting soggy?
That bottom layer of mini marshmallows does double duty—stopping leaks and keeping the cone crisp. You can also dip the inside in melted chocolate for an extra barrier (and more chocolate flavor, yum!).
Can I use milk chocolate instead of dark?
Definitely! Milk chocolate will make your ice cream sweeter and a bit lighter, which is perfect if you prefer a gentler chocolate vibe.
Are there easy ways to make this more kid-friendly?
Yes—get the kids involved in the marshmallow-stuffing and decorating. We make it a “decorate your own cone” party, and they love it!
Can this recipe accommodate different dietary needs?
For sure—try plant-based milks and vegan marshmallows for a dairy-free version (check your waffle cones too; some are vegan-friendly).
If you try this chocolate marshmallow ice cream cone, I’d love to hear about it! Drop a comment with your creative twists or tag me in your delicious creations. Here’s to making those sweet, summer memories—one chocolatey, marshmallow-y bite at a time. 🍦
Chocolate Marshmallow Ice Cream Cone
Ingredients
For the Chocolate Custard
- 2 cups heavy cream For that dreamy, scoopable texture.
- 1 cup whole milk Adds richness without being overly heavy.
- 3/4 cup sugar Regular granulated sugar works perfectly.
- 1/2 cup unsweetened cocoa powder Look for Dutch-processed or natural.
- 150 g dark chocolate, chopped At least 60% cacao for intensity.
- 4 large egg yolks Gives the ice cream its signature custard base.
- 1 tsp vanilla extract Brings out the chocolate notes.
- 1 pinch salt Balances the flavors.
For Serving
- Waffle cones Grab your favorite brand, or make your own!
- Mini marshmallows Essential for the signature surprise.
- Optional toppings Chocolate chips, caramel drizzle, cocoa nibs, or crushed cookies.
Instructions
Preparation
- In a saucepan, whisk together milk, heavy cream, sugar, cocoa powder, and salt. Gently heat until warm but not boiling.
- In a separate bowl, whisk the egg yolks until just thick. Slowly pour some warm cream mixture into the yolks, whisking constantly.
- Pour everything back into the saucepan and cook over low heat, stirring non-stop until thickened.
- Remove from heat, add chopped dark chocolate, and stir until melted and smooth. Stir in the vanilla extract.
- Pour into a bowl, cover with plastic wrap, and chill for at least 4 hours or overnight.
Churning
- Pour the cold custard into your ice cream maker and churn until creamy and thick. Then transfer to a container and freeze for 2–3 hours.
Assembly
- Drop a handful of mini marshmallows into the bottom of each waffle cone.
- Scoop three generous balls of chocolate ice cream on top, finishing with more marshmallows and your favorite toppings.