Red Velvet Raspberry Cake
The Red Velvet Raspberry Cake That Won My Heart
There are those special days that just call for the magic of red velvet cake—a birthday, an anniversary, or (let’s be honest) even just an ordinary Tuesday that could use a boost. I still remember the first time I tasted a red velvet raspberry cake: it was a cozy winter afternoon at my grandmother’s house, where she’d always serve cake with thick frosting and as many fresh raspberries as her garden could muster. The kitchen smelled like vanilla and warm cocoa, and I was hooked. Now, this red velvet raspberry cake has become my go-to homemade dessert whenever I want to treat those I love (or myself!). This recipe is all about velvety layers, dreamy cream cheese frosting, and that sweet-tart pop of raspberries—what’s not to adore?
Why You’ll Adore This Red Velvet Raspberry Cake
Let’s get right to it. Here’s why this red velvet raspberry cake is swoon-worthy:
- Unforgettable flavor combo – The classic tang of red velvet cake meets the juicy brightness of fresh raspberries. It’s comfort and elegance all in one bite.
- Creamy, luscious frosting – I’m unashamedly obsessed with cream cheese frosting, especially when it’s paired with cocoa and vanilla cake. (You can’t go wrong.)
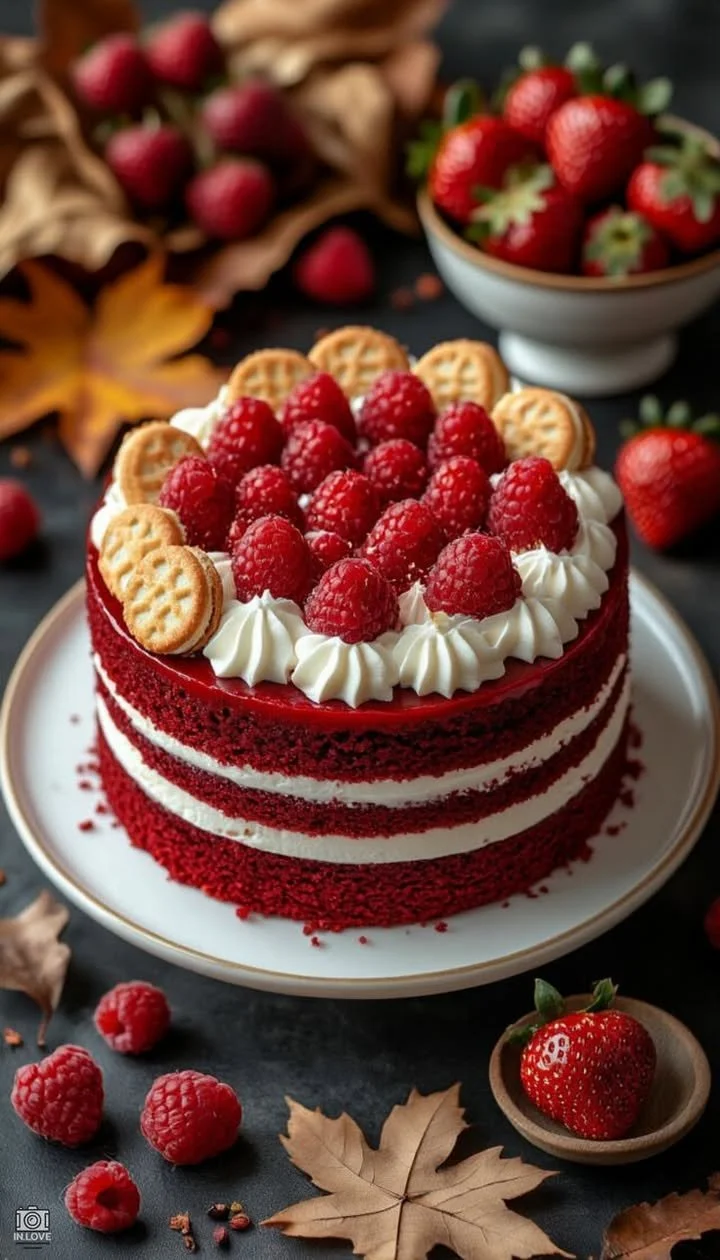
- Showstopper looks – That bold red color, a crown of raspberries, and delicate mini butter cookies make it absolutely dazzling. It’s a homemade dessert that looks bakery-worthy!
- Perfect for gatherings – The recipe serves a crowd, can be prepped ahead (hello, stress-free entertaining), and always brings people together around the table.
Ingredients You’ll Need for Red Velvet Raspberry Cake
Gathering your red velvet raspberry cake ingredients is such a satisfying step. Here’s what you’ll want on hand (plus, I’m sharing some personal tips!):
- All-purpose flour (2 1⁄2 cups) – Use reliable, unbleached flour for the best cake texture.
- Unsweetened cocoa powder (2 tbsp) – Dutch-process works beautifully here for flavor and color.
- Sugar (1 1⁄2 cups) – White granulated sugar keeps things sweet and classic.
- Baking soda (1 tsp) – Gives that irresistible lift.
- Salt (1 tsp) – Don’t skip! It balances all the flavors.
- Large eggs (2) – Room temp eggs create a smoother batter.
- Vegetable oil (1 1⁄2 cups) – Makes your cake ultra-moist and tender.
- Buttermilk (1 cup) – Can sub milk + 1 tbsp vinegar if you need to; the tang is key.
- Vanilla extract (2 tsp for cake + 2 tsp for frosting) – Real vanilla, if possible, lends depth!
- White vinegar (1 tsp) – Helps keep the crumb tender.
- Red food coloring (2 tbsp) – Gel color creates a vibrant hue, but use what you have.
- Cream cheese (16 oz, softened) – Full-fat for the creamiest frosting.
- Unsalted butter (1 cup, softened) – For perfect, fluffy frosting (avoid margarine for the best result).
- Powdered sugar (4 cups) – Sift to prevent lumps.
- Fresh raspberries – For that signature finish. Pick out the plumpest, brightest ones!
- Mini butter cookies or shortbread – Your secret weapon for an adorable edge.
- Optional: Strawberries – For extra color and flavor (and fun!).
- Optional: Raspberry coulis – A swipe between layers is next-level (plus, “coulis” just sounds fancy).
Step-by-Step Guide: Making the Perfect Red Velvet Raspberry Cake
Here’s how I make my go-to red velvet raspberry cake—relaxed, with lots of finger-licking in between. You really can do this!
- Prep your pans:
Preheat the oven to 350°F (175°C). Grease and line two 8-inch round pans with parchment—trust me, it makes cake removal a breeze. - Whisk dry ingredients:
In a big bowl, whisk together all-purpose flour, cocoa powder, sugar, baking soda, and salt. A little whisking helps break up clumps. - Mix wet ingredients:
In another bowl, combine eggs, vegetable oil, buttermilk, vanilla extract, white vinegar, and food coloring. Whisk until silky smooth—I always admire that deep red! - Bring it together:
Add the wet ingredients to the dry and gently mix just until you see no flour streaks. (Don’t overmix! That’s how you keep the crumb tender.) - Bake:
Divide batter evenly between your pans. Bake 30–35 minutes, or until a toothpick comes out clean. Your kitchen will smell ahhh-mazing. - Cool:
Let cakes cool completely before you try to frost them—impatience can lead to melted frosting (ask me how I know!). - Make the frosting:
Beat your softened cream cheese and butter together until creamy. Slowly add powdered sugar, then finish with vanilla. If it’s too soft, chill it for 20 minutes. - Assemble and decorate:
For a tall cake, carefully slice each round in half (serrated knife helps). Spread a generous layer of frosting, stack, repeat! Frost the outside lightly for a rustic “naked” look. Pipe swirls on top if you’re feeling fancy. - Garnish:
Mound fresh raspberries in the center and ring the edge with mini butter cookies. Strawberries make it extra festive. - Chill (and admire!):
Pop the decorated cake in the fridge for an hour before slicing for those clean, Instagram-worthy layers.
My Secret Tips and Tricks for Red Velvet Raspberry Cake Success
I’ve tweaked and tested this homemade dessert recipe often—here’s what I’ve learned (so you don’t have to):
- Room temperature frosting ingredients: Always! Cold butter and cream cheese just don’t blend well.
- Chill between layers: For super neat slices, chill the cake a bit before slicing and layering. It makes all the difference.
- Don’t overmix batter: Fold just until combined for the fluffiest crumb (overworking makes it dense).
- Level your layers: Use a serrated knife to even out domed cakes before stacking—your cake will look professional.
- Layer in a coulis (optional): If you really want that raspberry punch, spread a thin layer of raspberry sauce between cake layers along with the frosting. It’s divine!
Creative Variations and Ingredient Swaps
Our trusty red velvet raspberry cake is super flexible! Here are some ways you can tweak it:
- Gluten-free: Swap all-purpose flour for your favorite 1:1 gluten-free blend.
- Vegan twist: Try flax eggs, plant-based cream cheese, and dairy-free butter to suit vegan diets.
- Berry swap: No raspberries on hand? Blueberries or blackberries make a lovely substitute.
- Nutty crunch: Sprinkle chopped pistachios or pecans between layers for contrast.
- Flavor boost: Add orange zest to the frosting for a citrusy twist (so fresh!).
How to Serve and Store Your Red Velvet Raspberry Cake
When it comes to serving this beautiful red velvet raspberry cake, I love bringing the whole cake to the table and letting everyone take in that ruby-red color before slicing. Serve chilled or at room temperature (for the creamiest frosting).
Storing leftovers? Just cover the cake and pop it in the fridge—it stays moist and delicious for up to 4 days. (Pro tip: I always sneak a slice the day after; it’s even better once the flavors settle!) You can also freeze individual slices wrapped tightly for up to a month—just defrost overnight in the fridge when the craving strikes.
FAQs: Your Top Questions About Red Velvet Raspberry Cake Answered
Can I make this red velvet raspberry cake ahead of time?
Absolutely! Both the cakes and the cream cheese frosting can be made one day ahead and stored separately. Assemble on the day you serve for maximum freshness.
Is red velvet raspberry cake best with fresh or frozen berries?
Fresh raspberries add the prettiest pop and taste, but in a pinch, thawed and well-drained frozen berries work too!
What makes this red velvet raspberry cake so moist?
Vegetable oil and buttermilk are your moisture heroes. Make sure not to overbake for the softest texture.
Can I skip the cookies on top?
Of course—you do you! The mini butter cookies are just a fun (and tasty) touch, but your cake will still shine without them.
Why do you use vinegar in red velvet cake?
It reacts with the baking soda to create that classic, slightly tangy crumb and helps the red color pop.
Got another question about this homemade dessert? Drop it in the comments—I love talking all things red velvet raspberry cake!
So whether you’re baking for a special celebration or simply want to lift your spirits, I hope you’ll try this homemade red velvet raspberry cake. It’s pure joy in every bite—with just enough vintage charm (and real-life imperfection) to remind you: this is what love, laughter, and a little cocoa can taste like.