Chocolate Delight
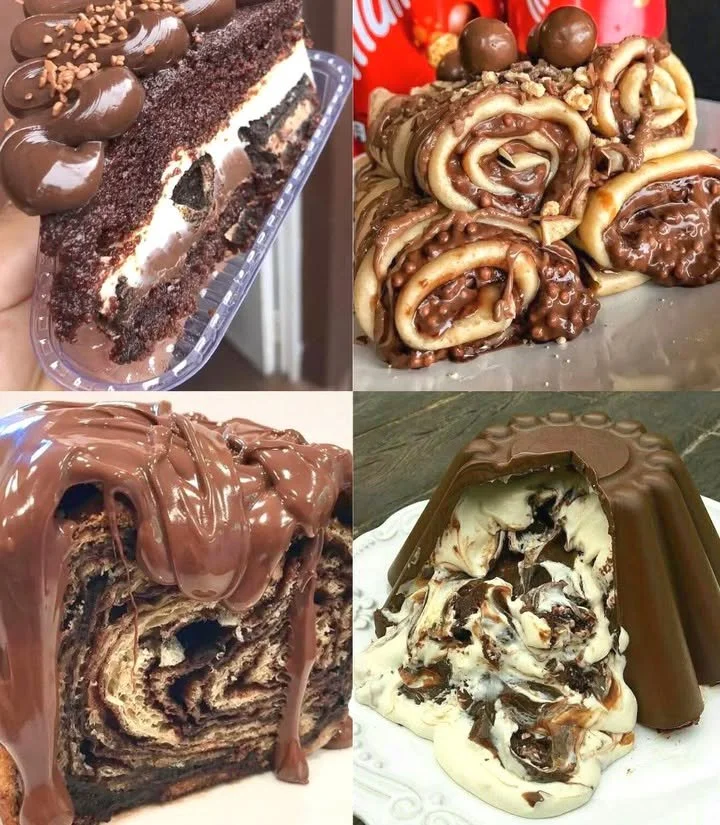
Chocolate Delight: The Cozy Treat That Always Warms My Heart
Have you ever noticed how certain recipes just bring you back? For me, Chocolate Delight is one of those soul-hugging, absolutely non-negotiable desserts that feels like a warm blanket on a chilly evening. The smell of cocoa, the anticipation as it bakes—suddenly, I’m ten years old, perched on a kitchen stool while my mom melts butter and tells me not to sneak spoonfuls (though I always did). There’s something magical about a pan of homemade chocolate delight cooling on the counter, promising rich, fudgy comfort in every bite.
So, if you’re on the hunt for the best chocolate dessert, let’s dive in and make this classic together!
Why You’ll Adore This Chocolate Delight
Let me just say—if chocolate is your love language, this is your translation guide! Here’s why I reach for this chocolate delight recipe time and time again:
- Ridiculously Easy: Truly, it’s a one-bowl wonder. No fancy equipment, no fuss—just simple ingredients coming together in dessert harmony.
- Rich and Fudgy Flavors: The deep cocoa, paired with just a hint of coffee (optional, but c’mon!), means every bite is intense, smooth, and ultra-satisfying.
- Perfect for Sharing (or Not!): This dish is ideal for casual get-togethers, rainy nights in, or late-night cravings when you need just “one more bite.”
- Crowd-Pleaser Status Achieved: Kids, adults, even my picky uncle who claims he “doesn’t do sweets” (yeah, right)—everyone goes back for seconds.
Ingredients You’ll Need for Chocolate Delight
Before you preheat the oven, let’s gather everything for this easy chocolate dessert. Here are my go-tos, along with a few quick tips:
- 1 cup cocoa powder – Go for a high-quality unsweetened cocoa for deeply chocolaty flavor.
- 1 cup sugar – Granulated sugar works best here; feel free to use organic if you wish.
- 1/2 cup butter, softened – I love using real unsalted butter (it makes the crumb so soft!).
- 2 eggs – Room temperature helps everything mix smoothly.
- 1 cup flour – All-purpose works just fine; if you’re gluten-sensitive, try a 1:1 gluten-free blend.
- 1 teaspoon vanilla extract – Splash in the best vanilla you’ve got for a subtle, fragrant sweetness.
- 1/2 teaspoon baking powder – This lifts and lightens the batter ever-so-slightly.
- 1/4 teaspoon salt – Just a pinch brings out all that chocolate flavor.
- 1/2 cup chocolate chips (optional) – I never say no to extra melty chocolate surprises in each bite.
- 1 cup brewed coffee (optional) – If you want to really deepen the chocolatey notes, add cooled strong coffee (trust me!).
Step-by-Step Guide: Making the Perfect Chocolate Delight
Ready to fill your kitchen with the smell of heavenly brownies? Here’s your roadmap to chocolatey joy:
- Preheat & Prep
Set your oven to 350°F (175°C) and grease your favorite baking dish. I usually line mine with parchment paper too, just for easy lifting (and fewer dishes!). - Cream Butter & Sugar
In a large bowl, cream softened butter and sugar until it’s light, creamy, and fluffy. (I always taste-test at this stage with a tiny spoonful. Zero regrets.) - Eggs & Vanilla Join the Party
Beat in eggs one at a time. Then stir in that gorgeous vanilla extract. You’ll notice everything look glossy and smooth—good sign! - Mix Dry Ingredients
In a separate bowl, whisk together cocoa powder, flour, baking powder, and salt. Gradually add to your wet mixture, stirring gently until just combined. - Add Chocolate Chips (if you’re feeling wild)
Fold in chocolate chips (I love the mix of semi-sweet and dark chocolate!). - Batter Up
Pour your luscious batter into the prepared dish. Use a spatula and make sure it’s even. (Licking the bowl is practically required, by the way.) - Bake It Up
Bake for 20-25 minutes, or until a toothpick poked in the center comes out mostly clean (a few moist crumbs are ideal for that fudgy texture). - Cool & Serve
Let it cool before slicing. Enjoy plain, with a scoop of ice cream, or—my personal favorite—with hot coffee.
My Secret Tips and Tricks for Chocolate Delight Success
Over the years, I’ve picked up a few tricks that guarantee perfect homemade chocolate delight every time:
- Don’t Over-Bake: The difference between gooey and dry? Just a minute or two. Pull the pan when the middle is just set.
- Room Temp Ingredients: Let your eggs and butter sit out beforehand (helps everything blend like a dream).
- Try Espresso Powder: For those coffee lovers, a teaspoon of espresso powder brings out even more chocolate depth (just as delightful as using brewed coffee).
- Quality Cocoa Matters: Spring for Dutch-processed if you can—it amps up richness in any easy chocolate dessert.
- Fold Don’t Beat: When it’s time to add flour, switch to a spatula and fold gently to keep things tender (nobody wants tough brownies!).
Creative Variations and Ingredient Swaps
Want to make this chocolate delight your own? I’ve got you covered with a few fun, semantic keyword-powered ideas:
- Nutty Twist: Add 1/2 cup chopped pecans or walnuts for crunch.
- Gluten-Free Option: Substitute all-purpose flour with a 1:1 gluten-free flour blend (don’t forget to check your baking powder, too).
- Dairy-Free Version: Use vegan butter and a flax egg (1 tbsp ground flax + 3 tbsp water, mixed and rested).
- Berry Bliss: Swirl in a handful of raspberries or dried cherries before baking for a fruity chocolate treat.
- Spice It Up: Sprinkle in a pinch of cinnamon or cayenne for a Mexican chocolate vibe.
How to Serve and Store Your Chocolate Delight
Serving up this homemade chocolate delight is the fun part!
- Serve: Warm, topped with vanilla ice cream, fresh berries, or a generous drizzle of chocolate sauce. (Paired with coffee? Perfection.)
- Store: Cover leftovers tightly and keep at room temperature for up to 3 days. To extend freshness, store in the fridge for up to a week (just let slices come to room temp before enjoying).
- Freeze: Want to stash some for later? Wrap slices well and freeze for 1-2 months. Thaw on the counter and rewarm in the microwave for that fresh-baked feel.
FAQs: Your Top Questions About Chocolate Delight Answered
Q: Can I make chocolate delight ahead of time?
Absolutely! Chocolate delight is just as delicious on day two. Bake, cool, and store it tightly covered overnight—it’ll be ready to serve when you need a quick dessert fix.
Q: What kind of cocoa powder should I use?
Personally, I love Dutch-processed cocoa for its deep, smooth flavor, but natural cocoa powder works just fine in this easy chocolate dessert.
Q: Can I double the recipe for a crowd?
You bet—just use a larger baking dish and add a few extra minutes to the baking time. Keep an eye on the center so it stays nice and fudgy!
Q: Is the coffee flavour strong?
Not at all! The coffee deepens the chocolate but doesn’t stand out as a separate flavor. You can skip it if preferred, though I recommend giving it a try at least once.
Q: How do I know when chocolate delight is done baking?
Start checking with a toothpick at 20 minutes. You want a mostly clean toothpick with a few moist crumbs—overbaking makes it dry.
Thanks for spending a little time in my chocolate-filled kitchen today. If you make this chocolate delight, I’d love to hear about your results or see your creations—share your photos and stories in the comments below! Here’s to chocolate, coziness, and easy desserts that bring us all a little closer together. Happy baking!
