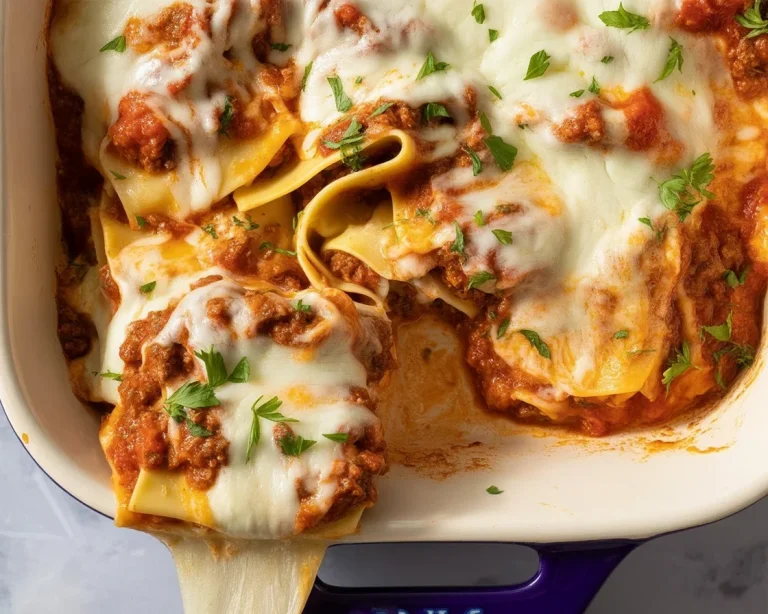
Baked Mac and Cheese
A Cozy Night In with Baked Mac and Cheese
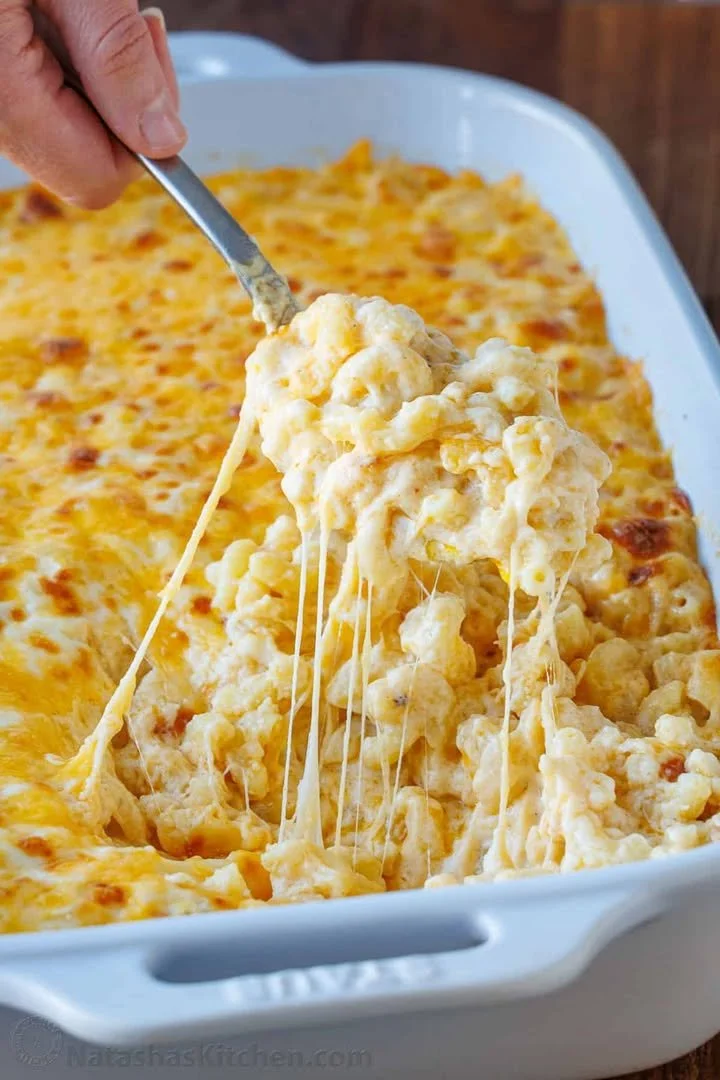
There’s something undeniably comforting about classic baked mac and cheese. It’s not just a dish to me—it’s an edible hug, a reminder of rainy days spent in my grandmother’s kitchen as we sprinkled cheese with reckless abandon. The scent of bubbling, golden cheese wafting from the oven still makes me feel safe, loved, and instantly at home. If you’re craving real, soul-warming comfort food, you’re in the right place. Let’s talk about this easy, ultra-creamy baked mac and cheese that’s got all the nostalgia and none of the complicated steps.
Why You’ll Adore This Baked Mac and Cheese
If you need any convincing about why this will become your new favorite homemade mac and cheese recipe, let me share my own reasons:
- Ultimate Comfort Food: Nothing beats the melty, cheesy goodness that warms you up from the inside out. It’s the kind of dish that chases away a stressful day.
- Simple Pantry Staples: Chances are, you’ve already got the main ingredients hanging out in your kitchen. No fancy cheese sauce or rare cheeses—just real, accessible ingredients.
- Family and Kid Approved: Whether I’m serving a crowd or just feeding a busy weeknight crew, everyone grabs seconds (sometimes thirds—I’m looking at you, Dad!).
- Crave-Worthy Texture: The combo of gooey cheese and a crispy, breadcrumb topping is pretty much mac and cheese perfection. Hot tip: broil it for a minute at the end if you want that extra crunch.
Ingredients You’ll Need for Baked Mac and Cheese
Here’s what you’ll need to whip up this homemade baked mac and cheese. I’ve included a few of my go-to hacks for each one:
- 2 cups elbow macaroni: The classic shape holds on to every bit of cheese sauce (but other short pastas like shells or cavatappi work great too).
- 2 tablespoons butter: Real butter gives the roux tons of flavor. Kerrygold is my secret splurge.
- 2 tablespoons all-purpose flour: Essential for thickening your creamy cheese sauce. Sift it if it’s clumpy (nobody likes lumps!).
- 2 cups milk: Whole milk is best for richness, but 2% works if you want it a little lighter.
- 2 cups shredded cheddar cheese: I recommend grating your own for the smoothest melted cheese—pre-shredded often has additives that make it less melty.
- 1 cup shredded mozzarella cheese: Adds that gooey, pull-apart texture.
- Salt and pepper to taste: Don’t be shy here; seasoning makes all the difference.
- 1/2 teaspoon paprika (optional): For subtle warmth and a hint of smokiness—highly recommended!
- 1/2 cup breadcrumbs (optional, for topping): I love using panko breadcrumbs for extra crunch, tossed with a tiny bit of olive oil.
Step-by-Step Guide: Making the Perfect Baked Mac and Cheese
Let’s walk through this—it’ll be easier (and tastier) than you think!
- Preheat your oven to 350°F (175°C).
This gives you time to get everything together—baked mac and cheese loves a hot, even oven! - Boil your macaroni until just al dente.
Remember, it’ll keep cooking in the oven so stop a minute early. Drain and set aside. - Melt the butter in a saucepan over medium heat.
Add flour, whisking constantly, for about a minute. This is your roux—don’t let it brown! - Gradually whisk in the milk.
Go slow, whisk often, and the sauce will thicken beautifully in about 3–5 minutes. - Remove from heat and stir in your cheeses.
Sprinkle in the cheddar and mozzarella, along with salt, pepper, and paprika. Stir until you get a glossy, velvety sauce. - Combine cheese sauce with macaroni.
I use a big mixing bowl for ease—give everything a thorough stir. - Transfer to a greased baking dish.
Butter or spray with cooking oil, just so nothing sticks! - Sprinkle with breadcrumbs (optional).
For the crisp lovers out there (I see you). - Bake for 20–25 minutes, until golden and bubbly.
Let it cool for a few minutes before digging in—it’s molten-lava hot straight out of the oven!
Kitchen tip: If you like those crispy corners, use a shallow casserole dish. And if you’re a cheese fanatic, double the cheese—no judgment here.
My Secret Tips and Tricks for Baked Mac and Cheese Success
Over the years, I’ve learned a few things about making really amazing homemade mac and cheese (and yes, I’ve made my fair share of less-than-perfect batches).
- Grate your own cheese! The smoother melt is 100% worth the extra couple of minutes.
- Don’t skip the roux. It keeps your cheese sauce creamy, not clumpy.
- Mix cheeses for flavor and texture. The cheddar brings sharpness, while mozzarella gives that unforgettable stretch.
- Broil at the end. If you love a deeply golden crust, pop it under the broiler for 2 minutes. Watch it closely!
- Season generously. Homemade baked mac and cheese soaks up flavors, so taste and adjust before baking.
- Pasta matters. Slightly undercook your noodles; overdone pasta turns mushy post-bake.
Creative Variations and Ingredient Swaps
Your classic baked mac and cheese is a great canvas. Here’s how you can riff on it:
- Add protein: Stir in cooked bacon, ham, or rotisserie chicken for a heartier bake.
- Try new cheeses: Swap in Gruyere, fontina, or gouda for different flavor profiles. Smoked cheddar is next-level!
- Go veggie: Sautéed spinach, peas, or roasted broccoli mix in beautifully.
- Make it gluten-free: Use gluten-free macaroni and swap out flour for a 1:1 GF blend.
- Boost flavor: Add a clove of minced garlic to your roux, or toss in a handful of caramelized onions.
- Healthier swap: Sub half the pasta for cauliflower florets to lighten it up.
(Easy recipe tweaks make this baked mac and cheese adaptable for almost any craving or dietary need!)
How to Serve and Store Your Baked Mac and Cheese
Serving baked mac and cheese is as simple as popping it on the table with a big spoon and letting everyone dig in. Here are my favorite ways to enjoy and store it:
- Perfect pairings: Serve alongside a crisp green salad or roasted veggies to balance out the richness.
- Make-ahead: Assemble everything up to the baking step, cover, and refrigerate up to 24 hours. Pop it in the oven right before mealtime!
- Leftovers: Store any remaining mac and cheese in an airtight container in the fridge for up to 3 days.
- Reheat tips: Warm gently in the oven at 300°F (covered to keep it moist), or microwave individual portions with a splash of milk for creaminess.
(Baked mac and cheese makes for the best leftovers—trust me.)
FAQs: Your Top Questions About Baked Mac and Cheese Answered
Can I make baked mac and cheese ahead of time?
Absolutely! Assemble, cover, and refrigerate it up to a day in advance. Add breadcrumbs just before baking for best texture.
What’s the best cheese for mac and cheese?
Cheddar is classic, but feel free to mix in mozzarella, Gruyere, Monterey Jack, or even a touch of cream cheese for extra richness.
Why does homemade mac and cheese sometimes get grainy?
Usually, it’s overheated cheese or pre-shredded cheese (which contains anti-caking agents). Use freshly grated cheese and melt it off the heat.
Can I freeze baked mac and cheese?
While you technically can, the texture may change a bit. Freeze before baking, if possible, and bake straight from frozen (just add a little extra time).
Is baked mac and cheese good for meal prep?
Yes! It keeps well and reheats beautifully. Just portion it out for grab-and-go lunches (your future self will thank you).
Baked mac and cheese is the ultimate crowd-pleaser, the kind of homemade mac and cheese recipe you’ll turn to again and again. Whether you make it for a cozy family dinner or a big holiday spread, I hope it brings as much joy and comfort to your kitchen as it has to mine. If you have your own secret twist, I’d love to hear it—let’s keep the cheese conversation going in the comments!