Homemade Moose Tracks Ice Cream
The Sweetest Scoop: My Homemade Moose Tracks Ice Cream Story
I can still remember the first bite of Moose Tracks ice cream I ever had—it was a hot July day, my sandals stuck with grass, and laughter echoed through the backyard as my family gathered for a summer barbecue. Someone pulled out a tub of ice cream, and nestled inside was that magical swirl of chocolate, creamy vanilla, and those irresistible peanut butter cups. From that moment, Moose Tracks became my gold standard for summer desserts. Years later, I set out to recreate that same magic right in my own kitchen with my version of homemade Moose Tracks ice cream. If you’re craving a treat that’s equal parts nostalgic and indulgent, this recipe is your golden ticket.
Why You’ll Adore This Homemade Moose Tracks Ice Cream
There are so many reasons to fall head over heels for this delightfully rich homemade Moose Tracks ice cream:
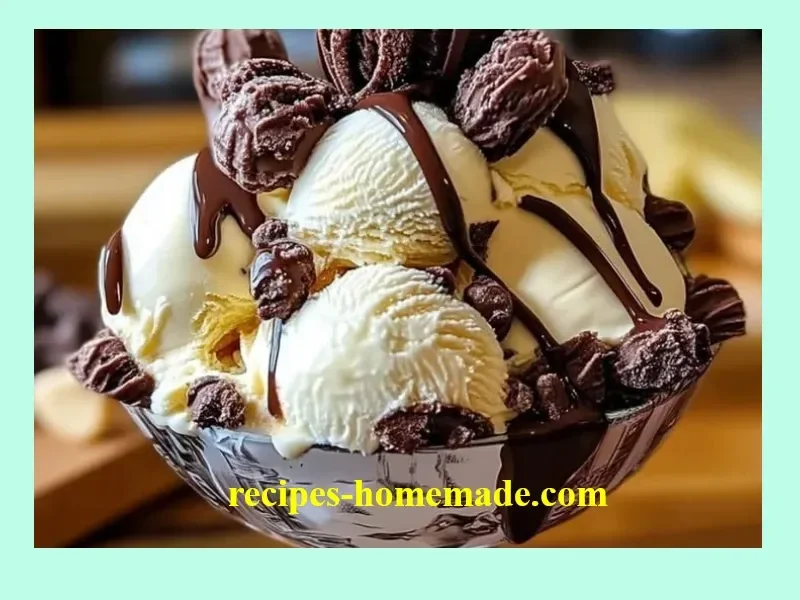
- It’s Truly Indulgent: Imagine creamy, homemade vanilla ice cream rippling with pockets of chocolate chips and peanut butter cups. Every bite brings a mix of textures and flavors—pure bliss!
- It’s Incredibly Easy: With a handful of pantry staples (and a trusty ice cream maker), you’ll have a decadent treat waiting in your freezer—no wild ingredients or advanced skills needed.
- It’s a Crowd-Pleaser: Whether you’re serving kids after a long day of play or hosting a get-together, this easy ice cream recipe always wins smiles.
- It Brings Back Memories: The chocolate fudge and peanut butter pieces transport me back to sunny afternoons and special moments, and I’m willing to bet it’ll do the same for you.
Ingredients You’ll Need for Homemade Moose Tracks Ice Cream
Here’s what you’ll want to gather for delicious, scratch-made Moose Tracks:
- 1 gallon half-and-half
(For the creamiest base! If you want a richer texture, opt for a mix of heavy cream and whole milk.) - 1½ cups sugar
(Keeps things perfectly sweet without overpowering the add-ins.) - ½ cup light corn syrup
(I love this for that stretchy, scoopable texture you find in classic ice cream shop treats.) - 1 tablespoon vanilla extract
(Use real vanilla for the best, most authentic flavor.) - ½ teaspoon salt
(Just a pinch makes everything taste brighter.) - 1 cup semisweet chocolate chips
(Chop them for more even pieces, or leave whole for bursts of chocolatey joy.) - 1 cup peanut butter cups, chopped
(Go big—no one’s ever complained about too many peanut butter cups in their Moose Tracks!)
Step-by-Step Guide: Making the Perfect Homemade Moose Tracks Ice Cream
Let’s make ice cream magic! Here’s how I do it, complete with tips I’ve picked up along the way:
Whisk It Up:
In a large mixing bowl, whisk together the half-and-half, sugar, corn syrup, vanilla extract, and salt. Whisk until the sugar completely dissolves (no gritty bits!).Chill Out:
Cover your bowl with plastic wrap and refrigerate the ice cream base for at least 2 hours (overnight if you’ve got the patience). This makes a big difference in both flavor and how well your ice cream churns.Churn Time:
Pour the chilled mixture into your ice cream maker and churn according to your machine’s instructions. It should reach a soft-serve consistency (watch it transform—it’s oddly satisfying!).Time for Mix-Ins:
During the last few minutes of churning, sprinkle in the semisweet chocolate chips and chunks of peanut butter cups. Let them mix in, but don’t overdo it or they can break apart—uneven, big swirls are part of the charm.Freeze:
Transfer the churned ice cream into an airtight container. I like to add a final “ripple” of peanut butter cup pieces at the top! Freeze at least 4 hours until it firms up like the scoop shop stuff.Serve and Enjoy:
Scoop generous mounds into bowls or crispy cones (or straight from the tub—no judgment!). Enjoy every bite of your homemade Moose Tracks ice cream on the porch, at a picnic, or curled up with a good book.
My Secret Tips and Tricks for Moose Tracks Ice Cream Success
After a few test batches (and, let’s be honest, some kitchen failures!), here’s what I’ve learned makes this homemade Moose Tracks ice cream even better:
- Splurge on Good Vanilla: Real extract gives a much deeper, richer flavor than imitation (I promise, it matters for the base).
- Go Heavy on Mix-Ins: The magic’s in the chocolate chips and peanut butter cups—don’t skimp! I even fold in a few more by hand before freezing.
- Let It Soften Before Scooping: Homemade ice cream can get extra hard, so leave the container out for 5-10 minutes before scooping.
- Chill Your Mix-Ins: Cold chocolate and peanut butter cups hold up better during churning and maintain their delightful, chunky texture (so smart for ice cream recipes like this).
- Try Chocolate Fudge Ribbons: If you’re feeling extra, swirl in some thick chocolate fudge or ganache for even more Moose Tracks goodness.
Creative Variations and Ingredient Swaps
Don’t be afraid to make this easy Moose Tracks ice cream recipe your own! Here are a few ideas:
- Nut-Free Version: Swap peanut butter cups for chocolate chunks or your favorite nut-free candies.
- Dairy-Free Delight: Use coconut cream and a non-dairy vanilla extract for a vegan Moose Tracks take.
- Flavor Twists: Mix in caramel sauce, white chocolate chips, or even bits of toffee for a creative spin.
- Seasonal Flavors: Add a pinch of cinnamon or espresso powder for a cozy flavor boost in colder months.
How to Serve and Store Your Homemade Moose Tracks Ice Cream
Serving up homemade Moose Tracks ice cream is fun and fuss-free:
- Scoop into cones, waffle bowls, or even DIY ice cream sandwiches (with freshly baked cookies—oh my!).
- For parties, I love setting up a DIY sundae bar with sprinkles, hot fudge, and chopped nuts.
- Store leftovers in an airtight container with a layer of plastic wrap pressed directly on the surface (to avoid icy crystals).
- Freshest flavor comes in the first week, but let’s be real—it rarely lasts that long!
FAQs: Your Top Questions About Homemade Moose Tracks Ice Cream Answered
Can I make Moose Tracks ice cream without an ice cream maker?
You sure can! Try whipping the base and freezing, stirring every hour until semi-firm. You won’t get quite the same texture, but the flavors will still be dreamy.
What’s the best way to chop peanut butter cups?
Pop them in the freezer for 10 minutes! This makes slicing easier, and you’ll get perfectly chunky mix-ins for your easy ice cream recipe.
Can I add a fudge swirl?
Absolutely! Layer in ribbons of store-bought or homemade fudge (just make sure it’s cool, or it’ll melt your base).
How long does homemade ice cream last?
If stored well, it’ll keep beautifully for about 2 weeks. After that, it might get a little icy—but at our house, it’s long gone by then!
Can I use different chocolate chips?
Yes! Go wild with milk chocolate, dark chocolate, or even white chocolate chips. It’s your bowl, your rules.
Honestly, making this homemade Moose Tracks ice cream brings such a sense of joy and nostalgia to my kitchen—I hope it does the same for you. If you try it, let me know your favorite add-ins or the creative twists you come up with! Here’s to many sweet, creamy, chocolate-studded memories ahead.

Homemade Moose Tracks Ice Cream
Ingredients
Ice Cream Base
- 1 gallon half-and-half For the creamiest base; can substitute with heavy cream and whole milk.
- 1.5 cups sugar Keeps things perfectly sweet.
- 0.5 cups light corn syrup Gives a stretchy, scoopable texture.
- 1 tablespoon vanilla extract Use real vanilla for best flavor.
- 0.5 teaspoon salt Enhances flavor.
Mix-Ins
- 1 cup semisweet chocolate chips Chop them for even pieces.
- 1 cup peanut butter cups, chopped Go big on the peanut butter cups!
Instructions
Preparation
- In a large mixing bowl, whisk together the half-and-half, sugar, corn syrup, vanilla extract, and salt until fully combined and smooth.
- Cover with plastic wrap and refrigerate the ice cream base for at least 2 hours or overnight.
Churning
- Pour the chilled mixture into an ice cream maker and churn according to the manufacturer's instructions until it reaches a soft-serve consistency.
- During the last few minutes of churning, add the semisweet chocolate chips and chopped peanut butter cups without overmixing.
Freezing
- Transfer the churned ice cream into an airtight container, adding a ripple of peanut butter cup pieces on top.
- Freeze for at least 4 hours until firm.
Serving
- Scoop into bowls or cones and enjoy with family and friends.