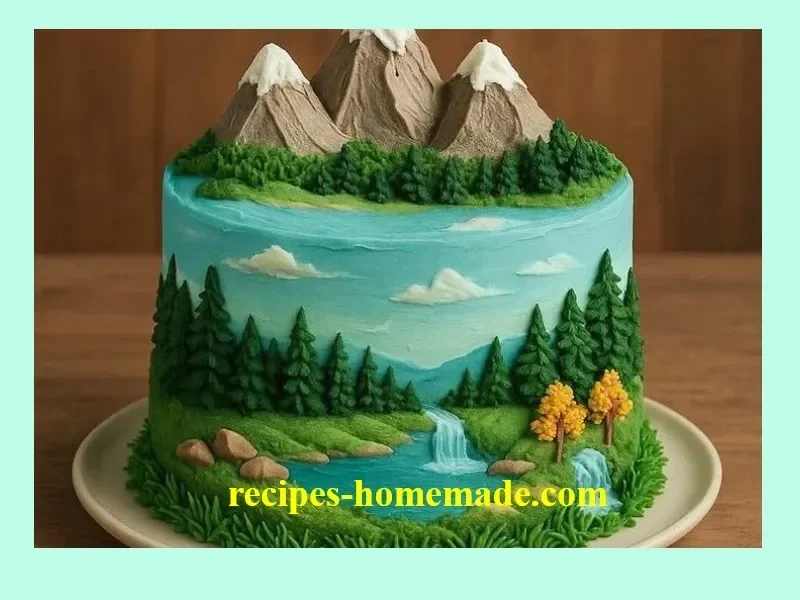
Landscape Cake Recipe
How the Landscape Cake Recipe Became Our Family’s Most Imaginative Dessert
It started on a rainy Saturday: just me, my little ones, and a wild idea to make baking an adventure rather than a chore. That’s how the landscape cake recipe became our weekend tradition—turning my kitchen into a sugar-fueled artist’s studio! There’s something utterly magical about taking classic cake ingredients and transforming them into rolling green hills, sparkling lakes, and pebble-lined paths.
With frosting-dipped fingers, giggles echoing across the room, and a whimsical mess in every corner, this isn’t just a cake—it’s an edible memory. If you’re craving a creative, crowd-pleasing dessert that’s both fun and beautiful, you’ll absolutely fall in love with this landscape cake recipe. Trust me, it’s as much about the experience as the result.
Why You’ll Adore This Landscape Cake Recipe
Baking a landscape cake goes far beyond measuring and mixing—here’s why it absolutely shines:
- Unleash Your Inner Artist: No two cakes are ever the same! Each time, you get to design fields, mountains, and meadows (my kids once created a frosting “dino island” that still makes us laugh).
- Perfect for All Ages: Whether you’re five or fifty, decorating this cake puts a smile on everyone’s face. Let the little ones shape rivers or sprinkle “grass”—it’s a hands-on, memory-making dream.
- Simple Ingredients, Showstopping Result: Even if you’re a beginner, you’ll feel like a pro. Basic pantry staples and a few colorful details elevate this humble cake into a masterpiece.
- Ideal for Special Occasions: Birthdays, garden parties, or rainy-day boredom-busters—this landscape cake recipe fits any celebration.
Ingredients You’ll Need for the Landscape Cake Recipe
Getting started is a breeze because everything on this list is pantry-friendly. Here’s what you’ll need (plus a few personal notes to help you choose):
- 2 cups all-purpose flour: For the softest crumb, sift before adding! (Flour is the backbone of any homemade cake.)
- 1 1/2 cups sugar: White sugar works great, but if you love a caramel note, try subbing in half brown sugar.
- 1 cup milk: Whole milk brings the richest flavor, but almond or oat milk will do in a pinch.
- 1/2 cup butter, softened: Salted or unsalted both work—just adjust the pinch of salt accordingly.
- 3 eggs: Room temperature eggs make your batter blend super smoothly.
- 2 tsp baking powder: The secret for that perfect, pillowy rise.
- 1 tsp vanilla extract: Real vanilla gives your landscape cake that classic homemade taste.
- Pinch of salt: Pop in just enough to balance the sweetness.
- Optional—green food coloring: For true “meadow” vibes, I swirl in a drop or two.
- For decorating:
- Green-tinted buttercream (for lush grass)
- Brown/grey icing or crushed cookies (mountains or winding paths)
- Blue piping gel or icing (sparkling lakes and creeks)
- Candy rocks, sugar flowers, animal/tree toppers (nature’s finishing touches!)
Step-by-Step Guide: Making the Perfect Landscape Cake Recipe
Let’s walk through each part of this landscape cake—messy hands and all!
- Preheat Your Oven: Set it to 350°F (175°C). I like to line my large rectangular (sheet) cake pan with parchment—it makes removing the cake (and clean-up!) a snap.
- Mix Dry Ingredients: In your biggest bowl, whisk together flour, baking powder, and salt. This tiny step means your rising agents are evenly distributed—no dense bites!
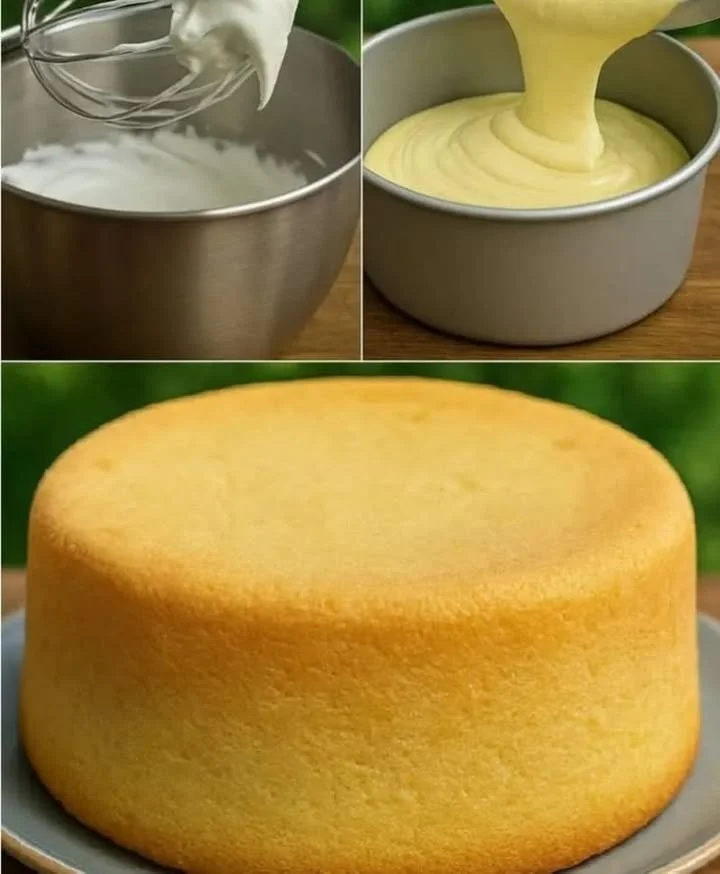
- Cream Butter and Sugar: Beat until pale and fluffy. (If you’re using a stand mixer, now’s the time to savor that gentle hum as you prep your next step.)
- Add the Eggs: One at a time, beating well. Don’t rush—each egg should disappear completely before adding the next.
- Stir in Vanilla: That scent alone will make your kitchen feel like a cozy bakery.
- Combine Wet and Dry Mixtures: Alternate adding flour mixture and milk to your batter, starting and ending with the flour. It keeps everything airy and prevents over-mixing (which can make the cake tough).
- Optional—Tint Your Batter: A few drops of green food coloring make the inside as playful as the outside!
- Bake: Pour into your prepared pan and bake for 30–35 minutes. (A toothpick poked in the center should come out clean—no gooey streaks.)
- Cool Completely: This step is crucial. Frosting a warm cake is a shortcut to a slippery, melty mess!
My Secret Tips and Tricks for Landscape Cake Recipe Success
Here’s what I’ve learned after lots of landscape cake adventures (including a few “mudslide” cake disasters):
- Freeze Before Frosting: Once cooled, pop the cake in the freezer for an hour. Decorating frozen cake makes those buttercream “mountains” and “rivers” hold their shape.
- Level Your Canvas: For a smooth decorating surface, trim the top with a serrated knife—embrace those cake trimmings as your baker’s snack.
- Create Dimension: Layer gobs of frosting or use cupcakes to build little hills and mounds—instant topography!
- Use Piping Bags or Zip Toppers: A simple zip-top bag with snipped corner doubles as a DIY piping tool for lakes and paths.
- Embrace Imperfection: The more rustic, the better. Nature isn’t perfect, and your landscape cake shouldn’t be, either (think “Pinterest meets backyard adventure”).
Creative Variations and Ingredient Swaps
Every landscape cake is unique—tailor yours with these easy swaps:
- Dairy-Free: Substitute plant-based butter and your favorite non-dairy milk. The cake stays moist and flavorful.
- Gluten-Free: Opt for a 1:1 gluten-free flour blend (Bob’s Red Mill or King Arthur work wonders).
- Natural Coloring: Use matcha or spinach powder instead of food dye for “all-natural” green hills.
- Different Landscapes: Wish for a winter wonderland? Use white icing and coconut flakes for snow!
- Add Citrus: Swap a tablespoon of milk for fresh lemon or orange juice for a zesty twist.
How to Serve and Store Your Landscape Cake Recipe
You’ve built your masterpiece—now, let’s keep it fresh and fabulous:
- Serving Tips: Slice with a hot, clean knife (run it under warm water). This way, each piece shows off those lovely cake layers and decorations!
- Storing Leftovers: Wrap slices or cover the entire cake with plastic wrap or an airtight cake dome. It’ll stay soft for 2-3 days at room temp, or up to a week in the fridge. (FYI, buttercream or cream cheese frostings need refrigeration.)
- Make Ahead: The cake base itself freezes beautifully—wrap tightly in foil and freeze up to a month. Thaw, then let the decorating fun begin.
FAQs: Your Top Questions About Landscape Cake Recipe Answered
Q1: Can I make the landscape cake ahead of time?
Absolutely! Bake the cake a day (or even two) in advance. Just frost and decorate right before serving for maximum WOW.
Q2: Can I use a cake mix instead of making the base from scratch?
You bet. Sometimes, I swap in a boxed vanilla or pound cake mix when short on time. The real magic comes with how you decorate it!
Q3: What’s the best way to get bright “grass” or “lake” colors?
Gel food colors are your friend—way more vibrant than liquid dyes and won’t water down your buttercream. For the blue lakes, blue piping gel gives that shimmery, water-like look.
Q4: How do I create textures like grass or rocky paths?
Use a grass piping tip (so satisfying), or simply rough up the buttercream with a fork. Crushed chocolate cookies make fantastic “pebbles” or “mountain” surfaces.
Q5: Can I make this landscape cake recipe nut-free?
Definitely. Just double-check your decorations and choose nut-free candies and toppers—your landscape cake will still be a hit.
Thanks for stopping by my kitchen for this landscape cake adventure! If you try this recipe (or design your own fantastical “edible world”), share a photo—I love seeing every unique take. Until next time, happy baking and even happier memory-making! 🍰🌳💚