Grandmother’s Springtime Treats
Grandmother’s Springtime Treats
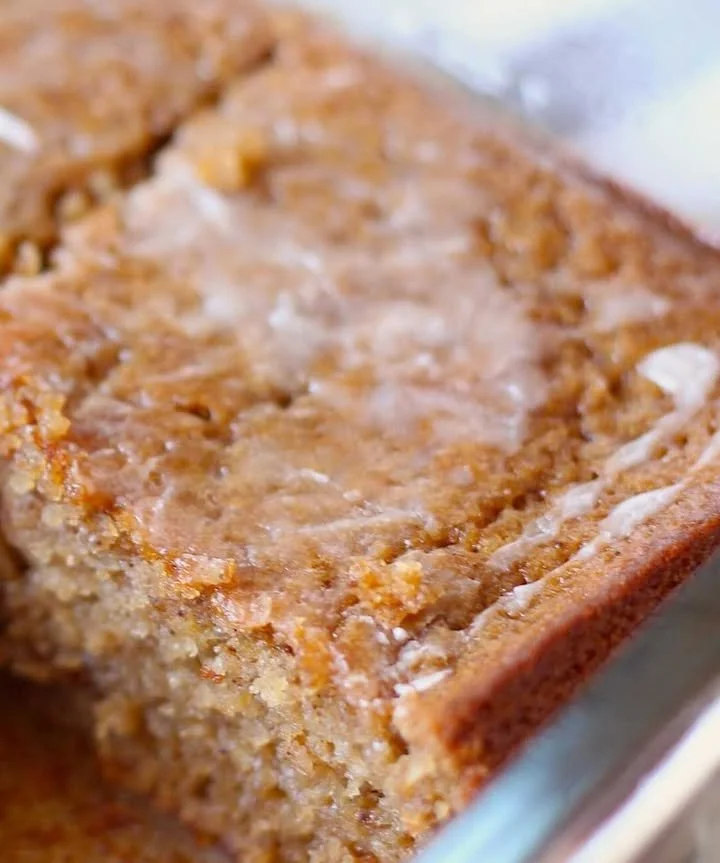
I still remember the first time I pulled these out of the oven — the whole kitchen smelled like warm butter and childhood. These simple squares are exactly what I mean when I say Grandmother’s Springtime Treats: comforting, unfussy, and impossible to resist.
They come together with just a few pantry staples, and they’re the sort of thing you’ll make when you need a little calm in the middle of a busy day. If you love simple nostalgic sweets, check out this round-up of addictive treats for spring that pair well with these squares.
One time I forgot to grease the pan and the edges stuck — yep, real kitchen life — but even then everyone ate them and smiled. Trust me, that’s the sign of a recipe worth repeating.
Grandmother’s Springtime Treats — Why You’ll Love Them
- Quick to make — ready in under 40 minutes from start to finish.
- Simple ingredients — flour, sugar, butter, eggs; nothing fancy.
- Reliable texture — soft center with golden edges, easy to slice into squares.
- Beginner friendly — no special techniques, and forgiving if you’re a little off on measurements.
This recipe sits comfortably among easy family favorites like those in my collection of addictive treats, which are great when you want to bake for a crowd.
Quick cooking insight: when a recipe has so few ingredients, small changes in technique matter — like creaming the butter and sugar long enough to trap air, which gives the finished squares a lighter crumb.
Ingredients You’ll Need
- 1 cup all-purpose flour — gives structure; sift if your flour is lumpy.
- 1/2 cup sugar — classic sweetness; use granulated.
- 1/2 cup butter (1 stick) — unsalted is fine; room temperature makes creaming easier.
- 2 eggs — bring them to room temperature for better mixing and rise.
Planning a little spring bake sale? These humble ingredients pair nicely with other crowd-pleasers from bake-off treats to try.
Notes:
- Butter temperature matters: too cold and you’ll get lumps; too warm and you’ll lose structure. Aim for soft but still slightly cool.
- If you like a citrus note, grate a bit of lemon zest into the batter — about 1 teaspoon — for a fresh spring twist.
Kitchen Tools
- Mixing bowl (large)
- Electric mixer or wooden spoon for creaming
- Measuring cups and spoons
- 8×8-inch baking dish, greased (or line with parchment)
- Cooling rack
If you’re gearing up for a weekend of baking, you might also enjoy browsing some of my favorite bake-off recipes for ideas on presentation and pairing.
Step-by-Step Instructions
- Preheat the oven to 350°F (175°C) and grease an 8×8-inch baking dish. You’ll know the oven is ready when it holds that cozy, even heat.
- In a mixing bowl, cream together the butter and sugar until light and fluffy — about 2–3 minutes with an electric mixer, a bit longer by hand. You’ll see it lighten in color and feel smoother.
- Beat in the eggs one at a time, scraping down the sides as you go so everything is evenly mixed. The batter should be glossy and slightly airy.
- Gradually mix in the flour until just combined. Stop when you don’t see streaks of flour — overmixing will make the squares dense.
- Pour the batter into your greased baking dish, smoothing the top with a spatula. Give the pan a gentle shake so the batter settles.
- Bake for 20–25 minutes or until the top is golden brown and a toothpick inserted near the center comes out clean. The smell will be buttery and slightly sweet — that’s your cue.
- Allow to cool in the pan for about 15 minutes, then lift out (if lined) or invert onto a rack to finish cooling before cutting into squares.
Pro tip: if the top is browning too quickly but the center isn’t set yet, tent the pan loosely with foil for the last 5–8 minutes.
Pro Tips for Success
- Let eggs and butter come to room temperature — they combine more smoothly and trap air better.
- Use the toothpick test: when it comes out with a few moist crumbs, it’s done. Overbaking dries these guys out.
- If you want even edges, line the pan with parchment and let the bars cool completely before slicing; warm bars tend to crumble.
- Want a shinier top? Brush a tiny bit of melted butter over the warm top right out of the oven.
A little imperfect confession: I once beat the eggs straight from the fridge and got a slightly heavier crumb — still tasty, but now I always wait the extra 20 minutes.
Common Mistakes to Avoid
- Overmixing the flour — stops the batter from staying tender. Mix until just combined.
- Skipping the grease or parchment — these bars can stick around the edges if you forget.
- Baking too long — they’ll dry out. Start checking at 18 minutes.
- Using too-warm butter — batter can look greasy instead of fluffy. If the butter’s melting, pop it in the fridge for 10 minutes and try again.
Variations and Substitutions
- Lemon bars: add 1–2 teaspoons lemon zest to the batter for a bright lift.
- Vanilla twist: fold in 1 teaspoon pure vanilla extract for warmth.
- Gluten-free: swap 1:1 gluten-free flour blend (results vary by brand).
- Dairy-free: use vegan butter and keep everything else the same — texture may be slightly softer.
If you want more ideas for serving or flavor swaps, my list of best treats has a few flavor profiles you can borrow.
What to Serve With This Recipe
- A steaming cup of coffee or tea — perfect for morning coffee chats.
- Fresh berries or a simple fruit salad to add brightness.
- A scoop of vanilla ice cream for an extra-comforting dessert.
These squares are also great in a picnic box because they’re sturdy and easy to portion.
Storage and Leftovers
- Refrigerator: keep in an airtight container for 3–4 days. They stay moist and slice cleanly when chilled.
- Freezer: individually wrap squares and freeze up to 2 months; thaw in the fridge overnight.
- Reheating: warm gently in a 300°F oven for 5–8 minutes or microwave a single square for 10–15 seconds.
If you’re freezing, pop parchment between layers so nothing sticks together.
FAQ (People Also Ask)
Q: Can I make this ahead of time?
A: Yes — bake, cool, and store in the fridge up to 3 days. They actually slice neater the next day.
Q: Can I double the recipe?
A: Absolutely. Use a 9×13-inch pan and extend baking time to 28–35 minutes; check for doneness with a toothpick.
Q: What’s the best pan to use?
A: An 8×8-inch metal or glass pan works well. Line with parchment for easy removal.
Q: Can I add nuts or chocolate chips?
A: Yes — fold in 1/2 cup chopped nuts or chips in step 4 for extra texture.
Q: Are these salty or sweet?
A: They’re pleasantly sweet; use salted butter if you like a tiny savory edge, or unsalted for a purer sweet profile.
Quick Recipe Summary (Recipe Card Style)
Prep time: 10 minutes
Cook time: 20–25 minutes
Servings: about 9 squares
Ingredients:
- 1 cup all-purpose flour
- 1/2 cup sugar
- 1/2 cup butter (1 stick), room temperature
- 2 eggs, room temperature
Short steps:
- Preheat oven to 350°F (175°C) and grease an 8×8 pan.
- Cream butter + sugar until fluffy.
- Beat in eggs, one at a time.
- Fold in flour until just combined.
- Bake 20–25 minutes until golden. Cool and cut.
Final Thoughts
If you try these, please tell me how they turned out — I love hearing about your kitchen wins and delightful mishaps. Don’t sweat it if the first batch isn’t perfect; mine never are either, and that’s half the fun.