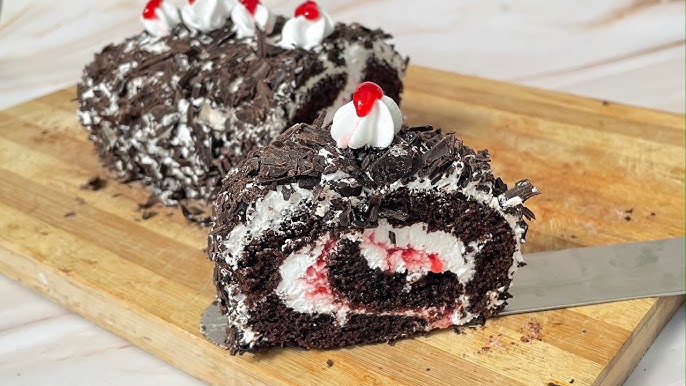
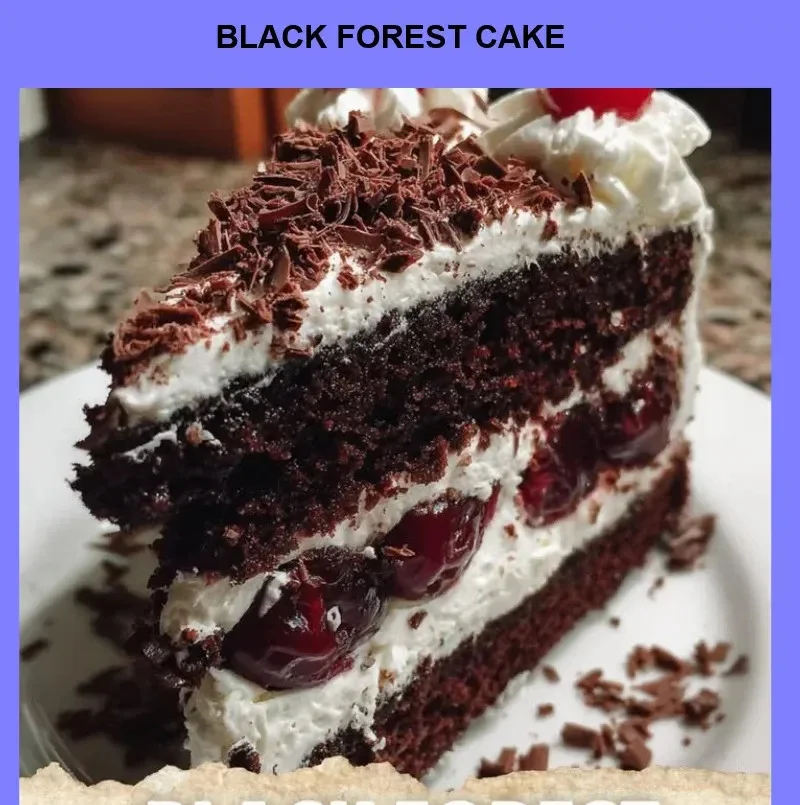
Black Forest Cake
Easy Homemade Black Forest Cake — A Traditional, Cozy Recipe
Introduction (Storytelling + Emotion)
Black Forest Cake has always been my family’s comfort-food celebration — the smell of cocoa and cherries brings me right back to my grandmother’s kitchen. This easy Black Forest Cake is a traditional, homemade version that’s perfect for Sunday dinners, birthdays, holiday gatherings, or any evening when you want to make something that feels like a hug.
Serve it after a cozy weeknight meal, at a special brunch, or bring it to holiday tables where it can steal the show. Read on for the full recipe, tips for healthy swaps, and ways to make it your own.
🧂 Ingredients:
- For the chocolate cake layers:
- 2 cups (240 g) all-purpose flour
- 2 cups (400 g) granulated sugar
- 3/4 cup (75 g) unsweetened cocoa powder (Dutch-processed if you like deeper flavor)
- 1 1/2 tsp baking powder
- 1 1/2 tsp baking soda
- 1 tsp salt
- 2 large eggs, room temperature
- 1 cup (240 ml) whole milk (or plant milk for dairy-free)
- 1/2 cup (120 ml) vegetable oil (or melted coconut oil / olive oil light)
- 2 tsp vanilla extract
- 1 cup (240 ml) boiling water
- For the cherry filling:
- 2 cups fresh or frozen cherries, pitted and halved (or canned tart cherries, drained)
- 1/2 cup (100 g) granulated sugar
- 2 tbsp cornstarch (or arrowroot)
- 1/4 cup (60 ml) water
- 1–2 tbsp Kirsch (cherry schnapps) or cherry juice (optional)
- For the whipped cream:
- 2 cups (480 ml) heavy cream, chilled (or coconut cream for vegan)
- 1/4 cup (30 g) powdered sugar (or powdered erythritol for low-sugar)
- 1 tsp vanilla extract
- For assembly & garnish:
- Chocolate shavings or curls
- Extra whole cherries
- (Optional) 1/4 cup Kirsch or cherry syrup to moisten layers
Notes: This recipe makes two 9-inch round layers. You can double for taller cakes or use three 8-inch pans.
👩🍳 Directions:
- Preheat the oven to 350°F (175°C). Grease and flour two 9-inch round cake pans, or line with parchment rounds.
- In a large bowl, whisk together flour, sugar, cocoa powder, baking powder, baking soda, and salt until well combined.
- Add eggs, milk, oil, and vanilla to the dry ingredients. Beat on medium speed for about 2 minutes until smooth.
- Carefully stir in the boiling water — batter will be thin. Divide batter evenly between prepared pans.
- Bake for 30–35 minutes, or until a toothpick inserted into the center comes out with a few moist crumbs. (Tip: ovens vary — start checking at 28 minutes.)
- Let cake layers cool in the pans for 10 minutes, then turn out onto wire racks to cool completely. For easier slicing, chill layers for 30 minutes.
- Meanwhile, make the cherry filling: In a saucepan, combine cherries, sugar, and cornstarch. Add water and cook over medium heat, stirring, until the mixture simmers and thickens — about 6–8 minutes. Remove from heat and stir in Kirsch or cherry juice. Let cool completely.
- Whip the cream: Beat chilled heavy cream, powdered sugar, and vanilla on high speed until soft-medium peaks form. Don’t overbeat — you want spreadable cream.
- If using, slice each cooled cake layer in half horizontally so you have four thin layers (optional but traditional for more filling).
- Assemble the cake: Place one cake layer on a serving plate. Brush lightly with Kirsch or cherry syrup. Spread a layer of whipped cream, then spoon on some cherry filling. Repeat with remaining layers.
- Frost the top and sides with remaining whipped cream. Press chocolate shavings into the sides or sprinkle on top and add whole cherries for decoration.
- Chill the assembled cake for at least 2 hours (overnight is best) so the flavors mellow and slices hold shape. Serve chilled or at cool-room temperature.
💡 Tips & Variations:
- Need a non-alcoholic version? Use cherry juice or simple syrup in place of Kirsch.
- Vegan swap: Use a vegan chocolate cake base, coconut cream whipped (chill full-fat coconut milk and whip the solid cream), and aquafaba for extra lightness.
- Gluten-free: Substitute a 1:1 gluten-free flour blend and add 1/2 tsp xanthan gum if your blend doesn’t already include it.
- Low-carb/Keto: Make an almond-flour chocolate sponge (look for keto chocolate cake recipes) and use erythritol or monk fruit sweetener. Use sugar-free cherries or macerate fresh cherries with a low-carb sweetener.
- Lighter option: Fold in 1 cup of Greek yogurt into the whipped cream (stabilize with a touch of gelatin if desired) to increase protein and reduce richness.
- Serving ideas: Pair slices with vanilla bean ice cream, espresso, or a sparkling wine for celebrations.
- Storage: Keep chilled in an airtight cake carrier for up to 3 days. For longer storage, freeze unfrosted layers up to 1 month (wrap tightly), thaw, then assemble before serving.
- Baking tip: Chill cake layers briefly before slicing to get cleaner cuts. Use a serrated knife and a gentle sawing motion.
🩺 Health & Lifestyle Tie-in (Optional)
Cherries are rich in antioxidants and anti-inflammatory compounds, and dark cocoa offers flavonoids that may support heart health when enjoyed in moderation. If you’re leaning toward a healthier version, swapping in Greek yogurt or using portion control can keep this indulgence part of a balanced lifestyle. Small choices in the kitchen — like adding fruit and reducing refined sugar — can also contribute to long-term health and potentially lower health costs down the road.
Conclusion
This easy, traditional homemade Black Forest Cake is one of those recipes that brings people together — it’s rich, fruity, and full of nostalgia. If you make this cake, please let me know in the comments or tag me in your photos — I’d love to see your version and hear the stories that go with it!
#fblifestyle