Black Velvet Cake Recipe

Black Velvet Cake Recipe: A Decadent Treat With a Story
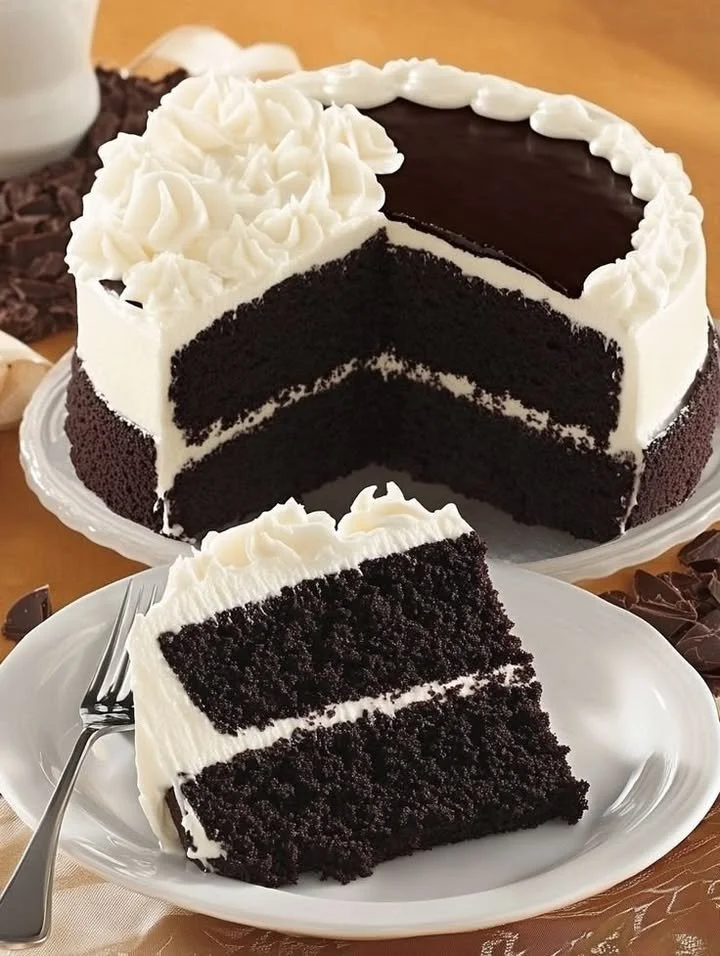
I don’t know about you, but there’s something almost magical about unveiling a cake that looks as striking as it tastes. The first time I baked this Black Velvet Cake for my best friend’s birthday, she gasped as I set it down—a dramatic, inky showstopper, velvety soft under a luscious swirl of cream cheese buttercream. That night, surrounded by laughter and flickering candlelight, one slice turned into two (who’s counting?), and the compliments kept coming: “What IS this?” “It’s so moist!” “How is the color so dark?” Moments like these are why I love baking—because this Black Velvet Cake recipe isn’t just a dessert, it’s an experience you’ll truly remember.
Why You’ll Adore This Black Velvet Cake
Let me spill the (cocoa) beans on why this homemade black velvet cake might just become your new favorite:
- It’s striking on every dessert table. The deep, dramatic color makes this cake perfect for special occasions (or anytime you want to wow a crowd!).
- Tastes as indulgent as it looks. Thanks to hot coffee and buttermilk, you get a tender crumb with rich, deep chocolate flavor—never dry or crumbly.
- Dreamy cream cheese buttercream. That tangy, fluffy frosting is truly marriage material for this cake—super smooth, never too sweet.
- So simple, but feels fancy. If you can whisk, you can do this. No stand mixer required, and easy ingredients you already know.
If you’ve ever wanted to make a statement with your baking (but keep it totally approachable), this is YOUR black velvet cake recipe!
Ingredients You’ll Need for Black Velvet Cake
I’m all about baking with what you have, so here’s a closer look at the ingredients—plus my favorite tips for success.
- All-purpose flour (2 1/2 cups, 310g): Gives the cake structure; sift for the fluffiest texture.
- Unsweetened cocoa powder (1/3 cup, 35g): Use a good-quality cocoa for a more intense (and authentic) chocolate flavor.
- Baking soda & baking powder (1 1/2 tsp + 1 tsp): That perfect rise and light, tender crumb.
- Salt (1/2 tsp): Don’t skip—it enhances the chocolate flavor.
- Granulated sugar (1 3/4 cups, 350g): Sweetens and adds moisture.
- Large eggs (2): Gives lift and richness.
- Buttermilk (1 cup, 240ml): Adds an unmatched tang and tender texture. (No buttermilk? Check “Variations” below!)
- Vegetable oil (3/4 cup, 180ml): Keeps the crumb extra moist—even after a couple days.
- Hot brewed coffee (3/4 cup, 180ml): Deepens the cocoa flavor without tasting overtly like coffee.
- Vanilla extract (1 tbsp): Always worth it for that classic, warm sweetness!
- Black food coloring (1 1/2–2 tsp): Start with less and add to your perfect gothic hue.
- For the frosting:
- Unsalted butter (1 cup, 225g, room temp): Makes your frosting rich and creamy.
- Cream cheese (1 cup, 225g, room temp): Adds that signature tang.
- Powdered sugar (4 cups, 500g): Sweetens and smooths the frosting.
- Vanilla extract (1 1/2 tsp) + pinch of salt: For the ultimate flavor balance.
(Pro tip: use full-fat cream cheese for frosting that pipes and spreads like a dream!)
Step-by-Step Guide: Making the Perfect Black Velvet Cake
Don’t worry—this black velvet cake recipe might look advanced, but the steps are totally beginner-friendly. Here’s exactly how I do it:
- Prep and Preheat: Grease and line two 8-inch round cake pans, then preheat your oven to 175°C (350°F). (Lining with parchment is worth it for effortless release.)
- Mix Dry Ingredients: Sift flour, cocoa powder, baking soda, baking powder, and salt into a large bowl. This means a fluffier, smoother cake—no lumps!
- Mix Wet Ingredients: In a separate bowl, whisk sugar, eggs, buttermilk, and oil until completely smooth. Stir in the vanilla and a splash of black food coloring.
- Combine Everything: Add the dry ingredients to the wet, mixing just until combined—don’t over-mix!
- Add Coffee: Slowly pour in the hot coffee. The batter will seem thin, but that’s exactly right for a moist, tender cake.
- Bake: Divide batter between pans. Bake for 30–35 minutes, or until a toothpick emerges clean. Let cool 10 minutes in the pans, then fully on a wire rack.
- Make Frosting: Beat the softened butter and cream cheese until perfectly smooth. Gradually add powdered sugar, beat until fluffy, then add vanilla and a pinch of salt.
- Assemble: Frost your cooled cakes. If you’re feeling extra, decorate with dark cake crumbs, black sprinkles, or a glossy chocolate drip.
(I love to chill the frosted cake for 30 minutes—it helps the flavors meld and slices carve beautifully.)
My Secret Tips and Tricks for Black Velvet Cake Success
Here’s what I’ve learned (sometimes the hard way!) for the richest, most luxurious black velvet cake:
- Room Temp Ingredients: Make sure eggs, buttermilk, butter, and cream cheese are room temp—it makes mixing SO much easier and creates a smoother cake and frosting.
- Don’t Fear the Food Coloring: True black velvet cake is all about that dramatic color! Gel or oil-based coloring works best here and won’t thin your batter (I skip the water-based stuff).
- Coffee Is Key: Even if you’re not a coffee drinker. In chocolate cakes, it doesn’t taste like coffee—it just deepens the cocoa flavor.
- A Light Touch: Never over-mix once you add dry to wet—just enough to bring it all together for a tender crumb.
- Let Cakes Cool Completely: The patience pays off—no melted frosting (I promise, you won’t regret it).
These little tricks turn a good homemade cake into a truly unforgettable black velvet cake.
Creative Variations and Ingredient Swaps
Let’s be real—sometimes you need to improvise! Here are some favorite swaps to try with this easy black velvet cake recipe:
- Dairy-Free: Swap buttermilk for plant-based milk mixed with a tablespoon of lemon juice; trade the cream cheese for vegan versions.
- Gluten-Free: Use a trusted 1:1 gluten-free flour blend for reliable results.
- No Black Food Coloring? You can go “midnight velvet” instead: use extra-dark Dutch-process cocoa and just a little gel coloring for a deep, dusky chocolate look.
- Orange Zest: Stir some into your frosting for a surprise citrus punch (seriously, chocolate and orange are meant to be together!).
- Mini Cakes or Cupcakes: This batter adapts beautifully for mini versions—perfect for parties.
Don’t be afraid to get creative or make this black velvet cake recipe your own!
How to Serve and Store Your Black Velvet Cake
Honestly, I love serving this cake on a simple white plate—no distractions from those bold layers and creamy frosting!
- Serve: Bring to room temperature for the dreamiest texture. If you want to get fancy, sprinkle with extra cocoa powder, decorate with dark chocolate shavings, or top with fresh blackberries for a gothic-inspired look.
- Store: Keep leftovers tightly covered in the fridge for up to 4 days. Bring slices to room temp before serving—they’ll be as soft as day one.
- Freeze: The unfrosted layers or even frosted slices freeze beautifully. Just wrap tightly, and thaw overnight in the fridge for when that chocolate craving strikes.
Trust me, this homemade black velvet cake tastes just as good (if not better) the next day.
FAQs: Your Top Questions About Black Velvet Cake Recipe Answered
Q: What’s the difference between black velvet cake and red velvet cake?
A: The flavor is similar—both are buttermilk-and-cocoa based cakes with a gentle tang—but the black velvet cake swaps that signature red for bold black coloring (hello, drama!) and often uses more cocoa powder for a richer chocolate cake.
Q: Is black food coloring safe to eat?
A: Absolutely, as long as you’re using gel or oil-based black food coloring from a reputable baking brand. A little goes a long way, so start slow and add to taste!
Q: Can I make black velvet cake without coffee?
A: Definitely. Just swap the coffee for hot water or hot milk, but I do recommend coffee for the best chocolate depth (and no—it won’t taste like coffee!).
Q: Can I make this cake ahead of time?
A: Yes! Both the cake layers and the frosting can be made 1–2 days in advance. Wait to frost until just before serving for the freshest look.
Q: What if I don’t have buttermilk?
A: Just mix 1 cup of regular milk with 1 tablespoon of white vinegar or lemon juice, let it sit for five minutes, and use as a substitute.
If you give this black velvet cake recipe a try at home,


