Chocolate Cake With Cream
Chocolate Cake With Cream
Nothing quite compares to the rich, indulgent taste of a homemade chocolate cake topped with velvety cream. Whether it’s for a birthday celebration, a cozy family dinner, or simply a treat for yourself, this chocolate cake recipe is sure to satisfy your sweet tooth and impress your guests. In this article, we’ll walk you through the process of creating this delightful dessert step by step, along with tips and tricks to make it even more special. Let’s dive in!
A Decadent Delight
Chocolate cake is a classic that never goes out of style. Its moist texture, combined with a luscious cream topping, creates a heavenly experience for chocolate lovers. This particular recipe is easy to follow and uses a few simple ingredients, making it accessible for bakers of all skill levels. Not only is it delicious, but it’s also versatile enough to be customized with your favorite toppings or variations.
🧂 Ingredients:
- 3 eggs
- 1 cup plain yogurt
- 1 yogurt container of light olive oil
- 1.5 cups granulated sugar
- 2 cups flour
- 1/2 cup cocoa powder
- 1 packet baking powder
- 1 packet vanilla
- 2 cups cold cream
- 3 tablespoons powdered sugar
- 1 teaspoon vanilla
- Grated chocolate (optional)
- Sprinkle cocoa (optional)
- Chocolate sauce (optional)
👩🍳 Directions:
Preheat the oven to 350°F (175°C). Grease and flour a 9×13-inch baking pan or two 9-inch round cake pans.
Mix the wet ingredients: In a large mixing bowl, whisk together the eggs, plain yogurt, and light olive oil until smooth.
Add the sugars: Gradually add in the granulated sugar, mixing continuously until well incorporated.
Combine the dry ingredients: In a separate bowl, sift together the flour, cocoa powder, baking powder, and a packet of vanilla.
Blend the mixtures: Gradually combine the dry ingredients with the wet ingredients, mixing just until combined. Be careful not to overmix, as this could result in a dense cake.
Transfer to baking pan: Pour the batter into the prepared baking pan(s) and smooth the top with a spatula.
Bake: Place in the oven and bake for about 30-35 minutes, or until a toothpick inserted in the center comes out clean.
Cool the cake: Remove from the oven and let cool in the pan for about 10 minutes before transferring to a wire rack to cool completely.
Prepare the cream topping: In a chilled bowl, whip the cold cream with powdered sugar and a teaspoon of vanilla until soft peaks form.
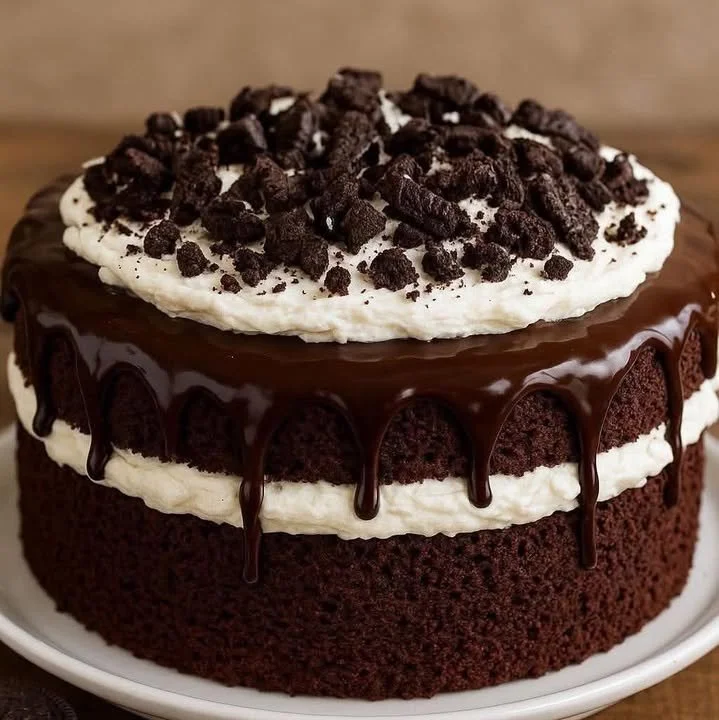
Assemble the cake: Once the cake is completely cooled, spread the whipped cream generously over the top. If using, sprinkle grated chocolate or cocoa powder for garnish, or drizzle chocolate sauce on top for added decadence.

💡 Tips & Variations:
- Make it gluten-free: Substitute the all-purpose flour with a gluten-free flour blend for a gluten-free version of this chocolate cake.
- Add some flair: Incorporate a cup of mini chocolate chips into the batter before baking for an extra chocolaty cake.
- Flavor Boost: Add a splash of espresso or coffee to the batter for an enhanced chocolate flavor.
- Layer it up: Consider making a layer cake by baking the batter in two round pans and layering with cream in between.

FAQ
Q: Can I make this cake ahead of time?
A: Yes! You can bake the cake a day in advance and keep it covered at room temperature. Add the cream topping just before serving for the best results.
Q: Is there an alternative to whipped cream for topping?
A: Absolutely! You can use cream cheese frosting or chocolate ganache for a different flavor profile.
Q: How do I store leftover cake?
A: Store any leftover cake in an airtight container in the refrigerator for up to 3 days. If you’ve added whipped cream, it’s best enjoyed within 1-2 days.
Q: Can I freeze this cake?
A: Yes, you can freeze the un-frosted cake for up to three months. Wrap it tightly in plastic wrap and then in aluminum foil. Thaw in the fridge before serving.
👉 Try it now!
Now that you have the recipe for this delightful Chocolate Cake With Cream, it’s time to roll up your sleeves and get baking! Your friends and family will love the rich flavor and moist texture of this cake. Be sure to share your experience in the comments below and let us know how your baking adventure went. Happy baking!