Chocolate Flavors
Chocolate Flavors: A Sweet Memory in Every Bite
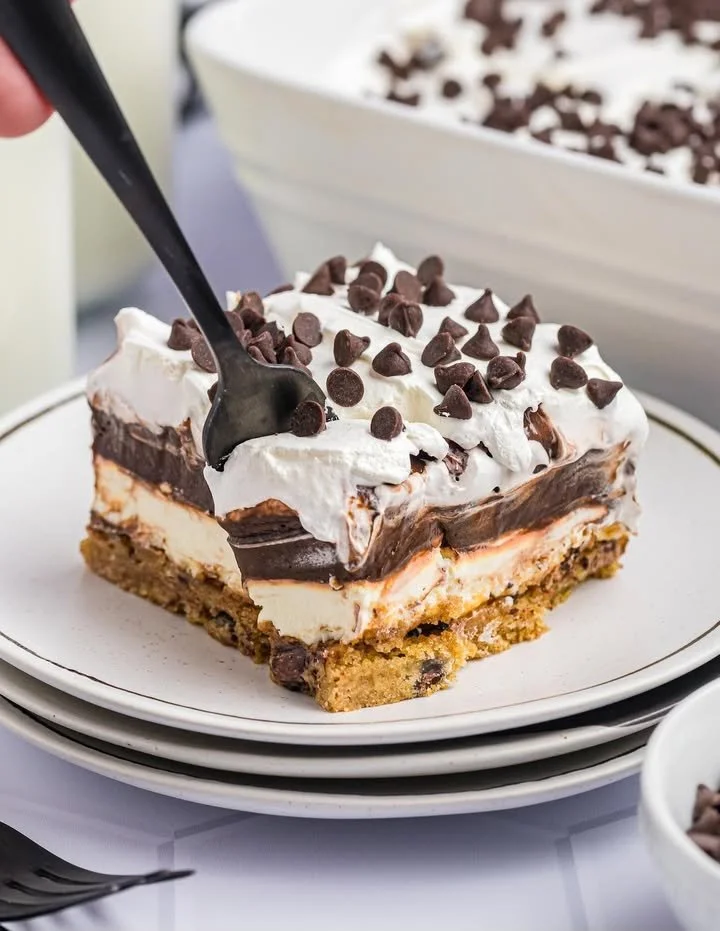
Chocolate. Just saying the word brings back a flood of childhood memories—like sneaking a piece from the baking stash when Mom wasn’t looking or the smell of cocoa wafting through the house on a rainy afternoon. There’s just something so deeply comforting about chocolate flavors, isn’t there? Whether it’s a cozy mug of hot cocoa or a decadent chocolate cake, every bite takes me back to those moments of pure happiness. Today, I’m excited to share my go-to chocolate flavors recipe—a treat that’s rich, dreamy, and guaranteed to make any day feel extra special.
Why You’ll Adore This Chocolate Flavors Recipe
I can’t help but gush about this homemade chocolate dessert. Here are just a few reasons why you’ll fall in love with it, too:
- Pure Chocolate Indulgence: Each bite bursts with deep, real chocolate flavor—the kind that melts on your tongue and makes your eyes close with delight.
- Super Simple, Yet Impressive: You don’t have to be a pro baker to pull this off. It’s truly an easy chocolate recipe, but the results look (and taste!) bakery-worthy.
- Crowd-Pleasing Magic: Whether you’re sharing with your family or need something special for a gathering, everyone asks for seconds.
- Total Comfort Food: There’s just nothing like the cozy feel of homemade chocolate flavors to instantly boost your mood and satisfy your sweet tooth.
Ingredients You’ll Need for Chocolate Flavors
Here’s what you’ll need to create this easy chocolate recipe. I like to keep it simple but rich:
- High-Quality Chocolate (semisweet or bittersweet): The better the chocolate, the deeper the flavor. I always use baking chocolate bars for extra creaminess.
- Cocoa Powder: Unsweetened cocoa powder enhances the chocolatey depth. (Dutch-processed works best for a smoother taste.)
- Butter: Real butter adds richness—don’t skimp on quality here!
- Sugar: Granulated sugar brings just the right amount of sweetness without overpowering the chocolate.
- Eggs: Room-temperature eggs give your dessert a fluffy, light texture.
- Vanilla Extract: Just a splash brightens all the chocolate notes—trust me, it makes a difference.
- Salt: A pinch of salt balances the sweetness and lets the chocolate flavors shine.
Feel free to swap in your favorite fair-trade or organic chocolate here if you like!
Step-by-Step Guide: Making the Perfect Chocolate Flavors
Ready to dive in? Here’s how I make my favorite chocolate dessert, step by step. I promise, it’s easier than it sounds!
- Melt the Chocolate & Butter:
Gently melt your chocolate and butter together in a heatproof bowl over simmering water. Stir until glossy and smooth—don’t rush this step (it’s kind of meditative!). - Whisk in Sugar:
Remove from heat, then whisk in the sugar while the mixture is still warm. It’ll look a bit grainy at first, but that’s normal. - Beat in Eggs:
Add the eggs one at a time, whisking well after each. The batter will get thick and shiny—my favorite part! - Add Cocoa, Vanilla, and Salt:
Sift in the cocoa powder, then add the vanilla extract and salt. Gently fold together until just combined. - Pour and Bake:
Pour the batter into a parchment-lined pan and smooth the top. Bake until just set—edges should look firm, but the center will be a little fudgy (the classic easy dessert trick for gooeyness). - Cool & Slice:
Let cool completely before cutting into squares (if you can wait that long!).
My Secret Tips and Tricks for Chocolate Flavors Success
- Use Good Chocolate: Always pick the highest-quality baking chocolate you can find (cacao content really matters for a homemade chocolate recipe).
- Don’t Overmix: Once the dry ingredients are in, stir gently—overmixing can make your treat a little tough.
- Room-Temperature Eggs: Cold eggs can make the batter seize, so leave them out ahead of time (it’s worth the extra step!).
- Line Your Pan: Parchment paper makes cleanup a breeze and helps lift your chocolate dessert out without fuss.
- Underbake Slightly: For that perfect fudgy center, take it out of the oven just as the middle is set.
Creative Variations and Ingredient Swaps
I’m all about easy swaps to fit whatever you’re craving or have on hand!
- Gluten-Free: Sub in a cup-for-cup gluten-free flour blend, or leave out flour entirely for extra-intense, flourless chocolate flavors.
- Nutty Goodness: Stir in a handful of toasted walnuts, pecans, or almonds for crunch.
- Spicy Kick: Add a pinch of cinnamon or cayenne for Mexican hot chocolate vibes (so good in colder weather!).
- Orange Twist: A teaspoon of orange zest adds a fresh pop of flavor to this chocolate dessert.
- Mocha Magic: Mix in a tablespoon of instant espresso powder to boost the chocolatey depth—coffee addicts, this one’s for you.
How to Serve and Store Your Chocolate Flavors
Here’s how I keep my chocolate flavors fresh (if there’s any left!):
- Serve: I love these slightly warm with a scoop of vanilla ice cream, but they’re equally delicious at room temperature for that classic homemade chocolate treat feel.
- Store: Pop any leftovers in an airtight container. They’ll keep on the counter for 2-3 days, or up to a week in the fridge. (Pro tip: Warm a piece in the microwave for 10 seconds for meltier chocolate bliss.)
- Freeze: Slice and freeze for up to 2 months—perfect for surprise cravings.
FAQs: Your Top Questions About Chocolate Flavors Answered
Q: Can I make this chocolate dessert ahead of time?
A: Absolutely! Chocolate flavors taste even better the next day as the flavors deepen—just store covered and let come to room temperature before serving.
Q: Can I use milk chocolate instead of dark chocolate?
A: Yes, but your dessert will be sweeter and less intense. I’d reduce the sugar a bit to balance things out.
Q: My chocolate seized when melting! What happened?
A: It’s usually from water splashing in or the heat being too high. Always melt chocolate gently over low heat and make sure your tools are dry.
Q: Can I add toppings?
A: Totally! Try flaky sea salt, a dusting of cocoa powder, or even chocolate chips for double the chocolatey goodness.
Q: Is this easy chocolate recipe kid-friendly?
A: 100%! The steps are simple enough for little helpers (just watch the melting and mixing parts).
If you try out these rich chocolate flavors, I’d love to hear how they turned out for you! Drop a comment below, or tag me on Instagram so I can see your gorgeous chocolate creations (#chocolateloversunite). There’s just nothing better than sharing a homemade chocolate dessert and a sweet memory or two—cheers, friend!