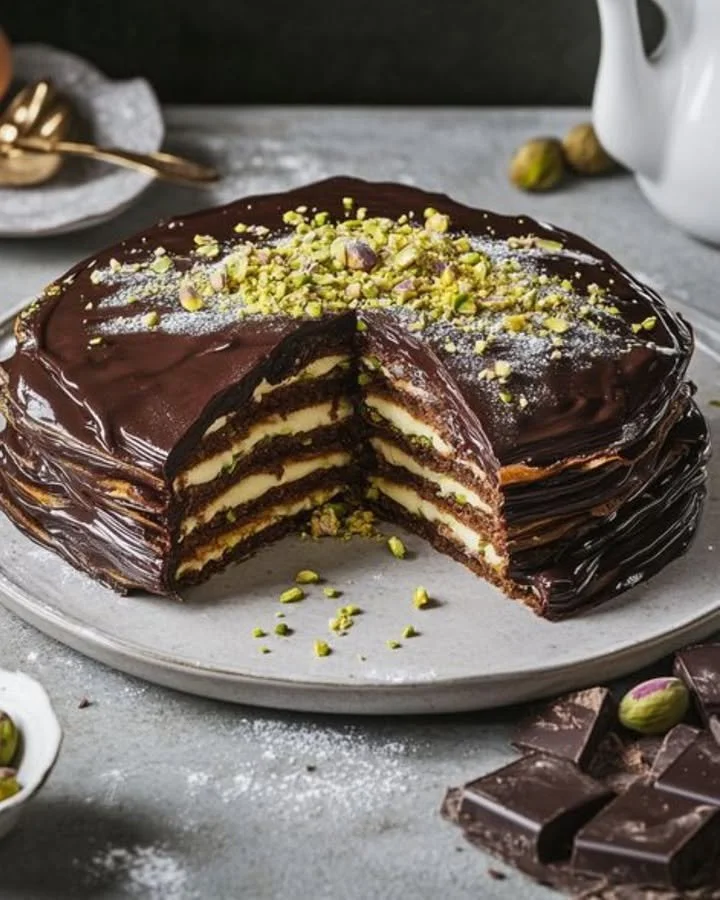
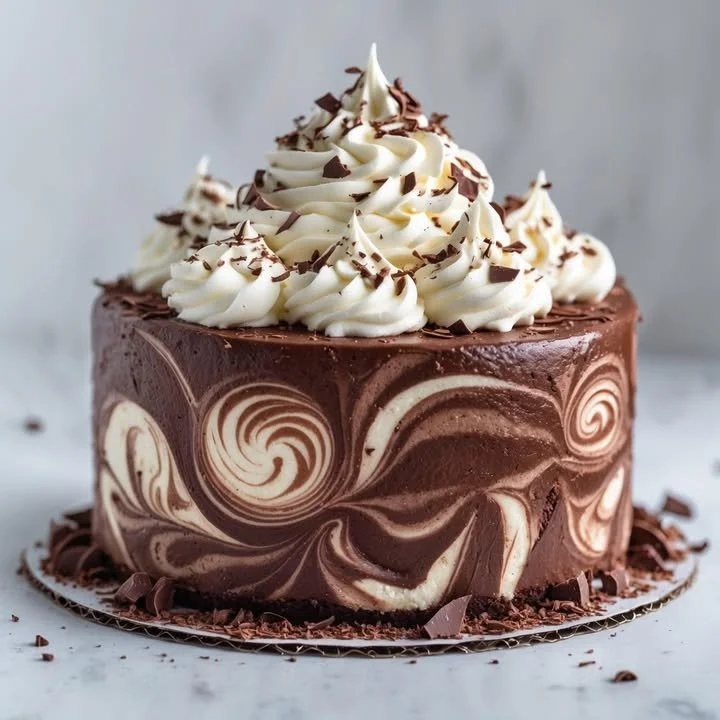
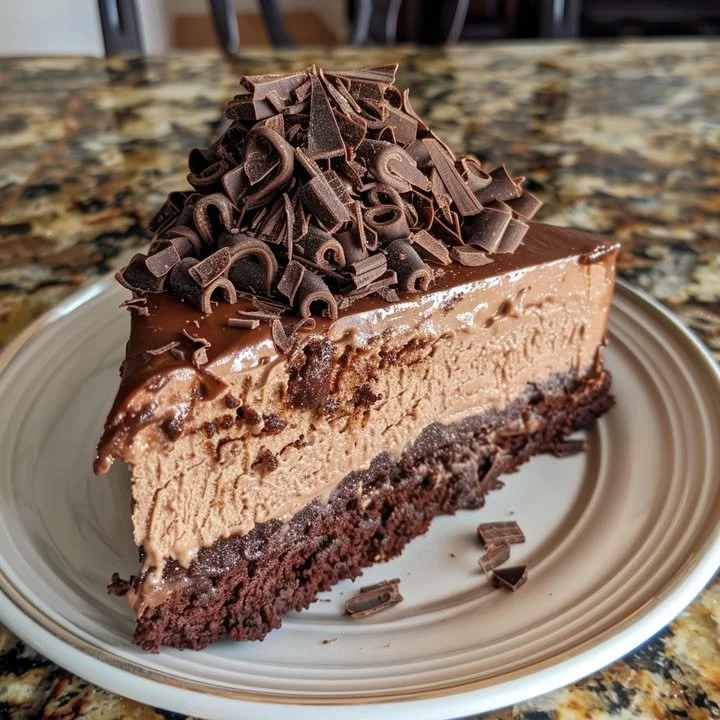
Homemade Chocolate Layered Cheesecake with Mousse and Ganache

The Chocolate Layered Cheesecake That Stole My Heart
Is there anything more magical than the first bite of a rich, decadent homemade chocolate cheesecake? For me, that magic always brings back one unforgettable Saturday afternoon: It was raining, my favorite oldies playlist hummed in the background, and my kitchen was filled with the sweet aroma of melting chocolate. I decided, on a whim, to tackle a chocolate lover’s dream—layer upon luscious layer of cheesecake, mousse, and ganache. By the time it had chilled and set, the weather had cleared, and my family dove in with pure delight. It instantly became our gold standard for chocolate indulgence.
If you’re searching for a show-stopping dessert, this homemade chocolate layered cheesecake with mousse and ganache truly delivers. Whether you’ve got a dinner party to wow or simply want to treat your loved ones (or yourself!) on a cozy weekend, I can’t wait to guide you through this process.
Why You’ll Adore This Homemade Chocolate Cheesecake
Let me tell you, this isn’t just any dessert. Here’s why you’ll fall in love:
- Pure Chocolate Heaven: Every bite is an explosion of chocolate flavor, thanks to the triple-threat combination of Oreo crust, silky chocolate cheesecake, airy mousse, and glossy ganache.
- Impress-Without-Stress: While the layers look seriously fancy (think bakery-worthy!), each step is totally doable at home. Your friends will ask which bakery made it!
- Comfort on a Fork: This recipe brings everyone together—there’s something almost nostalgic and heartwarming about sharing a homemade chocolate cheesecake at your table.
- Make-Ahead Magic: Planning ahead? This chocolate cheesecake is even better after a night in the fridge, giving you more time to enjoy your guests (or yourself) and less time fussing.
Ingredients You’ll Need for Homemade Chocolate Layered Cheesecake
Here’s your shopping list—plus a few of my favorite tips for chocolate cheesecake success:
- 1 1/2 cups Oreo crumbs (about 18 cookies, no filling): The key is no filling—trust me, it keeps the crust crisp and chocolatey, not soggy!
- 4 tablespoons unsalted butter, melted: Melted butter binds the crust perfectly and adds that rich flavor.
- 2 tablespoons granulated sugar (optional): I use it if I’m feeling extra-sweet, but you can skip it for a deeper cocoa vibe.
- 24 ounces cream cheese, softened (that’s 3 packages): Bring to room temp for a dreamy, lump-free filling.
- Chocolate mousse: Use your favorite recipe or even a high-quality store-bought option if you’re short on time—nobody will know, promise.
- Chocolate ganache: Good chocolate and heavy cream are all you need for that glossy, Instagram-worthy top.
Optional bonus: a sprinkle of flaky sea salt or some chocolate curls, just for flair.
Step-by-Step Guide: Making the Perfect Homemade Chocolate Cheesecake
Let’s break it down, friend to friend. No chef’s hat required!
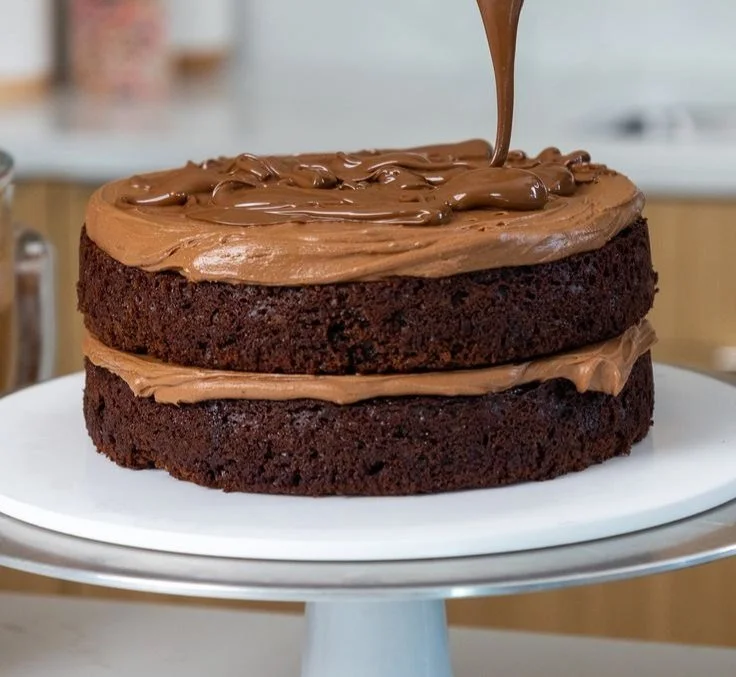
- Crust time: Toss your Oreo crumbs, melted butter, and sugar (if using) in a bowl. It should feel like wet sand (nothing fancy, just mix until combined!). Press it evenly into the base of a springform pan. I use the bottom of a measuring cup. Pop it into the fridge for at least 20 minutes—this sets the stage for all that creamy filling.
- Cheesecake central: Beat your softened cream cheese until smooth as velvet—no lumps allowed! Pour it over the chilled crust. Smooth the top, then bake at 325°F for about 50-60 minutes. Your kitchen will smell unreal. Tip: It’s done when the center is just set and still a tiny bit jiggly.
- Cool your jets: Let the cheesecake cool completely. If you’re impatient like me, set it near an open window (just keep it away from curious pets/people!).
- Mousse magic: Prepare your chocolate mousse and let it chill until set. Spoon it gently over the now-cooled cheesecake. Patience pays off here for neat layers.
- Ganache gloss: Gently heat together chocolate and cream (I use the microwave in 30-second bursts), then whisk until it’s shiny and smooth. Pour lovingly over the mousse layer. Resist the urge to dive in—chill the cheesecake for at least 4 hours, or overnight for perfection.
My Secret Tips and Tricks for Chocolate Cheesecake Success
You know I couldn’t leave you without my best secrets for this homemade chocolate layered cheesecake:
- Room Temp Everything: Cream cheese, eggs (if using in mousse), and even your heavy cream all blend more smoothly when not cold.
- Go Slow with Heat: Baking in a low oven (325°F) prevents cracks. You can even use a water bath if you’re ambitious, but I usually keep things simple!
- Use High-Quality Chocolate: Your ganache and mousse only taste as good as the chocolate you choose—choose something you’d eat straight from the bar.
- Line the Pan: I run a knife around the pan before unmolding to prevent sticking. Nothing ruins the “ta-da” moment like a stuck crust!
- Chill, Chill, Chill: I know waiting is tough, but chilling means clean layers and easy slicing.
Creative Variations and Ingredient Swaps
Make this chocolate cheesecake suit your style—or your pantry:
- Crust Swap: Try graham crackers, chocolate wafer cookies, or even ginger snaps for fun (the options for homemade cheesecake bases are endless).
- Flavor the Mousse: Add espresso powder or a splash of your favorite liqueur for a grown-up twist.
- Go Gluten-Free: Use gluten-free chocolate sandwich cookies to make the crust.
- Lighter Version: Swap in light cream cheese or use Greek yogurt for a tangy mousse filling.
- Seasonal Swaps: Swirl in raspberry sauce before the ganache, or top with fresh berries for a summery vibe.
How to Serve and Store Your Homemade Chocolate Cheesecake
Here’s how to nail dessert time—and keep leftovers dreamy:
- Serving: Use a sharp, warm knife (dip it in hot water and wipe dry between slices for clean cuts). Serve chilled or let it rest at room temp for 10 minutes before slicing for the silkiest texture.
- Storage: Cover with plastic wrap or an airtight cake dome—this homemade chocolate cheesecake keeps beautifully in the fridge up to 5 days. (It’s also delicious straight from the fridge!).
- Can You Freeze It? Absolutely! Slice, wrap well, and freeze for up to a month. Thaw in the fridge overnight—good as new.
FAQs: Your Top Chocolate Cheesecake Questions Answered
1. Can I make this chocolate layered cheesecake ahead of time?
Absolutely! In fact, chilling overnight makes it slice even better. I usually bake it the night before a special event.
2. What’s the best chocolate for the mousse and ganache?
I recommend a high-quality semisweet or bittersweet bar—something around 60–70% cacao is perfect.
3. Can I use low-fat cream cheese?
You can, but the final texture will be a bit lighter and less creamy. Full-fat is my go-to for classic, rich homemade cheesecake.
4. Help! My cheesecake cracked. What now?
Don’t stress—just cover the cracks with extra mousse or ganache. No one will ever know (and it always tastes incredible).
5. Can I add other flavors?
Of course! A hint of orange zest, a splash of espresso, or even peanut butter swirled into the mousse—get creative!
Homemade chocolate layered cheesecake with mousse and ganache is more than just a dessert. It’s a celebration in every slice—a little bit of effort for a whole lot of joy. If you’re ready to wow your crew, treat yourself, or just make an ordinary day feel special, get out those mixing bowls. You’ve got chocolate magic to make!