Chocolate Pudding Recipe
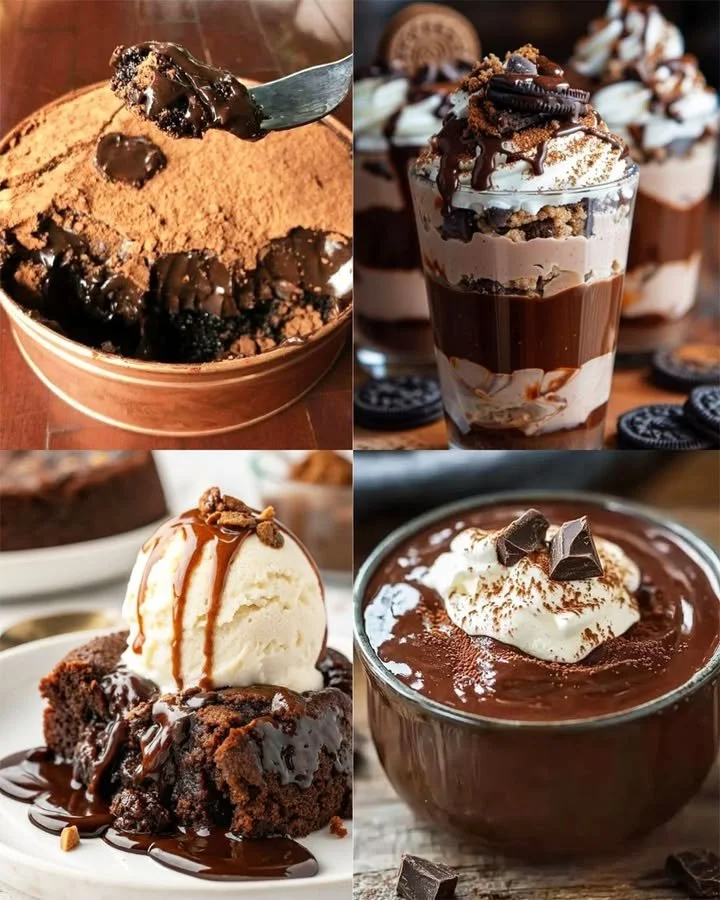
The Creamy Joy of Homemade Chocolate Pudding
I can still taste the anticipation of chocolate pudding nights as a kid—those evenings when my mom would hum quietly over the stove, filling our kitchen with the deep, warm scent of cocoa. There’s just something magical about a fresh batch of classic chocolate pudding: the kind you cook on the stovetop, spoon into little bowls, and sneak warm tastes from before it chills.
Today, I’m sharing the chocolate pudding recipe I now make for my own family—and, honestly, for myself on tough days or quiet nights in. Trust me, you don’t need fancy equipment, hours of prep (who needs that?), or an endless ingredient list. Just a handful of pantry staples and you’ll have a rich, creamy homemade chocolate pudding that feels like a hug in dessert form. Whether you’re making it for a special occasion or a simple Tuesday night, this classic treat never disappoints.
Why You’ll Adore This Chocolate Pudding Recipe
- Unbeatable Creaminess: The texture is melt-in-your-mouth smooth—way better than those boxed mixes. Each spoonful tastes rich and velvety, just like the chocolate pudding you grew up loving.
- Pure Chocolate Flavor: Thanks to real cocoa powder (and a handful of optional chocolate chips if you’re feeling decadent), you get a deep, genuine chocolatey taste—no weird artificial aftertaste here!
- So Simple & Comforting: There’s something genuinely soothing about stirring pudding on the stovetop. Honestly, it’s almost meditative. Plus, this is an easy dessert that comes together with minimal fuss.
- Family & Friend Approved: Whether you’re treating kiddos or impressing dinner guests, this homemade chocolate pudding recipe is a guaranteed crowd-pleaser. My friends beg for it every time they visit (I always have extra bowls tucked in the fridge, just in case).
Ingredients You’ll Need for Chocolate Pudding
Let’s break down what you’ll need for this classic chocolate pudding recipe—plus a couple tips from my own pantry adventures!
- Milk (2 cups/500ml): I usually use 2% for just the right creaminess, but whole milk works great. For a dairy-free pudding, almond or oat milk does the trick!
- Granulated Sugar (½ cup/100g): White sugar keeps things classic and sweet—but not overly so.
- Unsweetened Cocoa Powder (¼ cup/30g): The quality matters! If you can, splurge on a good Dutch-processed cocoa for a richer flavor.
- Cornstarch (¼ cup/30g): This is what makes your chocolate pudding thick and luscious. Make sure it’s not lumpy!
- Salt (¼ tsp): Just a pinch sharpens and balances the sweetness (never skip it).
- Vanilla Extract (1 tsp): Adds warmth and rounds out the chocolate.
- Butter (2 tbsp/30g): Stirred in at the end for luxurious richness.
- Optional: Chopped Chocolate or Chocolate Chips: Fold in a spoonful at the end for extra decadence or if you LOVE chocolate (raises hand!).
Step-by-Step Guide: Making the Perfect Chocolate Pudding
Let’s walk through the process together. I promise, homemade chocolate pudding is easy as can be!
- Mix Dry Ingredients: In a medium saucepan, whisk together the sugar, cocoa powder, cornstarch, and salt. (This keeps your pudding lump-free from the start.)
- Gradually Add Milk: Pour the milk in slowly, whisking constantly. Don’t rush this step—smooth pudding is worth the patience!
- Cook & Thicken: Pop the pan on medium heat and keep stirring. You’ll feel the pudding start to thicken, and it gets so satisfying to watch. Once it bubbles, cook for an additional 1-2 minutes to set the texture.
- Add the Finishing Touches: Remove from heat and stir in the butter and vanilla extract until silky. If you’re adding chocolate chips, fold them in now so they melt into the pudding.
- Pour & Cool: Spoon into individual bowls (my favorite for controlling portions and sneaking one just for me) or pour into one big serving dish.
- Prevent a Skin (Optional): Press plastic wrap right onto the surface of the pudding. This little trick keeps it perfectly smooth as it cools.
- Chill: Refrigerate for at least 2 hours for that classic cold pudding experience.
My Secret Tips and Tricks for Chocolate Pudding Success
- Use a Good Whisk: Don’t be shy! Whisking ensures your chocolate pudding is silky and totally lump-free—no one wants clumps.
- Don’t Leave the Pan Unattended: Pudding thickens fast, so stay close and keep stirring. It goes from “liquid” to “ready” in minutes.
- Upgrade the Cocoa Powder: Using a high-quality Dutch cocoa makes such a difference in the flavor—think deep, rich, and extra chocolatey.
- Extra Chocolate? Yes, Please: If you’re a serious chocolate lover, swirl in a handful of chopped chocolate or chips along with the butter for double chocolate pudding heaven.
- Chill Thoroughly: It’s tough to wait, I know, but two hours in the fridge transforms your pudding from “yum” to “WOW.”
Creative Variations and Ingredient Swaps
Let’s make this chocolate pudding recipe truly your own!
- Dairy-Free: Swap out dairy milk for almond, oat, or soy milk, and use a vegan butter or skip it entirely.
- Mexican Hot Chocolate Pudding: Add a pinch of cinnamon and cayenne for some heat (SO good).
- Mocha Madness: Stir in 1-2 tsp instant espresso powder for coffee-chocolate bliss.
- Peanut Butter Swirl: Drop in a couple spoonfuls of peanut butter just before cooling—total game-changer!
- Less Sugar: Reduce the sugar by 1-2 tablespoons for a less sweet, more cocoa-forward treat.
Feel free to experiment with these ingredient swaps and get creative with toppings and mix-ins (I’m a big fan of whipped cream and fresh raspberries).
How to Serve and Store Your Chocolate Pudding
This homemade chocolate pudding is dreamy straight from the fridge, garnished with a cloud of whipped cream or a sprinkle of shaved chocolate. Here are my favorite serving ideas (and a few smart storage tips):
- Serve in Pretty Bowls: Individual ramekins make dessert feel fancy—even on a weeknight.
- Toppings Galore: Add berries, toasted coconut, or even a drizzle of caramel if you’re feeling extra.
- Storing Leftovers: Keep chocolate pudding in the fridge, tightly covered with plastic wrap pressed to the surface, for up to four days. It almost never lasts that long in my house!
- No-Fuss Freezing: While you can freeze chocolate pudding, the texture can get a little icy. For best results, stick to the fridge.
FAQs: Your Top Questions About Chocolate Pudding Answered
Can I use plant-based milk for this chocolate pudding recipe?
Absolutely! Almond, oat, or soy milk will all work beautifully. Just make sure to give your cornstarch an extra minute to thicken—plant milks can be a little more finicky.
Why did my chocolate pudding turn lumpy?
This usually happens when you add the milk too quickly or don’t whisk enough. Next time, add the milk gradually, whisking as you go, and keep stirring until silky.
Do I really need to chill the pudding for two hours?
Technically, you can eat it warm (I won’t tell!), but chilling it lets it set and intensifies the chocolate flavor.
What’s the best cocoa powder for chocolate pudding?
Dutch-processed cocoa powder offers an extra-rich flavor and deep color. Natural cocoa works too—just use whatever you love!
Can I make chocolate pudding ahead of time?
Totally! This is one of those easy desserts you can (and should) prep a day ahead for next-level flavor and convenience.
Honestly, this homemade chocolate pudding recipe is everything I crave in a dessert—easy, nostalgic, and wildly chocolaty. I hope it brings as much comfort and joy to your kitchen as it does to mine. Don’t forget to let me know your favorite twists (and to save yourself an extra bowl in the fridge—you’re going to want it!).