Classic Black Forest Cake

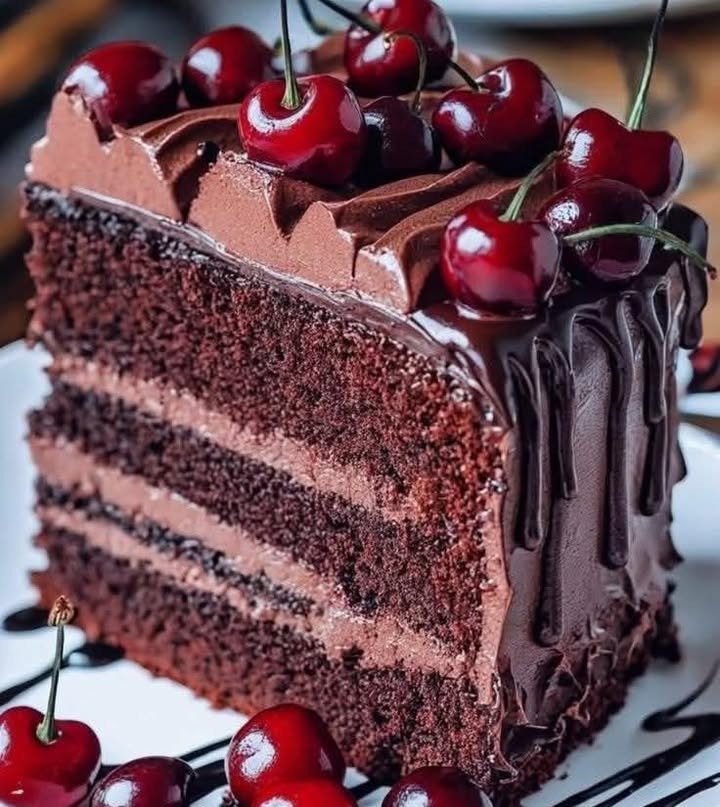
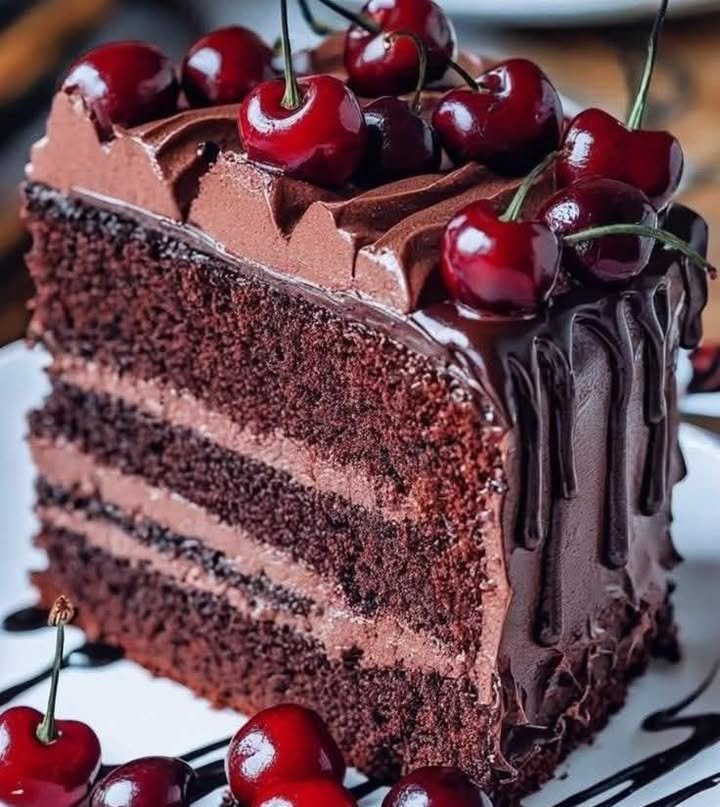
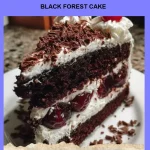
Delicious slice of Classic Black Forest Cake topped with cherries and whipped cream

My Sweetest Memory: Classic Black Forest Cake

The scent of chocolate mingling with the slight tang of cherries instantly sweeps me back to my grandmother’s cozy kitchen. That’s where my love affair with Classic Black Forest Cake began—a cake so unapologetically decadent, it stole the spotlight at every family gathering. She’d hand me a whisk twice the size of my hand and say, “Stir in those memories.” Even now, making this classic cake feels like gifting a slice of nostalgia—I always hope it brings you the same flutter of joy and comfort, whether you’re baking for the first time or reliving an old tradition. There’s just something irresistible about an authentic Black Forest Cake, and today, I’m excited to share that magic with you.

Why You’ll Adore This Classic Black Forest Cake

Let me gush a little about why this Black Forest Cake belongs in your repertoire:

  1. Unbeatable Flavor Harmony: Imagine what happens when airy chocolate sponge meets silky whipped cream and juicy cherries. It’s a match made in dessert heaven!
  2. Stunning Showstopper: This cake isn’t just delicious—it’s dazzling. The layers, the chocolate shavings, the cherry garnish…it never fails to wow a crowd.
  3. Surprisingly Simple: While it looks impressive, you’d be amazed how approachable the steps are. Don’t let the stunning exterior fool you—homemade Black Forest Cake is totally doable.
  4. A Celebration in Every Bite: Whether for birthdays, anniversaries, or a “just because” dessert adventure, this classic cake turns ordinary moments into cherished memories.

Ingredients You’ll Need for Classic Black Forest Cake

Before you get started, let’s go over what you’ll need—and I’ll share a few personal tips:

  • 8 large eggs: They create a fluffy sponge cake foundation. Use room-temperature eggs (they whip better!).
  • 1 ½ cups granulated sugar: Sweetens the cake layers perfectly.
  • 1 2⁄3 cups all-purpose flour: The backbone of our cake.
  • ½ cup unsweetened cocoa powder: I recommend a high-quality cocoa powder for that deep chocolate flavor.
  • Cherries (fresh or canned in syrup): Canned cherries in syrup are easy and reliable, but if cherries are in season, fresh ones will wow your tastebuds.
  • 2 cups heavy whipping cream (at least 35% milk fat): This is the key to a stable, fluffy whipped cream filling.
  • 3 ½ cups powdered sugar (confectioners’ sugar): Adds sweetness and structure to the whipped cream.
  • 10 oz semi-sweet chocolate (shaved or in curls): Chocolate shavings offer both drama and crunch—plus, who doesn’t love more chocolate?
  • Cherry liqueur (Kirsch) or any cherry-flavored liqueur: It’s traditional and adds a grown-up twist, but you can skip it for a kid-friendly version.
  • 1 tsp vanilla extract: Rounds out all the flavors beautifully.

(If you have a favorite brand or local ingredient, go with it—it’ll make this classic cake your own!)

Step-by-Step Guide: Making the Perfect Classic Black Forest Cake

I promise—making a homemade Black Forest Cake is more about love and patience than advanced baking skills. Here’s how to do it:

  1. Bake the Sponge Cake Layers:

    • Preheat your oven to 350°F (180°C). Grease and flour three 8–9-inch round cake pans.
    • In a large bowl, beat eggs and granulated sugar until light and fluffy (think pale yellow and triple in volume—about 7–10 minutes).
    • Sift together all-purpose flour and unsweetened cocoa powder. Gently fold into the egg mixture—don’t rush this, gentle folds keep your cake airy!
    • Pour the batter evenly into your pans, smoothing the tops.
    • Bake for about 15 minutes, or until a toothpick comes out clean. Don’t over-bake—you want a tender crumb.
    • Cool the cakes completely on wire racks before the next step.
  2. Whip the Cream and Prep the Filling:

    • In a chilled bowl, whip heavy cream, powdered sugar, and vanilla extract until stiff peaks form. (Cold equipment makes all the difference here.)
    • Set aside a generous scoop for decorating the top.
  3. Assembly Time!

    • Place the first cake layer on your serving plate. Brush it lightly with cherry liqueur for that classic grown-up touch.
    • Spread a layer of whipped cream, then dot generously with pitted cherries.
    • Repeat with the next two layers, finishing by covering the whole cake in whipped cream (don’t worry if it’s not perfect, chocolate shavings hide everything!).
    • Press chocolate shavings or curls onto the sides and top. Crown with extra cherries for a dramatic finish.
  4. Chill and Serve:

    • Let the cake chill in the fridge for at least 2 hours—it makes slicing easier and flavors meld together. Then, slice generously and enjoy every classic bite.

(Tip: If you’re sharing with little ones or skipping alcohol, just brush the layers with cherry syrup instead—still moist, still delicious!)

My Secret Tips and Tricks for Classic Black Forest Cake Success

Over the years, here’s what’s helped me master this iconic chocolate cherry cake:

  • Room Temp Eggs Whip Best: Let your eggs hang out on the counter for 30 minutes before baking—the volume pays off!
  • Chilled Equipment is Key for Whipped Cream: Pop your mixing bowl and beaters in the fridge beforehand for those picture-perfect peaks (trust me, it’s a game-changer).
  • Fresh vs. Canned Cherries: I love using canned cherries in winter, but nothing beats the burst of fresh cherries when they’re in season.
  • Patience = Perfection: Let your cake layers cool fully before assembling (otherwise your whipped cream will melt and run—a lesson I’ve learned the hard way).
  • For Clean Slices: Use a serrated knife and wipe it after each cut for those elegant, bakery-worthy pieces.

Remember, classic Black Forest Cake is forgiving—it’s meant to be loved and devoured, not fussed over!

Creative Variations and Ingredient Swaps

Baking should be personal! Here are some delicious twists if you want to put your own spin on this classic chocolate cherry cake:

  • Gluten-Free Version: Use a trusted gluten-free flour blend in place of all-purpose flour.
  • Vegan Spin: Replace eggs with flax or chia eggs, dairy with plant-based cream, and check your chocolate for dairy-free options.
  • Booze-Free Option: Skip the cherry liqueur and simply brush layers with cherry syrup or juice—perfect for family celebrations.
  • Berry Swap: Try raspberries or blackberries for a fun flavor remix—still fruity, still fabulous.
  • Chocolate Overload: Sprinkle mini chocolate chips between layers for a little extra cocoa indulgence.

Whether you follow the traditional recipe or a creative variation, you’ll have a Black Forest Cake that’s uniquely yours!

How to Serve and Store Your Classic Black Forest Cake

For serving, I like to chill the assembled cake for a couple of hours (which also makes it easier to slice). When you’re ready, serve up generous wedges—don’t be shy with the whipped cream and cherries! This cake absolutely shines as a festive centerpiece, making it perfect for birthdays, anniversaries, or holiday tables.

Leftovers (if you have any!) can be stored in the fridge, loosely covered, for up to 3 days. The sponge stays moist thanks to the cherry syrup/liqueur, and the flavors get even better with time. Just note, classic Black Forest Cake is best enjoyed fresh, so I rarely freeze it—but if you must, slice and wrap pieces tightly before freezing for up to 1 month.

FAQs: Your Top Questions About Classic Black Forest Cake Answered

1. Can I make this Black Forest Cake in advance?
Absolutely! Bake the sponge and prep the whipped cream a day ahead, then assemble the cake the day you want to serve. The flavors meld beautifully overnight.

2. Is there a substitute for cherry liqueur (Kirsch) in the cake?
Of course! Use cherry syrup from canned cherries, or a little cherry juice. If you’d like a flavor boost, add a dash of almond extract—it complements the cherries so well.

3. Can I use store-bought whipped cream for convenience?
I get it—sometimes shortcuts are needed! Just know that homemade whipped cream holds up firmer and tastes so much fresher in this classic recipe.

4. What’s the best way to get those fancy chocolate shavings?
Use a vegetable peeler on a bar of semi-sweet chocolate. If you want larger curls, gently warm the chocolate bar for a minute or so with your hands before shaving.

5. Can I use frozen cherries instead of fresh or canned?
Yes! Thaw them first and drain excess liquid. Tossing them with a little powdered sugar brings out their juiciness.


Baking a Classic Black Forest Cake at home is more than just making a dessert—it’s about creating unforgettable moments (and irresistible chocolate cherry cake!). If you try this recipe, please let me know how it goes or share your favorite cake memories below—I’d love to celebrate your sweet successes right along with you. Happy baking!

Print Pin

Classic Black Forest Cake

A decadent and nostalgic Classic Black Forest Cake made with chocolate sponge, whipped cream, and cherries, perfect for any celebration.
Course Birthday, Dessert
Cuisine European, German
Keyword Black Forest Cake, Cherry Dessert, Chocolate Cake, Classic Cake, Easy Dessert
Prep Time 30 minutes
Cook Time 15 minutes
Total Time 2 hours
Servings 12 servings
Calories 400kcal

Ingredients

Cake Ingredients

  • 8 large eggs Use room-temperature eggs for better whipping.
  • 1.5 cups granulated sugar Sweetens the cake layers.
  • 1.67 cups all-purpose flour The backbone of our cake.
  • 0.5 cups unsweetened cocoa powder Use high-quality cocoa for deep chocolate flavor.
  • 2 cups heavy whipping cream At least 35% milk fat for stability.
  • 3.5 cups powdered sugar Adds sweetness to whipped cream.
  • 10 oz semi-sweet chocolate Shaved or in curls for garnish.
  • 1 tsp vanilla extract Enhances flavors.

Filling Ingredients

  • Cherries fresh or canned in syrup Fresh cherries are ideal when in season.
  • Cherry liqueur Kirsch or cherry-flavored liqueur Optional, for a grown-up version.

Instructions

Bake the Sponge Cake Layers

  • Preheat your oven to 350°F (180°C). Grease and flour three 8–9-inch round cake pans.
  • In a large bowl, beat eggs and granulated sugar until light and fluffy (about 7–10 minutes).
  • Sift together all-purpose flour and unsweetened cocoa powder. Gently fold into the egg mixture.
  • Pour the batter evenly into your pans and bake for about 15 minutes, or until a toothpick comes out clean.
  • Cool the cakes completely on wire racks.

Whip the Cream and Prep the Filling

  • In a chilled bowl, whip heavy cream, powdered sugar, and vanilla extract until stiff peaks form.
  • Set aside a generous scoop for decorating.

Assembly

  • Place the first cake layer on your serving plate and brush lightly with cherry liqueur.
  • Spread a layer of whipped cream, then dot generously with pitted cherries.
  • Repeat with the next two layers, finishing with whipped cream on the whole cake.
  • Press chocolate shavings onto the sides and top, and crown with extra cherries.

Chill and Serve

  • Let the cake chill in the fridge for at least 2 hours before serving.

Notes

For a kid-friendly option, skip the liqueur and brush layers with cherry syrup instead. Store leftovers in the fridge for up to 3 days.

Similar Posts