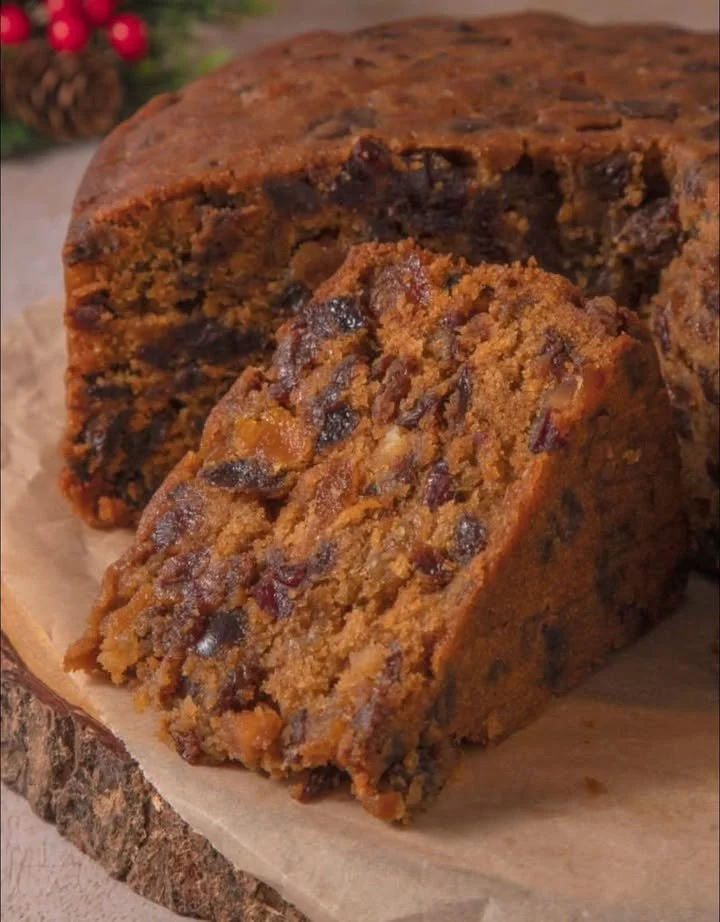
Moist Plum Cake (No Alcohol Version)
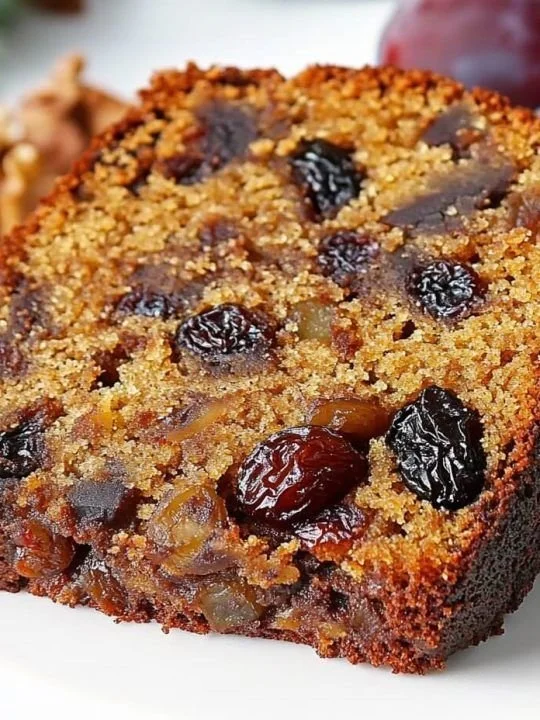
A Slice of Nostalgia: Moist Plum Cake (No Alcohol Version)
Growing up, my mom’s kitchen always seemed to capture the magic of each changing season. I remember late summer afternoons when the air was heavy with the sweet scent of plums ripening in our backyard. That’s how I fell in love with this moist plum cake (no alcohol version)—a treat that’s as comforting as a warm hug and honestly, way too easy to sneak a second slice! Today, I’m sharing my favorite recipe for moist plum cake, minus the booze, so everyone (kids included!) can join in the delight.
Whether you’re cozying up with a mug of tea or sharing dessert at a family gathering, this easy plum cake is sure to warm the hearts of everyone at your table.
Why You’ll Adore This Moist Plum Cake
If you’re on the lookout for a cozy dessert that checks all the boxes—and then some—let me tell you why this moist plum cake is a personal favorite:
- Incredibly Moist & Tender: Thanks to a mix of yogurt (or sour cream) and juicy plums, each slice is soft without being heavy.
- Rich, Spiced Flavors: Warming spices like cinnamon and nutmeg make this cake sing—think autumn in cake form.
- Simple, No-Fuss Ingredients: No fancy techniques or hard-to-find items, just pantry staples and fresh (or dried) plums.
- Family Friendly: No alcohol here—just pure, wholesome flavor, so kids and grown-ups alike can indulge worry-free.
Basically, if you love an easy dessert that feels both rustic and special, this homemade plum cake is about to become your new go-to!
Ingredients You’ll Need for Moist Plum Cake
Let’s break down what you’ll need—and a few tips I’ve learned along the way:
- All-purpose flour (1 1/2 cups / 190g): The base for a tender crumb. Sift if you want an extra-light texture.
- Baking powder & baking soda: The dynamic duo for lift and fluffiness.
- Ground cinnamon & nutmeg: These warm spices cozy up beautifully with the plums (don’t skimp—they’re the secret to the cake’s charm!).
- Salt: Just a touch brings everything to life.
- Unsalted butter (1/2 cup / 100g, softened): Room-temp butter creams perfectly for a silky batter.
- Brown sugar (3/4 cup / 150g): Gives a lovely caramel flavor and extra moisture.
- Large eggs (2): For structure and richness. Room temperature eggs blend more smoothly.
- Vanilla extract (1/2 tsp): A dash for aroma—always a must in homemade cakes.
- Plain yogurt or sour cream (1/2 cup / 120ml): My secret to keeping the crumb ultra-moist and tender.
- Chopped plums (1 cup / 150g): Use whatever you have—ripe fresh plums (my favorite!) add pops of color and tartness, but dried plums/prunes work in a pinch.
- Chopped walnuts or almonds (1/4 cup / 30g, optional): For crunch and a hint of nuttiness, but this cake is lovely without them too.
(Trust me: If you’ve ever wondered what to make with extra plums, this is it!)
Step-by-Step Guide: Making the Perfect Moist Plum Cake
- Preheat & Prep: Start by heating your oven to 175°C (350°F). Grease and flour your loaf or 8-inch round pan—I use parchment paper for easier cleanup (pro tip!).
- Mix Dry Ingredients: In a medium bowl, whisk together flour, baking powder, baking soda, cinnamon, nutmeg, and salt.
- Cream Butter & Sugar: In a separate big bowl, beat the softened butter with the brown sugar until it’s fluffy and pale. This takes a good 2-3 minutes—let your mixer have fun!
- Add Eggs & Vanilla: Beat in the eggs one at a time to prevent curdling, then stir in vanilla extract.
- Combine Wet & Dry: Add the flour mixture in 2-3 batches, alternating with the yogurt or sour cream. Mix gently; overmixing can make the cake tough.
- Fold in Plums (and Nuts): With a spatula, gently fold in the chopped plums (and nuts, if using). The batter will be thick and look generously studded—perfect!
- Pan & Decorate: Scrape the batter into your prepared pan. If you fancy, gently press some thin plum slices on top for a pretty finish.
- Bake: Bake for 40–50 minutes, until a toothpick poked in the center comes out clean (a few crumbs are okay—just no wet batter).
- Cool & Enjoy: Let the cake cool in the pan for 10 minutes, then move to a wire rack. Cue the irresistible spiced-plum aroma wafting through your kitchen!
(Bonus tip: If the cake is browning too quickly on top, just loosely cover it with some foil for the last 15 minutes.)
My Secret Tips and Tricks for Moist Plum Cake Success
After plenty of trial and a few too-dense cakes, I’ve picked up some tricks that guarantee plum cake perfection every time:
- Be gentle with mixing: Once the dry ingredients are in, fold just until combined—overmixing = dense cake.
- Room temp is best: Cold butter and eggs can make the batter separate or uneven, so let your ingredients warm up first.
- Go fresh if you can: Fresh plums add beautiful tart pockets, but prunes work in winter or when plums are out of season.
- Nutty crunch? Toast your nuts: If you’re using walnuts or almonds, lightly toast them in a dry skillet first for extra flavor.
- Test for doneness early: All ovens run differently, so start checking your cake at the 40-minute mark. The toothpick test never lies!
Trust me, these simple tweaks make all the difference for this easy, homemade plum cake.
Creative Variations and Ingredient Swaps
One of my favorite things about this plum cake recipe is how flexible it is:
- Switch up the fruit: Swap plums for peaches, apricots, or even pears for a different spin on this classic moist cake.
- Make it nut-free: Just leave out the nuts (no worries—you still get all that spiced, fruity magic).
- Gluten-free option: Use a cup-for-cup gluten-free flour blend. You might need to add a tablespoon of milk if the batter looks dry.
- Add a citrus twist: Stir some grated orange or lemon zest into the batter for a zingy note that brightens the whole cake.
- Change the spice: Don’t be afraid to play with cardamom or ginger along with (or instead of) cinnamon and nutmeg for a unique flavor.
Seriously, let this homemade plum cake be your canvas—it’s so easy to customize.
How to Serve and Store Your Moist Plum Cake
Now for the best part: Serving! I love to slice this moist plum cake while it’s still a bit warm, with a mug of black tea or a dollop of plain yogurt on the side. (It’s a killer brunch treat—or honestly, breakfast.)
Storing leftovers is easy:
- Keep any extra cake (ha, as if!) covered at room temperature for up to 2 days.
- For longer storage, wrap slices individually and pop in the fridge for a week, or freeze up to 2 months. Just thaw and warm gently in the oven or microwave when you need a cozy pick-me-up.
Whether you call it an easy plum cake, classic fruit loaf, or cozy tea-time treat, it keeps wonderfully moist!
FAQs: Your Top Questions About Moist Plum Cake Answered
Can I make this plum cake ahead of time?
You bet! The flavors actually deepen after a day, making it a perfect make-ahead dessert for gatherings.
Can I use prunes instead of fresh plums?
Absolutely—just chop them small, and you’ll get a richer, sweeter flavor. Dried plums work great if fresh aren’t available.
My cake stuck to the pan—help!
I’ve been there! Make sure to really grease and flour your pan (or use parchment), and let the cake cool for 10 minutes before unmolding for the prettiest slices.
Can I use Greek yogurt instead of regular?
Yes, absolutely. The cake will be a touch denser but beautifully creamy and moist.
What’s the best way to serve this cake?
I love it simply dusted with powdered sugar, alongside a scoop of vanilla ice cream, or—my guilty pleasure—spread with a layer of salted butter. Don’t knock it till you try it!
Honestly, this moist plum cake (no alcohol version) captures what I love most about baking: transforming simple, seasonal ingredients into comfort you can eat. So if you’re craving something cozy and low-fuss—or have a few extra plums sitting around—give this easy plum cake a whirl. I promise it’ll become a time-tested favorite in your kitchen, too. 🍰💜
Happy baking, friends! If you make this recipe, let me know how it turns out in the comments—stories, tweaks, and photos are always welcome.
