My mom made this dessert, and it was a total crowd-pleaser. I had to grab the recipe! Full recipe below.
Mom’s Best Easy & Creamy Banana Pudding — A Quick, Homemade, Traditional Family Favorite
My mom made this dessert, and it was a total crowd-pleaser. I had to grab the recipe! Full recipe below. If you’re looking for an easy, quick, creamy, homemade dessert that tastes like comfort in a bowl, you’ve landed in the right place.
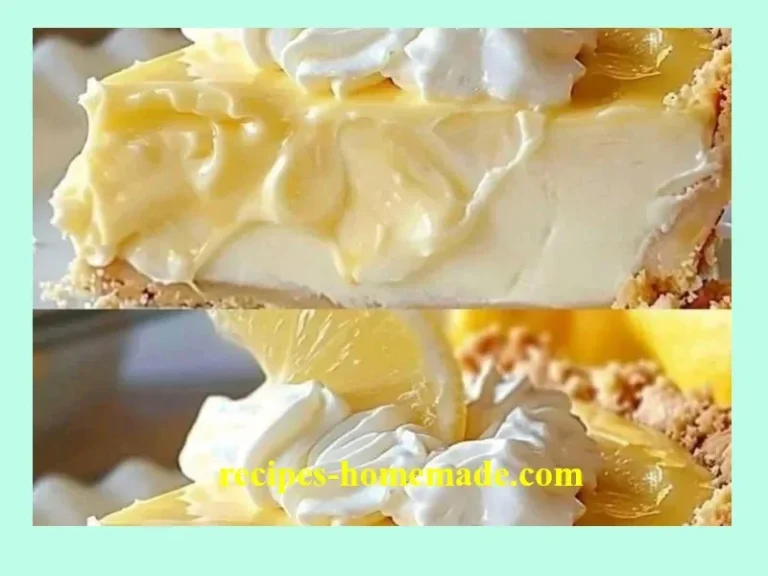
This creamy banana pudding works for weeknight dinners, family meals, weekend cooking, potlucks, and holidays. It’s smooth, custardy, and layered with tender bananas and crisp vanilla wafers — that contrast of textures is what keeps everyone coming back for seconds. If you love make-ahead crowd-pleasers, check out this freezer-friendly meal for more ideas on feeding a crowd.
Background & Origin
Banana pudding is a classic Southern dessert with simple roots — tender bananas, creamy custard, and vanilla wafers layered to make something comforting and nostalgic. It likely evolved from English trifle traditions, adapted with local ingredients like bananas and wafer cookies.
Why this recipe is so popular:
- It’s simple to scale up for guests.
- The textures — creamy custard and soft bananas with crunchy wafers — make it irresistible.
- It’s forgiving: a little extra banana or wafer won’t ruin it.
Fun kitchen science: making the custard from scratch (egg yolks, milk, cornstarch) yields a silkier, more stable filling than boxed mixes. Also, resting the pudding allows the flavors to meld; the wafers soften just enough to be creamy without going mushy.
What makes this version unique: a light lemon-zest finish in the custard brightens the flavor and keeps the dessert from tasting overly sweet — a trick my mom always used and now I share with you. For other family recipe inspirations, see this family recipe root that celebrates heirloom cooking.
Ingredients
Makes about 8–10 servings
- 2 1/2 cups whole milk (or 2 cups milk + 1/2 cup heavy cream for extra creamy) — room temperature
- 3 large egg yolks — whisked
- 1/2 cup granulated sugar
- 1/4 cup cornstarch — sifted
- 2 tsp pure vanilla extract
- 1 tsp lemon zest (optional but recommended) — finely grated
- Pinch of salt
- 1 box (11–12 oz) vanilla wafer cookies (Nilla wafers) — about 3 cups
- 4–5 ripe bananas — sliced into 1/4-inch rounds (ripe but firm)
- 1 1/2 cups heavy cream — chilled (for whipped cream topping)
- 2 tbsp powdered sugar (for whipped cream)
- Optional garnish: banana slices, crushed wafers, mint leaves, cinnamon
Notes:
- Use very ripe bananas for sweetness, but avoid overly brown ones that’ll turn mushy.
- For a lighter version, swap heavy cream for Greek yogurt in the topping (see Variations).
Step-by-Step Instructions
Prep time: 25 minutes | Chill time: 2–4 hours | Total: ~3 hours
Make the custard base
- In a medium saucepan, warm 2 cups of milk over medium heat until it’s steaming but not boiling (visual cue: small bubbles form around edges).
- In a mixing bowl, whisk together egg yolks, sugar, and cornstarch until pale and slightly thickened.
- Slowly temper 1/2 cup of the hot milk into the egg mixture, whisking constantly to avoid curdling.
- Pour the tempered egg mixture back into the saucepan with the remaining milk. Cook over medium-low heat, stirring constantly until the mixture thickens to a pudding-like consistency (visual cue: when you draw a spoon across the bottom, the custard holds a line). This takes about 4–6 minutes.
- Remove from heat and stir in vanilla, lemon zest, and a pinch of salt. If you want an ultra-smooth custard, strain through a fine-mesh sieve.
- Cover with plastic wrap pressed directly on the surface to prevent a skin, and let cool to room temperature.
Whip the cream
- Chill a mixing bowl and beaters in the freezer for 10 minutes.
- Whip chilled heavy cream with powdered sugar until soft peaks form. Fold about 1/3 of the whipped cream into the cooled custard to lighten it, then fold in the remaining whipped cream gently until uniform and creamy.
Assemble the pudding
- In a 9×13 baking dish (or individual glasses), layer about one-third of the custard, then a layer of vanilla wafers, then a layer of banana slices. Repeat layers ending with a thick custard layer on top.
- Press a few wafer crumbs on top for crunch or decorate with extra banana slices.
- Chill for at least 2 hours (ideally 4) to let flavors meld and wafers soften to the perfect tender-but-not-soggy texture.
Serve
- Just before serving, add more crushed wafers or a dusting of cinnamon. For a picnic option, assemble the layers in a portable dish and keep chilled until ready.
Mini-tips:
- If your custard looks slightly grainy after cooking, whisk in 1 tbsp butter off the heat for sheen and smoothness.
- For a party shortcut, use instant vanilla pudding but fold in real whipped cream for a creamier texture.
For more on family dessert traditions and step-by-step photos, you might enjoy this family recipe traditions piece.
Pro Tips & Common Mistakes
- Avoid curdling: temper eggs slowly with hot milk and keep stirring while cooking.
- Bananas brown fast: slice them right before assembling or toss in a little lemon juice.
- Don’t over-soften wafers: chill long enough so they soften but still hold layers (2–4 hours).
- Texture trick: swap 1/2 cup milk for heavy cream in the custard for silkier mouthfeel.
- What NOT to do: don’t bake the assembled pudding — classic version chills. Baking can dry it out.
- Helpful shortcuts:
- Use store-bought vanilla pudding in a pinch.
- Assemble in individual jars for grab-and-go desserts.
Prep-ahead hack:
- Make custard up to 3 days ahead; store covered in the fridge. Slice bananas just before layering.
Variations & Substitutions
- Vegan: Make coconut-based custard — use full-fat coconut milk, a slurry of cornstarch, and aquafaba whipped for topping. Layer with vegan vanilla cookies and bananas.
- Gluten-free: Swap vanilla wafers for gluten-free vanilla cookies or thin gf shortbread.
- Low-carb: Use sugar substitute in custard and swap bananas for thinly sliced strawberries or cooked rhubarb; use low-carb cookies or crushed almonds.
- Kid-friendly: Add mini chocolate chips between layers or use animal crackers.
- Extra creamy: Replace 1 cup milk with 1 cup heavy cream in the custard, and fold in stabilized whipped cream.
- Spicy twist: Add 1/2 tsp cinnamon and a pinch of nutmeg to your custard for fall warmth.
- Budget-friendly: Make your own simple custard with staple pantry ingredients and use bulk cookies.
Breakfast pairing: Serve small ramekins alongside warm classic pancakes for a brunch spread — the banana flavor ties together beautifully.
Serving Suggestions
- Best sides: Coffee, strong black tea, or a creamy cappuccino.
- Bread: Toasted brioche or a simple buttery biscuit on the side for dipping.
- Salads: A light arugula salad with citrus vinaigrette cleanses the palate after a sweet serving.
- Wine pairing: Sweet dessert wine, late harvest Riesling, or tawny port if you want a boozy pairing.
- How to plate beautifully:
- Serve in clear glasses to show the layers.
- Top with a fan of banana slices, a sprinkle of crushed wafers, and a small mint leaf.
- Use contrasting textures on the plate: crunchy cookie crumbs over silky custard.
Storage, Freezing & Reheating
- Fridge life: Keeps 3–4 days covered in the refrigerator. Note: bananas will brown over time; consume sooner for best appearance and texture.
- Freezing: Assembled banana pudding does not freeze well (bananas become mushy). Freeze custard separately in airtight container up to 2 months. Thaw overnight in the refrigerator and re-whip the cream if needed.
- Best reheating: If you warmed custard, gently reheat in a saucepan over low heat, whisking until smooth — do not boil. For serving warm, layer with fresh banana slices after heating.
- Meal-prep options: Make custard and whipped cream ahead, store separately, and assemble on the day for freshest texture.
Nutrition & Health Info
Approximate per serving (1/8): 320–380 calories — varies with use of heavy cream and full-fat milk.
- Protein: ~5–6 g
- Carbs: ~35–45 g (mostly from banana and sugar)
- Fat: ~18–24 g (depends on cream)
Lighter version tips: - Use low-fat milk and reduce heavy cream or replace topping with Greek yogurt.
- Reduce sugar by 25% and rely on ripe bananas for natural sweetness.
This dessert can fit into a balanced lifestyle when enjoyed in moderation and adapted with lighter dairy or sugar substitutes.
FAQ

Q: Can I prepare My mom made this dessert, and it was a total crowd-pleaser. I had to grab the recipe! Full recipe below. ahead of time?
A: Yes — make the custard up to 3 days ahead and whip the cream the day you assemble. Slice bananas right before layering for best look.
Q: How do I thicken or thin the custard?
A: To thicken: add 1–2 tsp more cornstarch (mixed with cold milk) and gently cook until thick. To thin: whisk in a little warmed milk, a tablespoon at a time, until desired consistency.
Q: What ingredient substitutions work best?
A: Coconut milk for dairy-free, Greek yogurt for lighter topping, cornstarch for gluten-free thickening. For crunch, swap vanilla wafers for graham crackers or shortbread.
Q: Can I double or halve the recipe?
A: Absolutely. This recipe scales linearly — double everything for a 9×13 pan; halve for a smaller dish. Adjust chilling time slightly if volume changes.
Q: What cookware is best?
A: Use a heavy-bottomed saucepan for custard to prevent hot spots. A 9×13 glass or ceramic baking dish is ideal for even chilling and pretty presentation.
Q: Can I make it dairy-free or meat-free?
A: Definitely dairy-free: use full-fat coconut milk in the custard and coconut cream whipped topping. It’s naturally meat-free as written.
Q: What sides go well with it?
A: Fresh berries, a small green salad, coffee, or a dessert wine pair nicely. For brunch, serve with pancakes or French toast.
Conclusion
This is the kind of dessert that feels like home — quick to pull together, deeply comforting, and always a crowd-pleaser. Try making the custard one day ahead and assembling on the day you serve for stress-free hosting. If you make it, I’d love to hear how it turned out — leave a comment, rate the recipe, or share a photo on social media. Happy baking and enjoy a spoonful of nostalgia!
👉 #fblifestyle