Red Velvet Marble Cupcakes
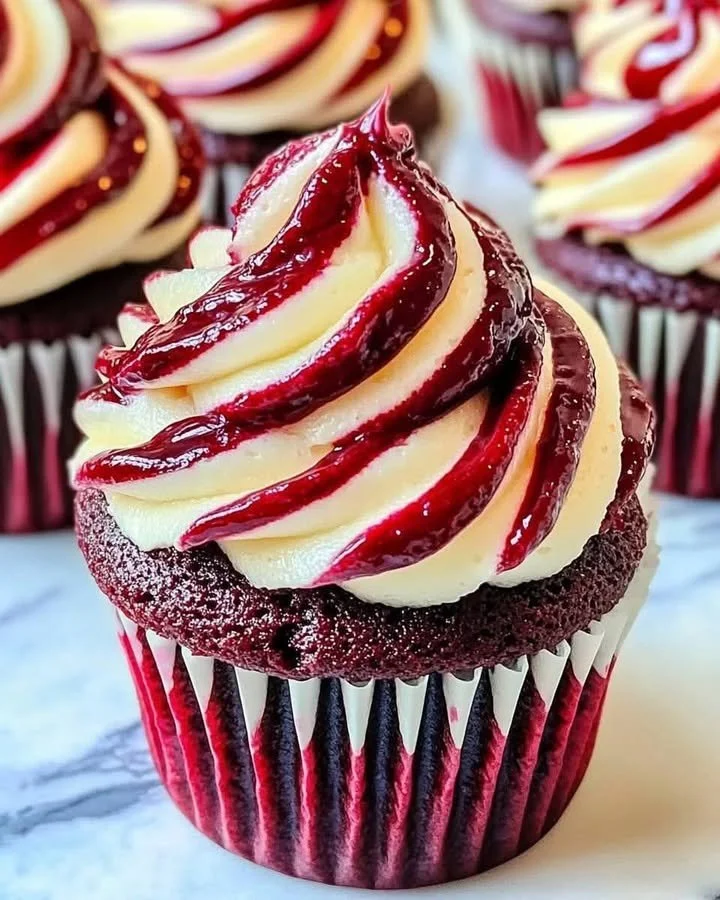
Red Velvet Marble Cupcakes: Swirls of Joy in Every Bite
When I think of red velvet marble cupcakes, I’m instantly transported back to my grandmother’s cozy kitchen. The scent of vanilla and cocoa mingling as she swirled the batter, her hands always dusted with a little flour. It was a family ritual—each swirl a tiny adventure, every bite a celebration. These cupcakes aren’t just desserts—they’re little love letters, swirled with nostalgia and a hint of raspberry brightening each bite.
If you’ve ever craved something that feels special, yet approachable, red velvet marble cupcakes are exactly that—a charming twist that never fails to delight.
Why You’ll Adore These Red Velvet Marble Cupcakes
Let me tell you why these red velvet marble cupcakes have totally stolen my heart (and will win yours too!):
- Swirls That Make You Smile: The marbled red velvet and raspberry frosting isn’t just gorgeous, it’s a flavor combo that feels both familiar and exciting.
- Moist & Tender Crumb: Thanks to buttermilk and a touch of vinegar (the old-fashioned secret!), these cupcakes are incredibly soft and rich.
- Crowd-Pleaser: Whether it’s a birthday, Valentine’s, or just a random Wednesday, these cupcakes always get a “wow” (and requests for seconds).
- Easy, Not Intimidating: Despite the marbled effect and dual-colored frosting, the steps are super friendly—even for baking beginners.
Trust me, one batch of these homemade red velvet marble cupcakes and you’ll never look at plain cupcakes the same way again.
Ingredients You’ll Need for Red Velvet Marble Cupcakes
Gather your ingredients for these unforgettable cupcakes. Here’s what you’ll need, with a few tips along the way:
- All-purpose flour (1 1/4 cups): Gives the cupcakes structure—a classic choice for baking.
- Cocoa powder (1 tbsp): Just enough for that signature red velvet flavor; use natural cocoa for the best color.
- Baking soda (1/2 tsp): Helps the cupcakes rise and stay fluffy.
- Salt (1/4 tsp): A little pinch balances all the sweetness.
- Buttermilk (1/2 cup): The secret to a tender crumb—regular milk + lemon juice works in a pinch!
- White vinegar (1 tsp): Don’t worry, you won’t taste it; this old-school trick reacts with the cocoa and baking soda.
- Vanilla extract (1 tsp): Always go for pure vanilla for the dreamiest aroma.
- Unsalted butter, softened (1/2 cup + 1/2 cup for frosting): Let it sit out to room temp for a creamy batter and soft frosting.
- Granulated sugar (3/4 cup): For sweetness and that delicate lacy top.
- Large eggs (2): Bind everything together.
- Red gel food coloring: Use gel for the deepest color without watering down the batter.
- Cream cheese, softened (8 oz): For luscious, tangy frosting.
- Powdered sugar (2 1/2 cups): Creates a smooth, dreamy frosting.
- Raspberry preserves or thick puree (1/2 cup): For fruity tang and beautiful swirls!
- Extra red gel food coloring (optional for the raspberry swirl): Deepens the swirl color if you want something bold.
Step-by-Step Guide: Making the Perfect Red Velvet Marble Cupcakes
Ready to fill your kitchen with the sweetest aroma? Let’s dive in:
- Preheat & Prep: Set your oven to 350°F (175°C). Line a muffin tin with 12 paper liners—trust me, you’ll want the easy clean-up.
- Mix Dry Ingredients: In a bowl, sift together the flour, cocoa powder, baking soda, and salt. This keeps the cupcakes extra light (no pockets of baking soda surprise!).
- Mix Wet Ingredients: In a cup, quickly whisk together buttermilk, vinegar, and vanilla. This combo is the secret behind tender, flavorful red velvet cupcakes!
- Cream Butter & Sugar: Now, in your largest bowl, beat together the softened butter and granulated sugar until light and fluffy—think pale yellow clouds (about 2-3 minutes).
- Add Eggs & Color: Beat in eggs one at a time, then add the red gel food coloring a little at a time. You want a deep, dramatic red (it’s okay to gasp at how pretty it looks).
- Combine Everything: Alternately add the dry ingredients and buttermilk mixture to the butter mixture, blending just until combined.
- Fill & Bake: Evenly divide the batter among cupcake liners. Bake 18–20 minutes, or until a toothpick comes out clean. Let them cool (I know it’s hard to wait!).
- Cream Cheese Frosting: Beat cream cheese and butter until very smooth. Add vanilla and powdered sugar, mixing until super fluffy.
- Raspberry Swirl: Mix raspberry preserves with a drop of red food coloring if you want an extra vivid swirl.
- Swirl & Pipe: Scoop frosting on one side of a piping bag, raspberry swirl on the other, then pipe dramatic swirls on cooled cupcakes.
Cupcake tip: Swirl your piping bag on a plate first to “prime” the dual-color effect!
My Secret Tips and Tricks for Red Velvet Marble Cupcake Success
Baking red velvet marble cupcakes at home has taught me so much—here’s what I wish I’d known sooner:
- Use Gel Food Coloring: It’s more concentrated (and won’t water down your batter like liquid dyes sometimes do).
- Room Temperature Ingredients: Pull out your butter, eggs, and cream cheese ahead of time—trust me, everything mixes smoother (good-bye, lumpy frosting!).
- Don’t Overmix: Stir until just combined for the fluffiest cupcakes. Overmixing can make them dense.
- Prep the Piping Bag: For a flawless swirl, spoon the cream cheese frosting on one side, raspberry on the other—the marbled effect is show-stopping.
- Test for Doneness: Start checking for doneness at 18 minutes—over-baked cupcakes can dry out quickly.
There’s nothing quite like homemade red velvet cupcakes—each bite just melts in your mouth!
Creative Variations and Ingredient Swaps
Want to put your own spin on these red velvet marble cupcakes? Here are some ideas you’ll love:
- Chocolate Lovers: Add a handful of mini chocolate chips to the batter for extra gooey goodness (great for birthdays).
- Nut-Free or Dairy-Free: Use a dairy-free butter and plant-based cream cheese for a vegan red velvet cupcake.
- Berry Boost: Swap raspberry preserves for strawberry or blackberry for a whole new twist.
- Festive Touch: Top with heart-shaped sprinkles for Valentine’s Day cupcakes, or sparkling sugar for the holidays!
Whether you’re working around allergies or mixing it up for the season, these cupcakes are super adaptable.
How to Serve and Store Your Red Velvet Marble Cupcakes
Here’s how I keep these beauties tasting their best:
- Serving: They’re perfect at room temp (the frosting softens up and the flavor really shines). Sometimes I sprinkle extra freeze-dried raspberries or white chocolate curls on top!
- Storing Leftovers: Place cupcakes in an airtight container and refrigerate—they’ll stay moist and fresh for up to 4 days.
- Freezing: Unfrosted cupcakes freeze beautifully—just wrap individually and freeze for up to 2 months. Thaw, frost, and serve for a “wow” any time you want.
Trust me, there’s rarely a crumb left, but it’s good to be prepared just in case!
FAQs: Your Top Questions About Red Velvet Marble Cupcakes Answered
Can I make these red velvet marble cupcakes ahead of time?
Absolutely! You can bake the cupcakes a day in advance and frost them before serving. Store the unfrosted cupcakes in an airtight container at room temperature.
Why is there vinegar in this recipe?
It’s an old Southern tradition—the vinegar reacts with the cocoa and baking soda to help the cupcakes rise and stay soft. You won’t taste it, promise!
Help! My frosting is too runny. What do I do?
Usually, letting the frosting chill for 10-15 minutes in the fridge will help it firm up (especially if your kitchen is warm). Make sure your butter and cream cheese aren’t too soft.
How do I get a deep red color without lots of food dye?
Using natural cocoa (rather than Dutch-processed) and a quality gel food coloring gives you a vibrant hue—with less dye. Or, you can embrace a more natural, muted red!
Can I substitute the raspberry swirl?
Of course! Strawberry or blackberry preserves work great. Or skip it entirely for classic cream cheese frosting swirls.
Red velvet marble cupcakes are my love language—little treats that look fancy but are totally do-able for a home baker. I hope they bring a swirl of joy to your kitchen, too. If you try them, let me know how they turned out; I love hearing your stories (and seeing those gorgeous swirls)! Happy baking!