Uncle Joe’s Sunday Meat
Uncle Joe’s Sunday Meat
The very first time I made Uncle Joe’s Sunday Meat I was juggling a toddler, a phone call, and an oven that clearly wanted attention. Somehow it still turned out comforting and tender — and that’s the whole point. This recipe is the kind of thing you toss together, go about your day, and come back to a home that smells like love.
If you like simple, comforting dinners, you might also enjoy these gooey cheesy meatballs — same idea of hands-off cooking that rewards you big time.
Why this recipe works is obvious: it’s forgiving, cozy, and fuss-free. Read on — you’re going to love how easy this is.
Why Uncle Joe’s Sunday Meat Works
- Quick to assemble — you literally sprinkle and pour, perfect for busy Sundays.
- Simple ingredients — 3 lbs roast, one packet of onion soup mix, and a can of beef broth. That’s it.
- Slow, gentle cooking makes the meat fall-apart tender without fancy techniques.
- Beginner-friendly — no searing, no complicated timing, and it’s hard to mess up.
Quick cooking insight: the low-and-slow oven at 300°F (150°C) gives collagen time to melt, so the roast becomes fork-tender. Trust me — patience pays off here.
One more thing: if you want a different kind of comfort meat for a weeknight twist, check out this cozy crockpot loaf with Swiss cheese that’s also super hands-off. Give it a peek.
Ingredients You’ll Need
- 3 lbs beef or pork roast – chuck, shoulder, or a small rump roast all work great. Pork shoulder is extra forgiving.
- 1 packet onion soup mix – adds seasoning and savory onion flavor.
- 1 can beef broth (about 14–15 oz) – pour around, don’t drown the meat.
- Salt and pepper to taste (use sparingly; the soup mix is salty).
- Optional: 2–3 cloves garlic, smashed for extra depth, or 1 bay leaf.
Notes:
- If your roast has a nice fat cap, leave it on — it keeps things juicy.
- Don’t over-salt at the start; you can always add a pinch later.
Kitchen Tools
- Roasting pan with lid or a rimmed baking dish
- Aluminum foil (if your pan doesn’t have a lid)
- Meat thermometer (helpful, not mandatory)
- Tongs or large spoon for serving
If you prefer a skillet-style finish or want patties instead, I sometimes fry leftovers into quick patties — here’s a great guide on making crispy fried meat patties for day-two magic.
Step-by-Step Instructions
- Preheat your oven to 300°F (150°C). Low and slow is the secret.
- Place the roast in a roasting pan. If it’s wet, pat it dry first.
- Sprinkle the onion soup mix evenly over the top of the roast. Press it down gently so it sticks.
- Pour the beef broth around the roast — pour to the pan sides but not necessarily over the top. You want steam and moisture, not a braise-level of liquid.
- Cover the pan tightly with a lid or heavy-duty aluminum foil. A good seal keeps the steam in and the meat moist.
- Bake for 3–4 hours, or until the meat is tender and falls apart easily. Check at 3 hours; depending on the cut it might need the full 4.
- Rest for 10–15 minutes, then shred or slice and serve with your favorite sides.
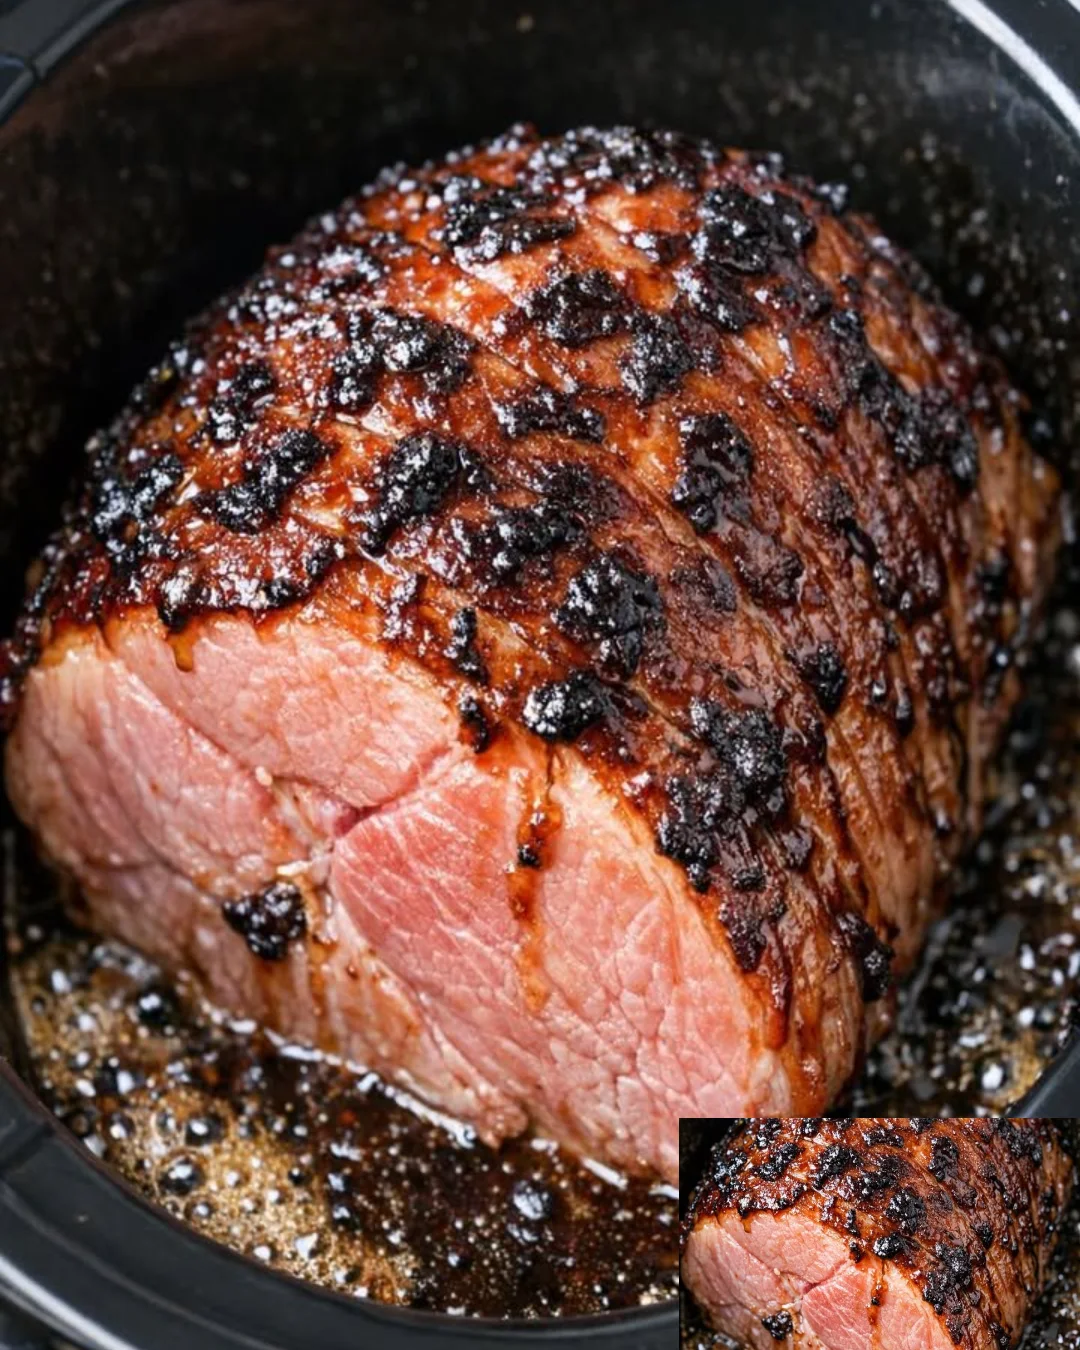
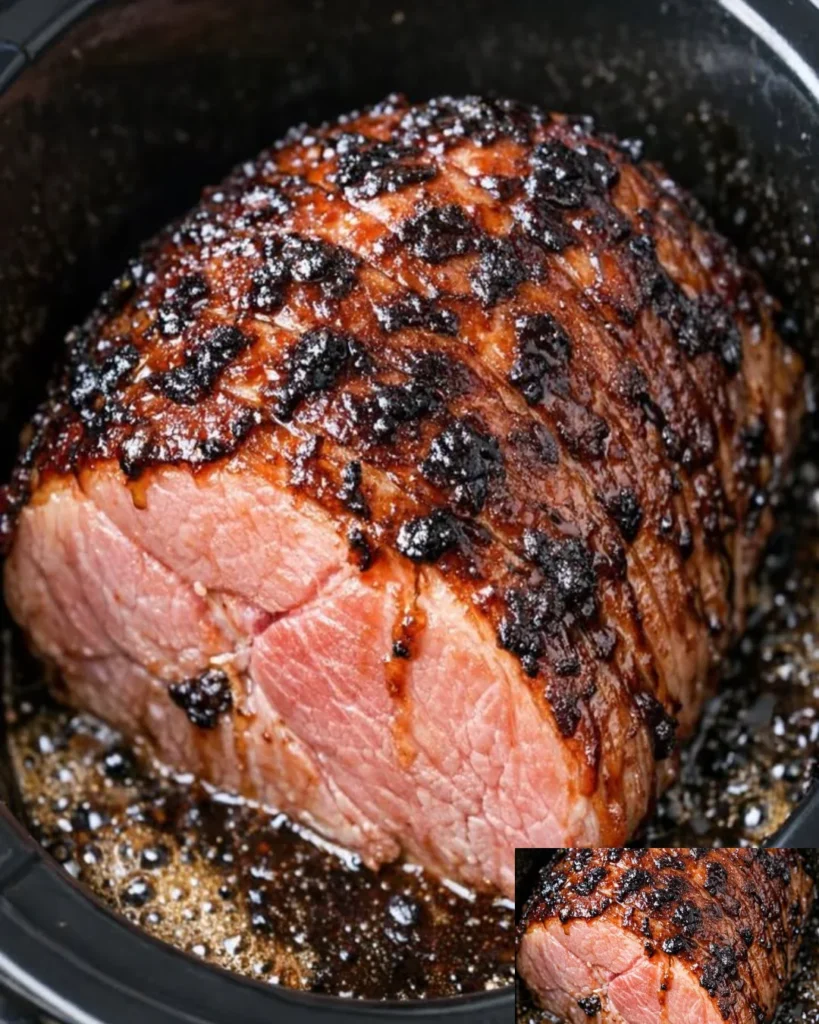
Visual cues: you’ll know it’s ready when a fork slides in like butter and strands of meat pull apart without effort. The kitchen will smell warm and oniony — like a Sunday hug.
I’ll admit — once I forgot to cover the pan and the edges dried out a bit. I learned to double-seal with foil when my lid’s not super tight. Imperfections make better cooks, right?
Pro Tips for Success
- If you have a meat thermometer, cook to about 195–205°F for shreddable roast. For sliceable but tender, aim for 160–175°F.
- Let the roast rest under foil after baking; it keeps juices from running straight onto your cutting board.
- Use pork shoulder for a slightly sweeter, fattier result. For beef, chuck roast is reliable and flavorful.
- If you want a thicker sauce, remove the roast, skim fat, then simmer the juices on the stove to reduce slightly.
Common Mistakes to Avoid
- Over-salting — the onion soup mix is salty. Add salt at the end if needed.
- Not covering the pan — this dries the meat. Seal it well.
- Cranking up the temperature to save time — higher heat can make the meat tough before it gets tender.
- Slicing too soon — resting is part of the cooking.
Variations and Substitutions
- Spicy version: stir a teaspoon of smoked paprika or chili flakes into the broth for a little kick.
- Herb-forward: toss in fresh rosemary or thyme before baking.
- Crockpot swap: if you want to slow-cook all day, transfer everything to a slow cooker and cook on low for 8 hours.
- Make it into meatballs later: leftovers shred nicely and can be formed into quick patties or meatballs; here’s a helpful recipe for classic fried meatballs (German-style patties) if you want a crisp, pan-fried twist.
What to Serve With This Recipe
- Classic: mashed potatoes to soak up that broth.
- Veggies: roasted carrots or green beans for color and texture.
- Carby comfort: buttered egg noodles work really well.
- For a sandwich: shred the meat, pile it on a toasted roll, and you’ve got an instant hot sandwich. If you love crispy texture, leftover shredded meat also makes great reheated fried meatballs or quick pan-fried bites.
Storage and Leftovers
- Fridge: Store in an airtight container for 3–4 days.
- Freezer: Freeze in portions for up to 3 months; thaw in the fridge overnight before reheating.
- Reheating: Warm gently in a covered pan with a splash of beef broth to keep it moist, or microwave with a damp paper towel over the top.
If you want to reinvent leftovers, shred and toss into pasta, tuck into tacos, or make a quick hash with potatoes.
FAQ (People Also Ask)
Q: Can I make this ahead of time?
A: Yes — cook the roast, let it cool, then refrigerate. Reheat gently when you’re ready to serve.
Q: Can I use only pork or only beef?
A: Absolutely. Both work. Pork will be a bit sweeter and fattier; beef is richer and beefy.
Q: What if I don’t have onion soup mix?
A: Use a mix of onion powder, garlic powder, salt, and a pinch of sugar. But the packet is convenient and gives that classic flavor.
Q: Is this recipe freezer-friendly?
A: Yes. Freeze shredded or sliced portions in airtight containers or freezer bags.
Q: What pan is best to use?
A: A roasting pan with a tight-fitting lid is ideal, but a rimmed baking dish sealed tightly with foil works fine too. If you want to try a different texture, you can finish the roast in a hot skillet after shredding.
For a different take on quick pan-fried meat snacks, I sometimes turn leftovers into crispy bites using a simple frying method — here’s a walk-through for basic fried meatballs you might like.
Quick Recipe Summary
Prep time: 10 minutes
Cook time: 3–4 hours
Servings: 6–8 (depending on appetite)
Ingredients:
- 3 lbs beef or pork roast
- 1 packet onion soup mix
- 1 can beef broth
- Optional: garlic, bay leaf, salt & pepper
Steps:
- Preheat oven to 300°F (150°C).
- Place roast in roasting pan.
- Sprinkle onion soup mix over roast.
- Pour broth around roast.
- Cover and bake 3–4 hours until tender.
- Rest, then serve.
Final Thoughts
This is the kind of recipe that doesn’t ask much of you but gives a lot back. It’s forgiving, scent-filled, and perfect for feeding a crowd or a cozy family meal. If you try Uncle Joe’s Sunday Meat, tell me how it went — and don’t worry if you forget a step once in a while (I do too). Happy cooking!
Uncle Joe's Sunday Meat
Ingredients
Method
- Preheat your oven to 300°F (150°C). Low and slow is the secret.
- Place the roast in a roasting pan. If it’s wet, pat it dry first.
- Sprinkle the onion soup mix evenly over the top of the roast. Press it down gently so it sticks.
- Pour the beef broth around the roast — pour to the pan sides but not necessarily over the top.
- Cover the pan tightly with a lid or heavy-duty aluminum foil.
- Bake for 3–4 hours, or until the meat is tender and falls apart easily.
- Check at 3 hours; depending on the cut it might need the full 4.
- Rest for 10–15 minutes, then shred or slice and serve with your favorite sides.