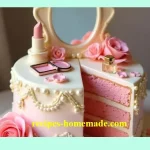
Vintage Vanity Cake

A Glimpse into the Past: My Vintage Vanity Cake Moment
There’s something absolutely magical about stepping into your grandmother’s room and catching a glimpse of her old-fashioned vanity table—delicate lace trims, shining pearls, and the faint scent of rose lingering in the air. That’s exactly the memory that inspired me to create this Vintage Vanity Cake, a showstopping dessert that marries nostalgic elegance with a sweet, modern twist. Right from the first bite, this vintage vanity cake feels like an edible heirloom—soft, buttery layers, raspberry buttercream, and all the whimsical decorations your heart desires. If you’ve been searching for a stunning centerpiece that brings out your inner child (and inner pastry artist!), this is the cake you’ll treasure.
Why You’ll Adore This Vintage Vanity Cake
Let’s be honest: there are plenty of fancy cakes out there, but this Vintage Vanity Cake holds a special kind of joy. Here’s why I absolutely love it—and why I think you’ll fall in love, too:
- Pure Nostalgia: Who doesn’t want to relive moments of playing dress-up, rifling through costume jewelry, and pretending to dab on perfume? This cake captures that feeling in every single detail!
- Buttery, Moist Layers: Thanks to a luscious cake batter and whole milk, each bite is soft, tender, and bursting with buttery richness.
- Raspberry Buttercream Heaven: That hint of fruit in the creamy pink filling is like a sophisticated play on classic birthday cakes—a secret grown-up twist to a childhood memory.
- Absolute Showstopper: Whether it’s a birthday, tea party, or just a special Saturday, this cake is always the star on your dessert table.
Ingredients You’ll Need for Vintage Vanity Cake
Here’s what you’ll need to create your own elegant edible vanity (with some of my personal tips sprinkled in!):
- All-purpose flour (2 ½ cups / 315g): Standard for classic cakes! I always sift mine for extra fluffiness.
- Baking powder (2 tsp): The key to light, tall layers.
- Salt (½ tsp): Just a pinch boosts all those sweet flavors.
- Unsalted butter (1 cup / 225g, room temp): Make sure it’s truly softened—creaming it is what gives this classic cake that trademark light crumb.
- Sugar (1 ¾ cups / 350g): For that perfect sweetness.
- 4 large eggs: They add structure and richness.
- Vanilla extract (2 tsp): Don’t skimp on the good stuff—pure vanilla, if you can!
- Rose water (1 tsp, optional): I love adding this for a delicate, old-world floral note—it truly makes the cake taste romantic.
- Whole milk (1 cup / 240ml): Gives a tender crumb that just melts in your mouth.
For the raspberry buttercream filling:
- Butter (1 cup / 225g): Again, room temp is key!
- Powdered sugar (3 cups / 375g): Sifted, for silky-smooth buttercream.
- Seedless raspberry jam (½ cup): Adds that gorgeous color and zing—plus, no seeds to get stuck in your teeth!
- Pink food coloring (optional): A tiny drop for that dreamy pastel effect.
For the vanity decor:
- Fondant or modeling chocolate: Perfect for getting those smooth, pastel finishes.
- Edible gold & silver shimmer: Trust me, it makes the “mirror” and “accessories” sparkle!
- Sugar gems, fondant balls, pearl dust: For those extra-special touches—think pearl necklaces, dainty perfume bottles, and compact mirrors, all edible.
Step-by-Step Guide: Making the Perfect Vintage Vanity Cake
Ready to create something beautiful (and delicious)? Here’s my step-by-step guide—with all my tried-and-true tips so you can bake with confidence!
- Preheat your oven to 350°F (175°C). Grease and line two rectangular cake pans (I like to use parchment paper for extra-easy removal).
- Mix dry ingredients: In a medium bowl, whisk together the flour, baking powder, and salt.
- Cream butter and sugar: In a large bowl, beat the butter and sugar on medium-high until super light and fluffy—usually about 4-5 minutes with an electric mixer. Don’t rush this step!
- Add eggs: Add eggs one at a time, beating well after each. Stir in vanilla and (optional) rose water.
- Alternate flour and milk: Add about a third of your dry mixture, then half the milk, repeating until everything is just combined. (This keeps your cake delightfully moist and even.)
- Bake: Divide the batter evenly between pans, smoothing the tops. Bake 30–35 minutes (a toothpick should come out clean). Cool completely on wire racks.
- Make the buttercream: Whip the butter until creamy. Gradually add powdered sugar, mixing until smooth, then blend in raspberry jam. Tint a soft pastel pink if desired.
- Layer and shape: Trim cakes for even layers. Stack with buttercream between, then carefully carve into a vanity shape—a rectangle with space at the back for the “mirror.”
- Create the mirror: You can use fondant-covered cardboard or even Rice Krispies shaped and wrapped in fondant for sturdiness.
- Cover in fondant: Drape your chosen pastel fondant color (I’m partial to pink or mint) over the cake, smoothing gently for that classic vanity look.
- Add edible decorations: Arrange fondant balls, sugar gems, and other accessories on top—let your imagination run wild!
- Finish with details: Edible gold for the trim, pearls along the edge, and perhaps a hand-painted lace pattern to emulate vintage fabric.
My Secret Tips and Tricks for Vintage Vanity Cake Success
Let’s keep it real: decorating a vintage vanity cake can feel intimidating! Here are my favorite tricks after a few “practice” (read: messy, delicious) test bakes:
- Don’t stress about perfection: Even if your mirror’s a little wobbly or your pearls aren’t perfectly round, your creativity shines through. That’s the beauty of this homemade cake!
- Crumb coat magic: Before laying on fondant, always lightly frost with buttercream and chill—it smooths rough edges (and traps stray crumbs).
- Easy fondant smoothing: Use a fondant smoother or the palm of your hand, dusted with a little cornstarch, to get that showy finish.
- Chill out: If your buttercream feels too soft, pop it in the fridge for 10 minutes before assembling. It’ll hold its shape better and make stacking a breeze.
- Play with color: Pastel fondant looks so elegant, but you can mix and match shades (mint, cream, baby blue) for a truly custom look!
Creative Variations and Ingredient Swaps
I firmly believe every baker should feel free to make a cake their own! Here are some fun ways to tweak your vintage vanity cake:
- Gluten-free cake: Swap all-purpose flour for your favorite 1:1 gluten-free blend (just watch the bake time—it may be a little shorter).
- Dairy-free version: Use plant-based butter and almond or oat milk; the texture will still be dreamy.
- Flavor twist: Swap raspberry jam for strawberry, apricot, or even lemon curd for a summery vibe.
- Simpler decor: If you’re short on time, skip the fondant and just pipe a pink “lace” border and top with edible pearls.
- Kids’ party hack: Let kiddos decorate mini “compact” cupcakes with edible gold and sugar gems—it’s a hit every time!
How to Serve and Store Your Vintage Vanity Cake
Serving suggestions and storage tips are the unsung heroes of every homemade cake adventure:
- Serving: Use a sharp, warm knife (dip in hot water and wipe dry) to cut tidy slices that show off all those gorgeous layers (and that pastel raspberry buttercream!).
- Storing: Cover leftovers in plastic wrap or a cake dome. This vintage vanity cake keeps moist and fresh at room temperature for up to 2 days, or chilled in the fridge (just let slices come to room temp before eating for the best texture).
- Freezing: Leftover slices freeze beautifully—just wrap tightly and store in an airtight container for up to 2 months.
FAQs: Your Top Questions About Vintage Vanity Cake Answered
1. Can I make this vintage vanity cake in advance?
Absolutely! You can bake the cake layers a day or two ahead and keep them tightly wrapped. Decorate the day you plan to serve for best texture and wow factor.
2. Is the rose water necessary?
Nope! It’s optional, but I love the gentle floral note it adds. If you’re not a fan, just skip it or try orange blossom water for a different (gorgeous!) twist.
3. Do I have to use fondant for decorating?
Not at all! Buttercream piping, sprinkles, and edible pearls make for a lovely (and less fussy) finish if fondant isn’t your thing.
4. What pans work best for the vanity shape?
I recommend two rectangular pans (8×12 or similar), but you can get creative—a square cake trimmed into a rectangle will work in a pinch!
5. Can I use store-bought jam for the raspberry buttercream?
Of course! Seedless raspberry jam works great (and keeps the filling ultra-smooth). If you’re feeling fancy, homemade is always extra delicious
Vintage Vanity Cake
Ingredients
Cake Base
- 2.5 cups All-purpose flour Sifted for extra fluffiness.
- 2 tsp Baking powder Key for light, tall layers.
- 0.5 tsp Salt Enhances sweetness.
- 1 cup Unsalted butter (room temp) Make sure it's truly softened.
- 1.75 cups Sugar Provides the perfect sweetness.
- 4 large Eggs Adds structure and richness.
- 2 tsp Vanilla extract Use pure vanilla for best flavor.
- 1 tsp Rose water Optional; adds a floral note.
- 1 cup Whole milk Gives a tender crumb.
Raspberry Buttercream Filling
- 1 cup Butter (room temp) Key for smooth buttercream.
- 3 cups Powdered sugar Sifted for smooth texture.
- 0.5 cup Seedless raspberry jam Adds color and flavor.
- 1 drop Pink food coloring Optional for pastel effect.
Vanity Decor
- 1 Fondant or modeling chocolate For decorating cake.
- 1 Edible gold & silver shimmer For sparkling effects.
- 1 Sugar gems, fondant balls, pearl dust For decorative touches.
Instructions
Preparation
- Preheat your oven to 350°F (175°C). Grease and line two rectangular cake pans with parchment paper.
- In a medium bowl, whisk together the flour, baking powder, and salt.
- In a large bowl, beat the butter and sugar on medium-high until super light and fluffy, about 4-5 minutes.
- Add eggs one at a time, beating well after each addition. Stir in vanilla and optional rose water.
- Gradually add the flour mixture and milk, alternating between them until just combined.
Baking
- Divide the batter evenly between the pans and smooth the tops. Bake for 30-35 minutes or until a toothpick comes out clean.
- Cool completely on wire racks.
Buttercream Preparation
- Whip the butter until creamy. Gradually add powdered sugar, mixing until smooth. Blend in raspberry jam and tint pink if desired.
Assembly
- Trim cakes for even layers, stack with buttercream between, and carve into a vanity shape.
- Create the mirror using fondant-covered cardboard or Rice Krispies.
- Drape fondant over the cake, smoothing for a classic look.
- Decorate with fondant balls, sugar gems, and edible gold.
- Finish with edible gold for trim and lace patterns.