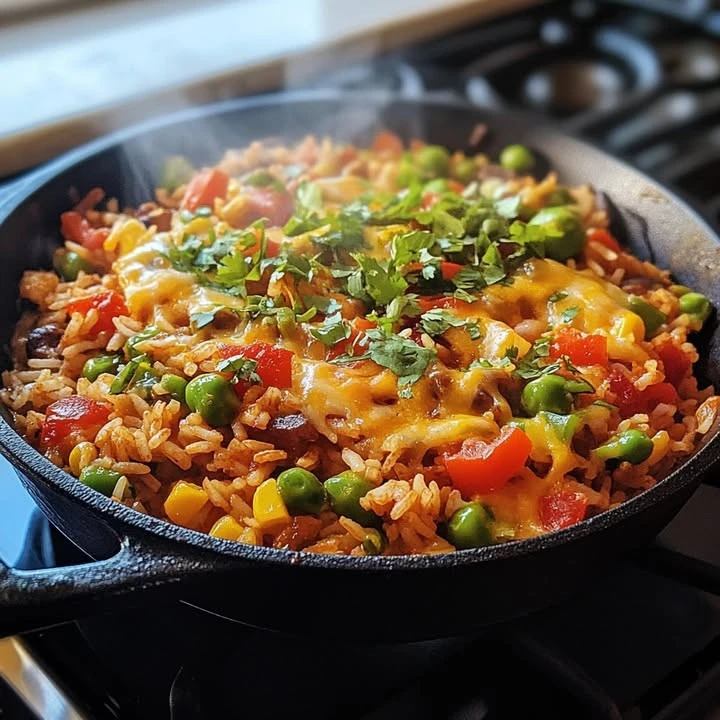
California-style Spanish Rice
A Taste of Home: My Comforting California-style Spanish Rice
If I close my eyes, I’m back in my childhood kitchen—sun streaming in, the sound of rice sizzling in oil, and the warm aroma of onion and garlic filling the air. My mom called it California-style Spanish Rice, and it was a staple at every family gathering, always nestled right beside the enchiladas or tucked into burritos. It’s simple, homey, and somehow just tastes like sunny afternoons and laughter.
I’m excited to share my go-to California-style Spanish rice recipe with you—not only because it’s genuine comfort food, but also because it’s the ultimate, fuss-free side dish that belongs in every home cook’s lineup.
Why You’ll Adore This California-style Spanish Rice
Let me tell you why this dish always has a special place on my table (and why I think you’ll love it just as much!):
- It’s Pure Comfort: There’s something about a spoonful of fluffy, tomato-kissed rice that feels like a hug in a bowl.
- Weeknight-friendly: With a handful of simple pantry staples, you get this savory Spanish rice ready in less than 30 minutes. Perfect for those busy California weeknights!
- Ultimate Versatility: Serve it solo, pile it into tacos, or use it as a base for burrito bowls—the options are endless.
- Crowd-pleaser: Kids and picky eaters adore its gentle, familiar seasoning—plus, you can sneak in veggies (I see you, picky toddlers!).
Ingredients You’ll Need for California-style Spanish Rice
Here’s everything you need for this classic rice recipe (with a few of my personal picks and tips):
- 1 cup white rice: I recommend long-grain white rice for fluffiness, but jasmine or basmati work, too.
- 3 tbsp canola oil: For the classic flavor and golden toasting. Vegetable oil is a great stand-in.
- 1/4 onion, diced: Yellow or white onion both add subtle sweetness. Dice fine for even sautéing.
- 1/2 cup tomato sauce: This gives that “just right” color and savory note. Use plain or low-sodium if you like more control over the salt.
- 1 3/4 cups warm chicken broth: Store-bought or homemade both work. Vegetable broth makes it vegetarian.
- 1 tsp garlic salt: The secret to deep, nostalgic flavor. (I’ll often dial it down by 1/4 tsp if my broth is salty).
- 1/4 tsp ground cumin: Earthy, warm, and essential for that Spanish rice essence.
- 1/2 cup frozen peas or mixed veggies (optional): Totally optional, but so great for color and a little nutrition boost.
Semantic keywords: rice side dish, homemade Spanish rice, easy Mexican rice, pantry staples.
Step-by-Step Guide: Making the Perfect California-style Spanish Rice
Ready to channel a little California sun right in your kitchen? Let’s jump in:
- Toast the Rice
Heat your canola oil in a heavy-bottomed skillet (I use my trusty nonstick pan) over medium. Add the white rice and stir constantly. You’re looking for a deep, even golden brown (about 4-6 minutes). This step sets the flavor—don’t rush it! - Add Onions
Toss in your diced onion. Sizzle for 2 minutes, stirring often, until the onion is fragrant and softened. (Your kitchen will smell heavenly right about now.) - Mix in the Good Stuff
Stir in tomato sauce, warm chicken broth, garlic salt, cumin, and any veggies. Give it a good mix—make sure those grains of rice are swimming but not drowning. - Simmer, Then Cover
Bring to a quick boil. Once bubbling, reduce heat to low and cover. No peeking! Let your Spanish rice steam undisturbed for 18 minutes. - Let It Rest
After 18 minutes, turn off the heat but keep that lid snug for another 5 minutes. This little pause makes the rice extra fluffy. - Fluff and Enjoy
Grab a fork, fluff up your perfect California-style Spanish rice, and dive in!
My Secret Tips and Tricks for Spanish Rice Success
I’ve made California-style Spanish rice more times than I can count, and these little tweaks make all the difference:
- Always toast your rice! This golden step develops an irresistible nutty flavor—and keeps the rice fluffy instead of mushy.
- Let it rest after cooking. That 5-minute steam finish? It’s the secret to evenly cooked, non-gummy grains.
- Be gentle with stirring. Over-mixing rice while it cooks can make it sticky. Just stir gently at the start, then leave it alone.
- Chicken broth matters! If you’re using salty broth, taste before you add more garlic salt to keep it balanced.
- Add veggies last. If you like crisp veggies, add frozen peas or mixed vegetables during the last 5 minutes of cook time.
- Try a squeeze of lime. Right before serving, a splash of fresh lime juice brightens all the flavors (delicious keyword alert: “zesty Spanish rice”).
Creative Variations and Ingredient Swaps
One of my favorite things about homemade Spanish rice is how easy it is to customize for your family’s tastes. Here are some fun twists:
- Make it meatless: Use vegetable broth and skip the chicken entirely for vegetarian Spanish rice.
- Amp up the spice: Add a pinch of cayenne or a diced jalapeno with the onion for a spicy kick.
- Go whole grain: Substitute brown rice (just add 1/2 cup more broth and cook for about 10 extra minutes).
- Change up the veggies: Not a pea fan? Try corn, bell peppers, or even diced carrots.
- Use fresh tomatoes: Out of tomato sauce? Blend up a couple of ripe tomatoes with a splash of water—a fresh spin on this California classic.
(Keyword variations: healthy Spanish rice, vegetarian rice dish, spicy California rice.)
How to Serve and Store Your California-style Spanish Rice
Serving up Spanish rice is the best part! Here’s how we love it at my house:
- Alongside tacos, enchiladas, or grilled chicken (classic rice side dish magic!).
- In burrito bowls or wraps for easy lunches.
- Topped with chopped cilantro and a dollop of sour cream for a California-inspired twist.
Storing leftovers:
Let your homemade Spanish rice cool, then pop it into an airtight container (hello, easy meal prep!). It keeps in the fridge for up to 4 days and reheats beautifully in the microwave with a splash of broth to revive that just-cooked fluff.
You can also freeze Spanish rice in individual portions—just thaw overnight and reheat for a little piece of California sunshine anytime.
FAQs: Your Top Questions About California-style Spanish Rice Answered
Can I use brown rice instead of white?
Yes, you can! Brown rice is heartier, so you’ll need a bit more broth and extra cook time (about 10 minutes more). The texture’s a bit chewier—delicious and wholesome.
Is this rice spicy?
Nope! Classic California-style Spanish rice is mild and kid-friendly. Want more heat? Add chopped jalapenos or red pepper flakes while sautéing the onion.
Can I make Spanish rice ahead of time?
Absolutely. It’s a great make-ahead side. Store in the fridge and fluff with a fork after reheating. Easy, stress-free meal planning!
What if I don’t have tomato sauce?
No worries. Substitute equal parts of tomato puree, or mix tomato paste with a little water. Even salsa can work in a pinch for that vibrant red color.
How do I fix mushy rice?
It happens to the best of us! Next time, try toasting the rice longer and measuring the liquid with care. If you’ve already got a pot of mushy rice, spread it on a baking sheet and bake in a low oven (300°F) for 10 minutes—it’ll dry out beautifully.
From my family’s table to yours, I hope this easy, comforting California-style Spanish rice becomes a beloved staple in your home. If you try it, let me know how it goes—or share your favorite tweaks in the comments. There’s nothing better than helping each other keep great food traditions going, one bite at a time. 🌞🍚